During a project, I had to work with Zerto virtual replication for the first time (I have worked with SRM but Zerto never!). It was great and valuable and forced me to write some posts about it. In a series of blog posts, I’m going to take you through the quick and complete guide of setting up and configuring Zerto virtual replication.
- Zerto Virtual Replication – Installation
- Zerto Virtual Replication – Configuration
- Zerto Virtual Replication – Failover
- Zerto Virtual Replication – Reporting
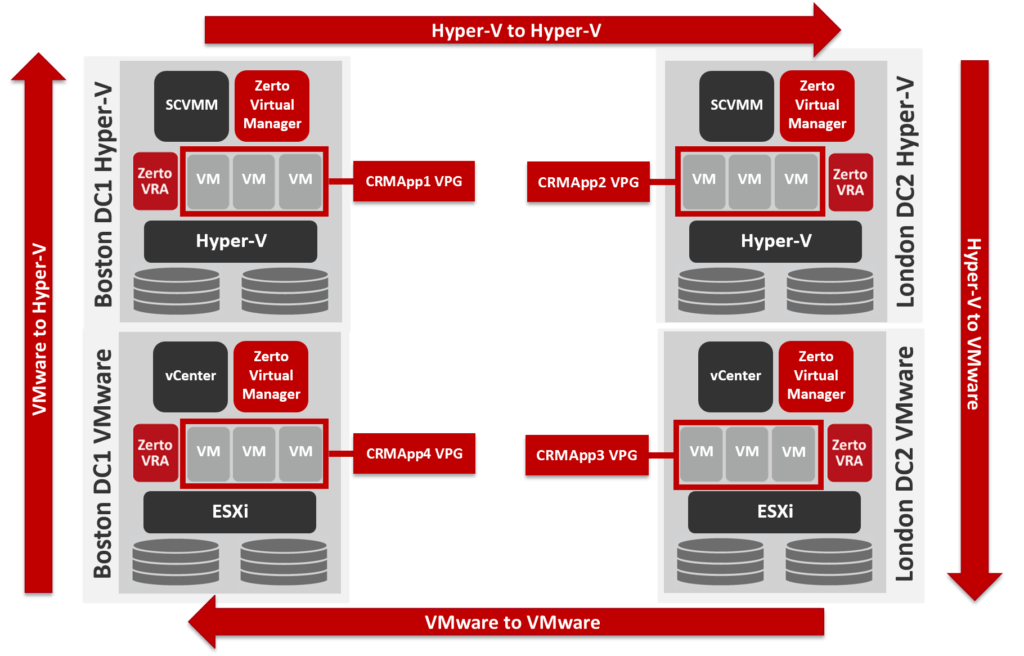
Zerto Virtual Replication delivers IT resilience in a single platform for disaster recovery, data protection, and workload mobility to, from or between multiple clouds. By combining continuous replication, automated orchestration, and enterprise-class scalability, the Zerto platform dramatically simplifies IT operations and increases business agility.
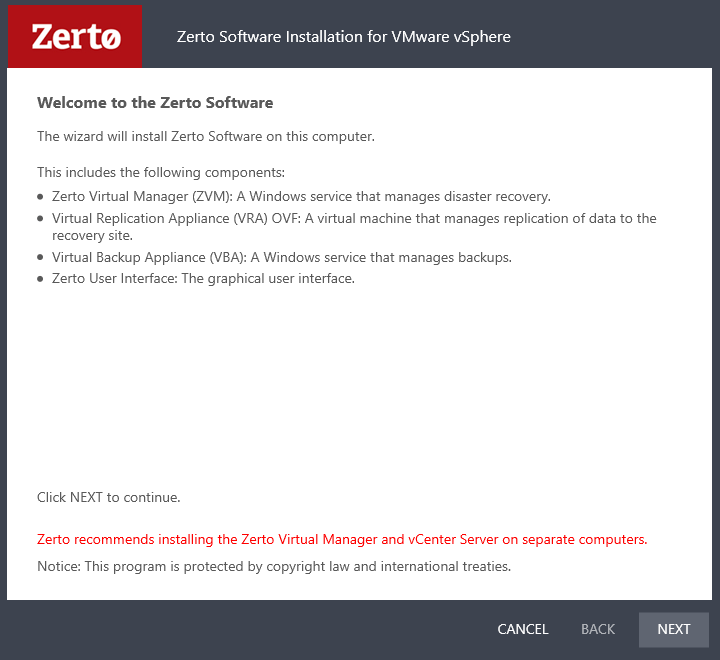
The Zerto installation includes:
• A Zerto Virtual Manager (ZVM): This is a Windows service and manages the replication at the site level, and the ability to install Virtual Replication Appliances (VRAs), virtual machines installed on each ESX/ESXi host to move the data to be replicated from the protected to a recovery site.
• A Virtual Backup Appliance (VBA): A Windows service that manages File Level Recovery operations within Zerto Virtual Replication. These repositories can be local or on a shared network.
Install Zerto Virtual Manager
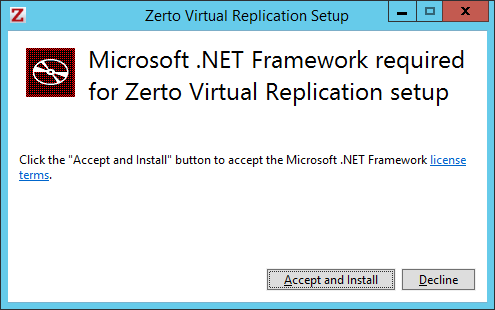
Download the installer from Zerto website and run the executable file. You will be prompted to install Microsoft .NET Framework if Microsoft .NET Framework 4.5.2 or higher is not installed.
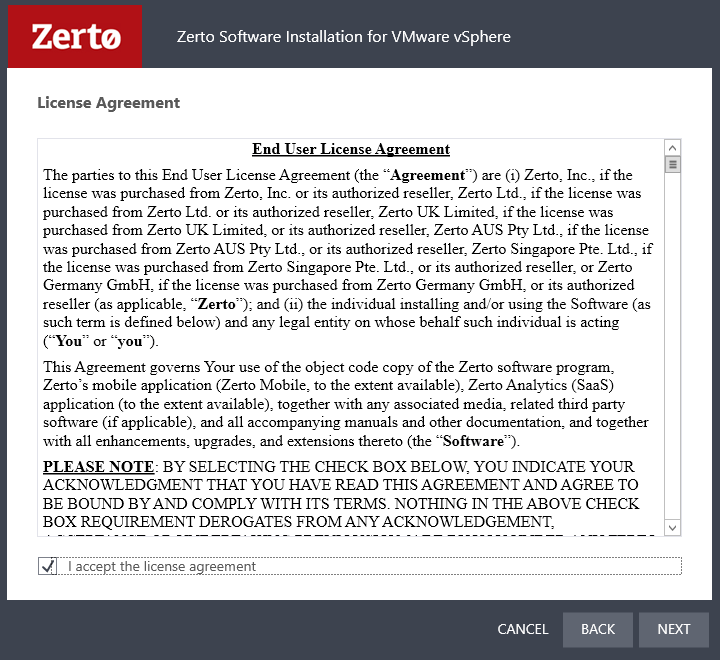
Read the information provided by Zerto and accept the Zerto EULA.
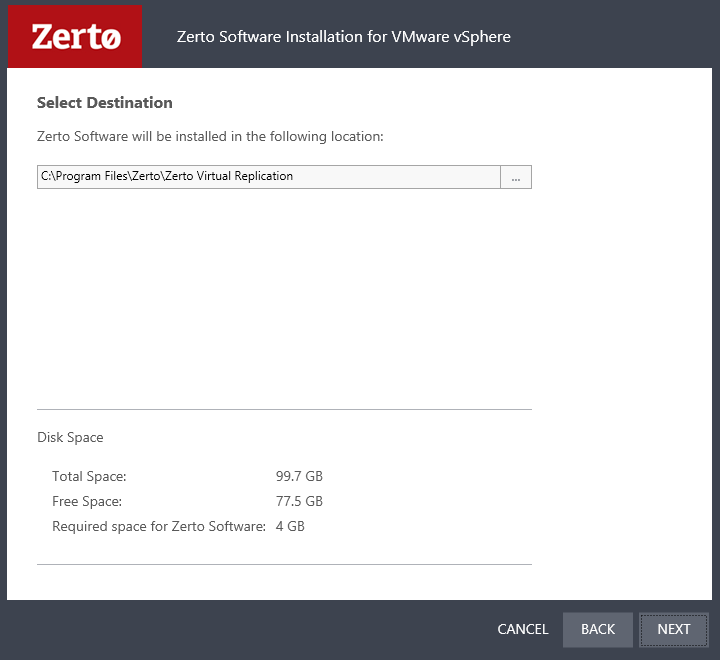
Specify the installation location and click Next.
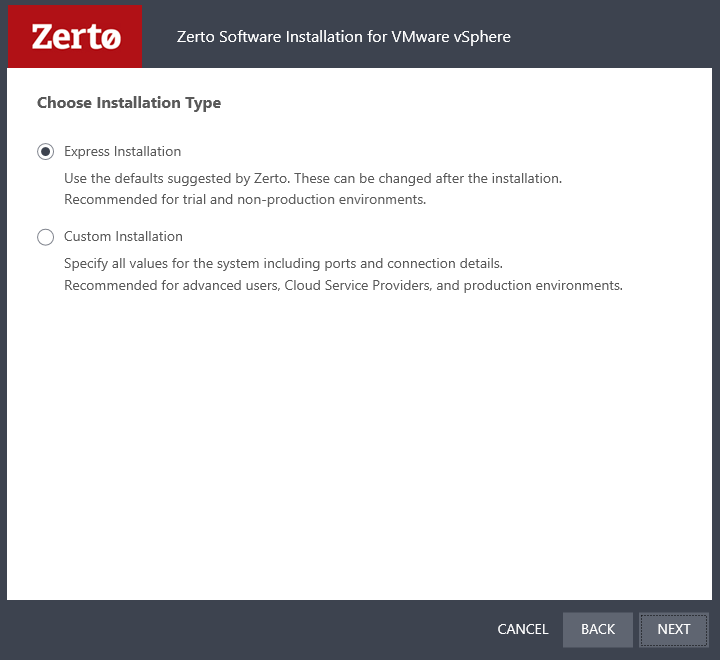
Select Express installation to utilizes defaults settings; whereas, if you want to specify ports, service accounts, external database, SQL authentication, etc chose the Custom Installation.
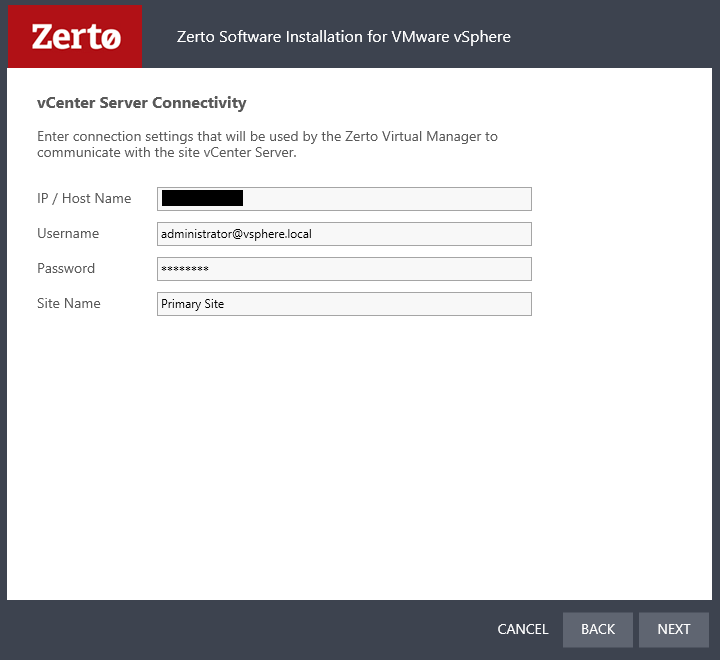
Enter the vCenter information which wants to protect its virtual machines.
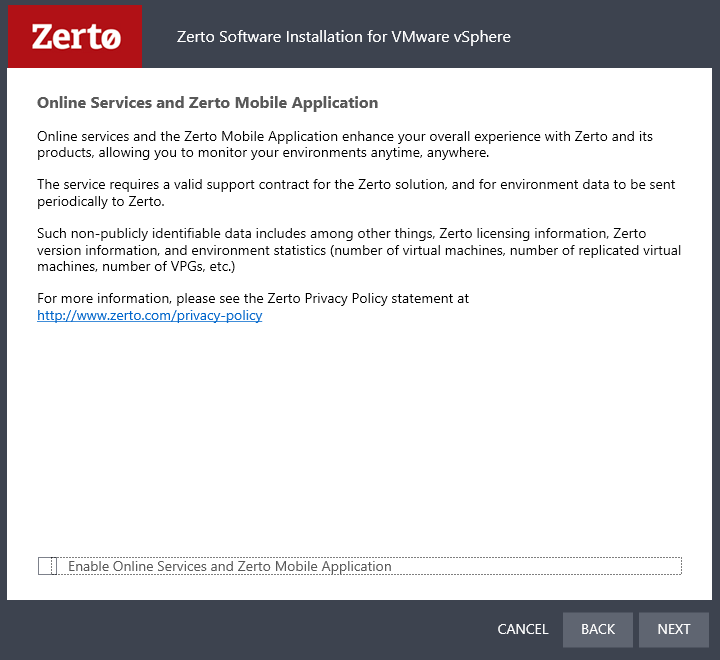
Enable or disable Online Services and the Zerto Mobile Application
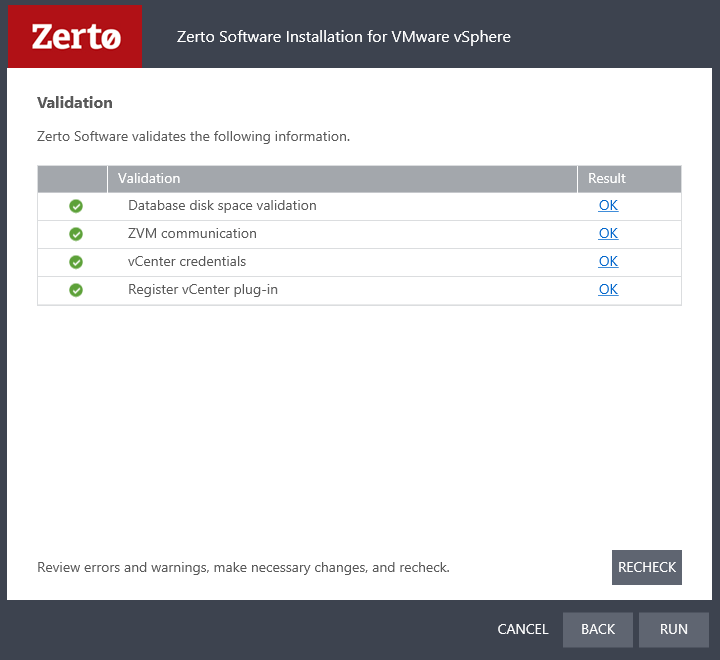
Validate the configuration and connectivity of Zerto and then click Run.
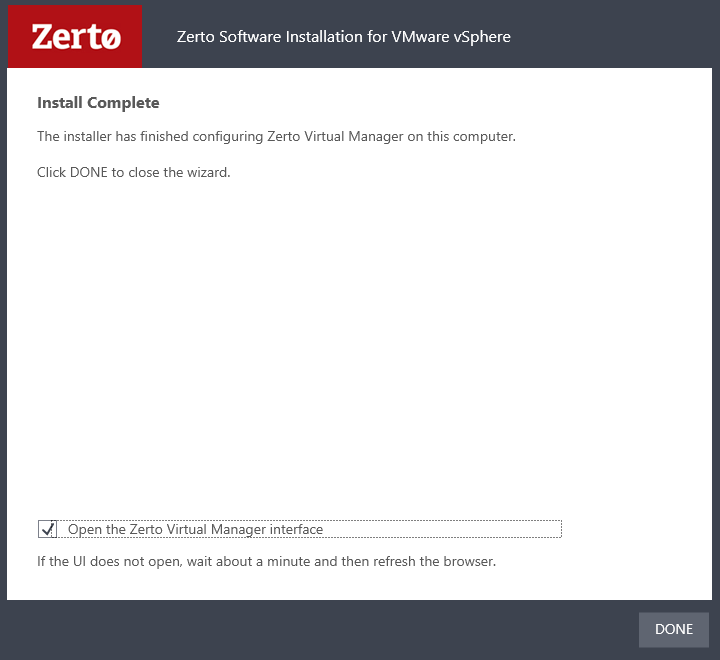
After Zerto installation has been finished, select the Open the Zerto Virtual Manager interface checkbox and then click done to access Zerto manager, however, you can navigate to https://<zvm IP address>:9669 to access Zerto Manager.
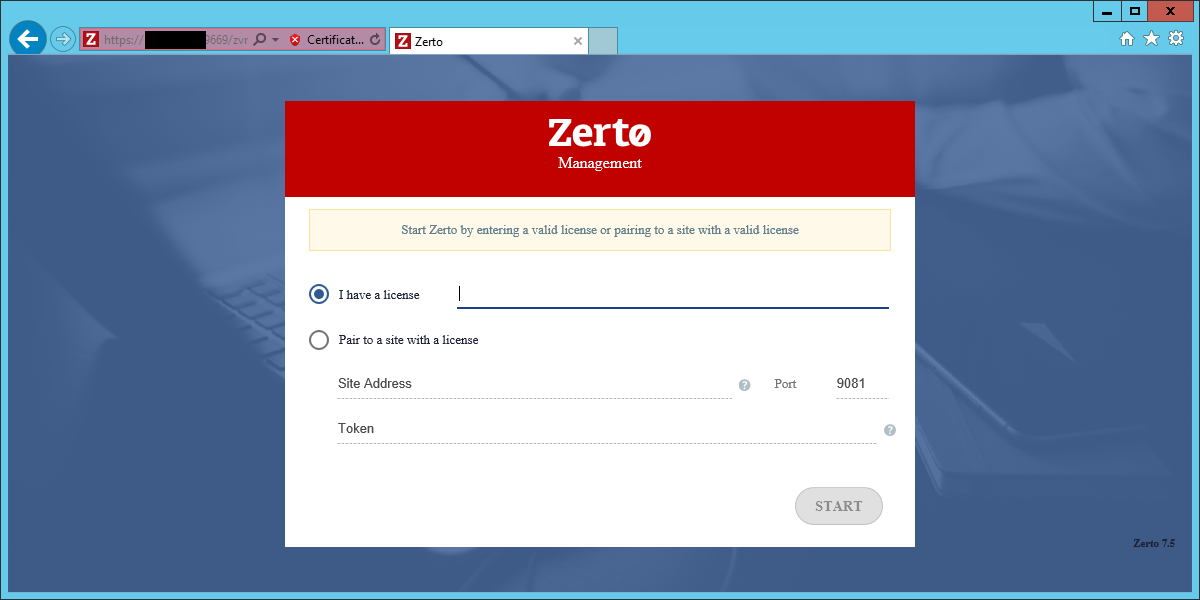
The first time you log in (Using vCenter administrator credentials), you’ll need to provide licensing details.
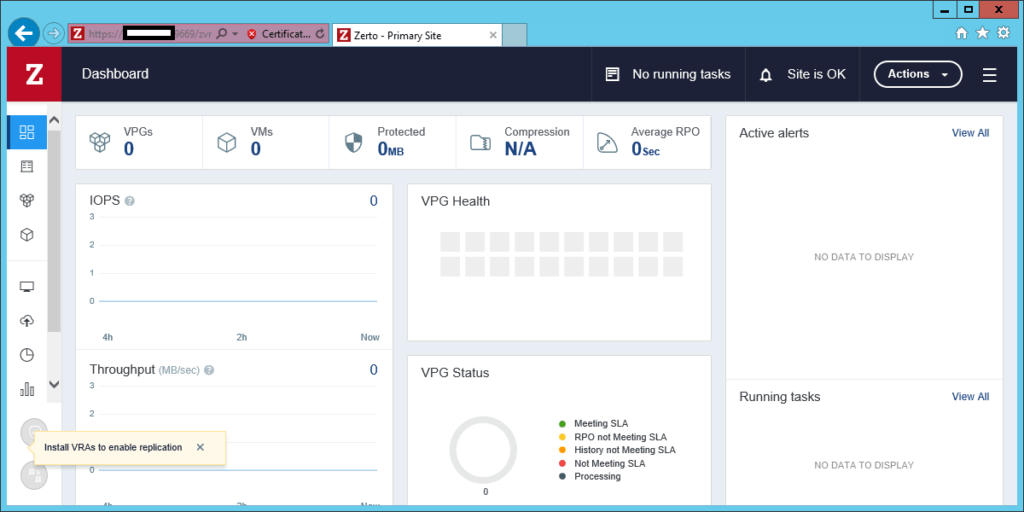
After you enter the license, you will be logged into the Zerto manager. Here you can set up VRAs, sites, and VPGs or virtual protection groups.
In the next post, I will configure and deploy VRAs and pair the Zerto virtual replication to a secondary site.