This is part of the VMware vSAN guide post series. You can access and explore more objectives from the VMware vSAN study guide using the following link.
In this post, I want to update my vSAN Cluster from version 8 to version 8 Update 2. Updating vSAN is a multistage process. You must update vCenter first, then ESXi, and finally update the vSAN disk format. I will go through a complete update of the entire stack with the following sequence:
- Update the vCenter Server
- Update the ESXi hosts.
- Update the vSAN disk format
Before going through the update procedure, as with any update, you should check hardware compatibility for ESXi and vSAN, including hardware components, drivers, firmware, and so on.
Update the vCenter Server
I considered that vCenter does not have access to the Internet or the VMware update repository, and I want to perform an offline update.
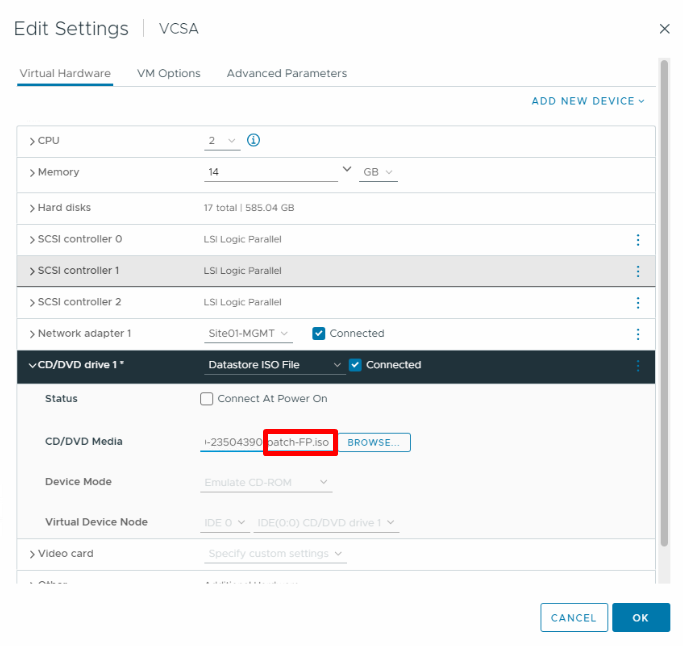
1- Download the patch ISO image from this link, you need to download the file ending in “-FP.iso.”
2- Upload ISO image to a datastore accessible by vCenter VM, and then mount the ISO in vCenter VM.
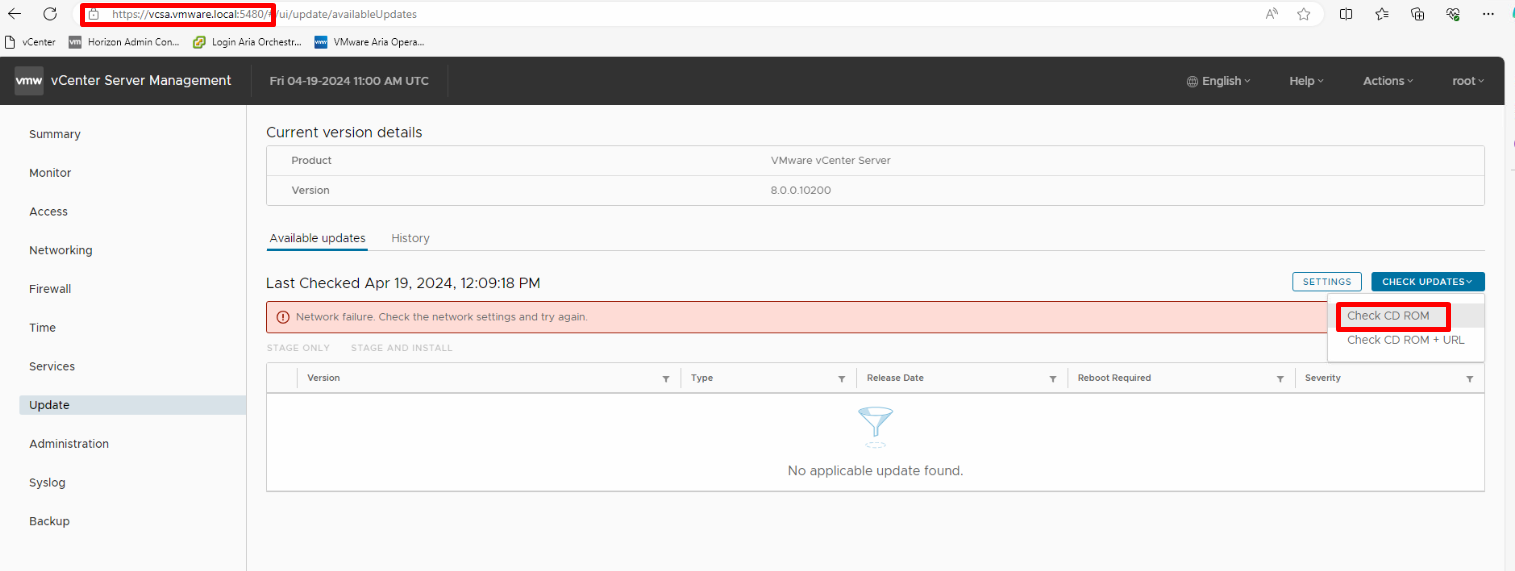
3- Log in to the vCenter Server Appliance Management (https://appliance-IP-address-or-FQDN:5480), then navigate to the left panel and click on Update, and then from the right side, click CHECK UPDATES, and select Check CD-ROM.
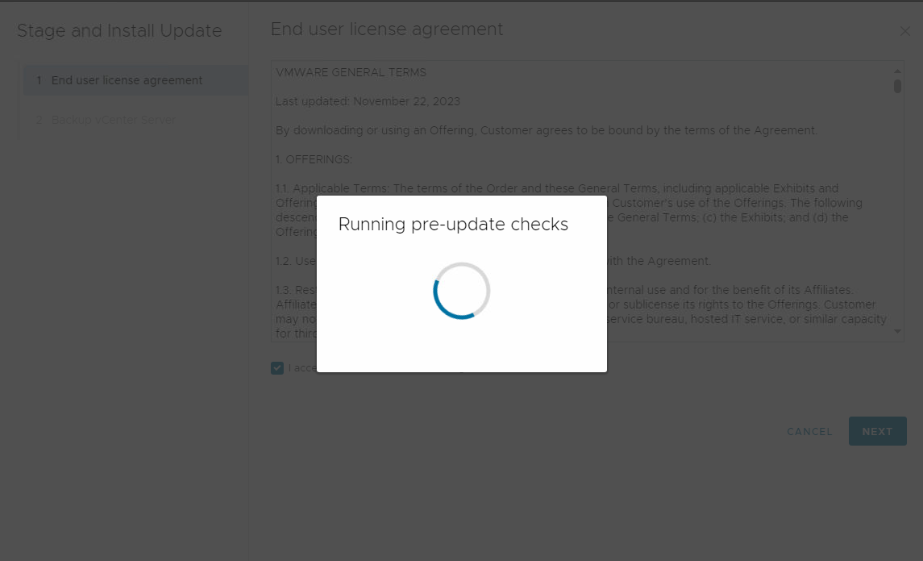
5- Available update will show up. Select it and Click Stage and Install.

6- Accept the End user license Agreement and click Next. A system pre-check will verify the patches.
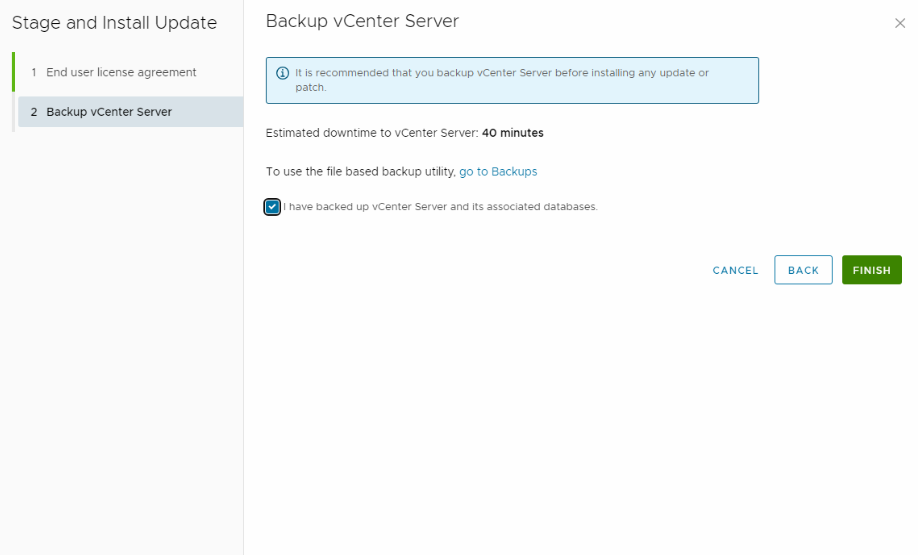
7- Confirm that you have backed up from vCenter and then click Finish.
If you don’t have any backup from vCenter, make sure to take one before proceeding.
8- When update is installed successfully, verify vCenter and its functionality.
9- If everything is good, now it’s time to update ESXi hosts.
Update the ESXi Hosts
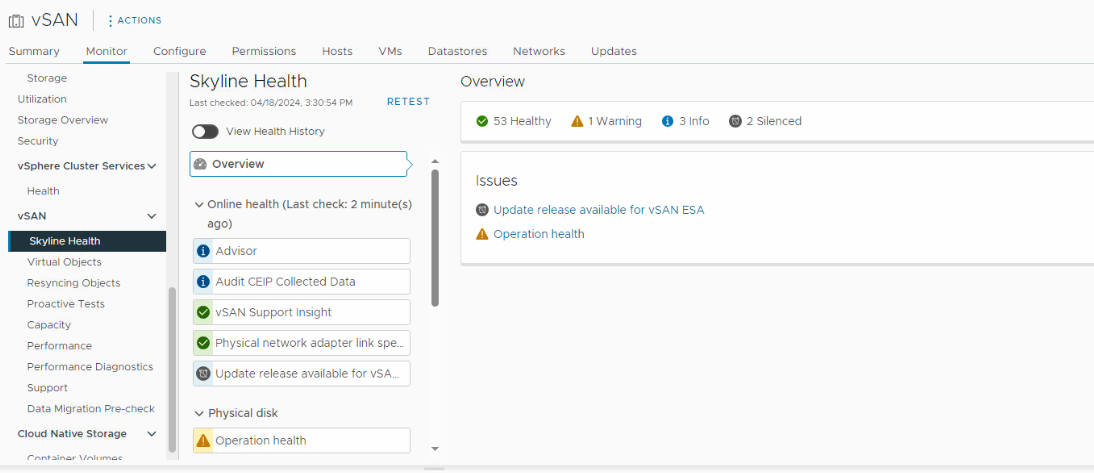
1- Before start updating ESXi-Hosts, verify the vSAN Skyline Health to ensure the cluster’s health and that everything is OK. (Warnings in my case are because of nested ESXi)
2- Download the offline bundle of desired ESXi version for VMware Download.
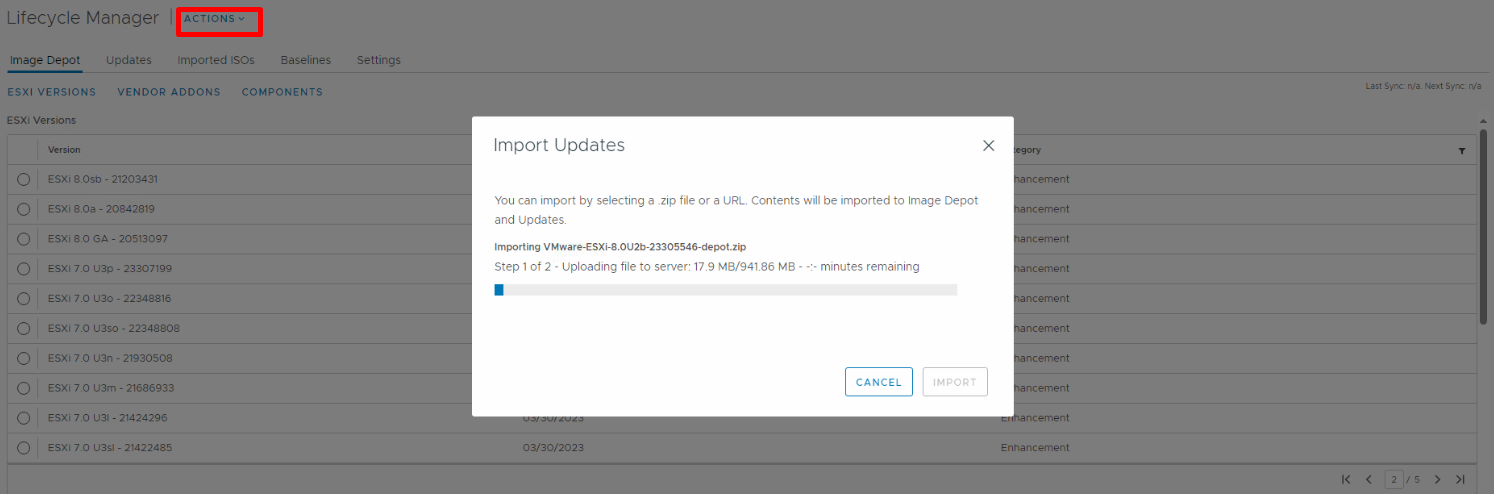
3- Upload ISO image to a Lifecycle Manager Image Depot by navigate to the vSphere Lifecycle Manager view and then from Action tab, select Import Updates. Select offline bundle that you downloaded and click Next.
If vCenter has Internet access, it will automatically updates catalogs from VMware Repository.
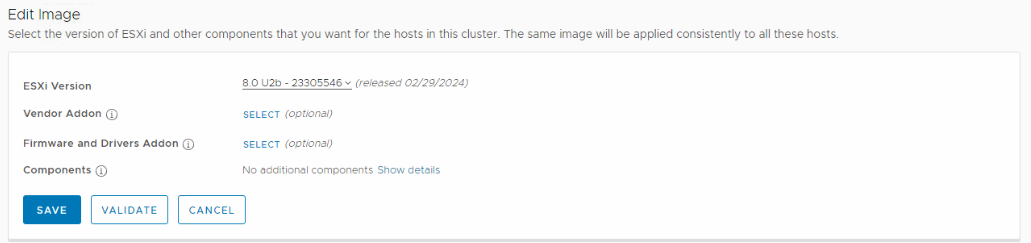
4- Navigate to the vSAN cluster and from the Updates tab, click the Edit button to select the new Image that you have already uploaded.
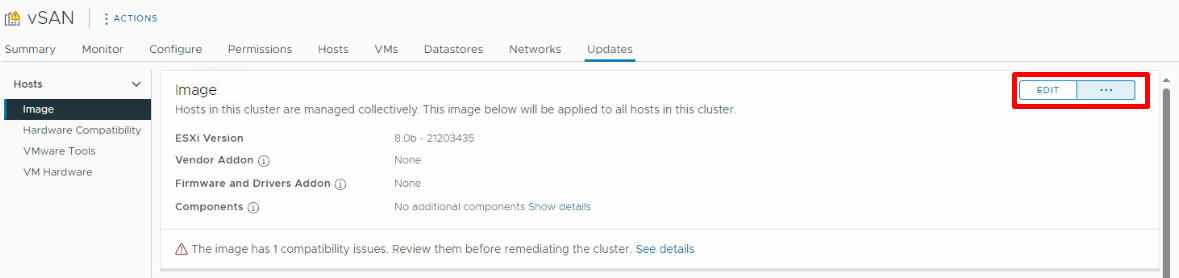
5- Select the ESXI version and customize Firmware and Vendor Addon if you want and then click Save.
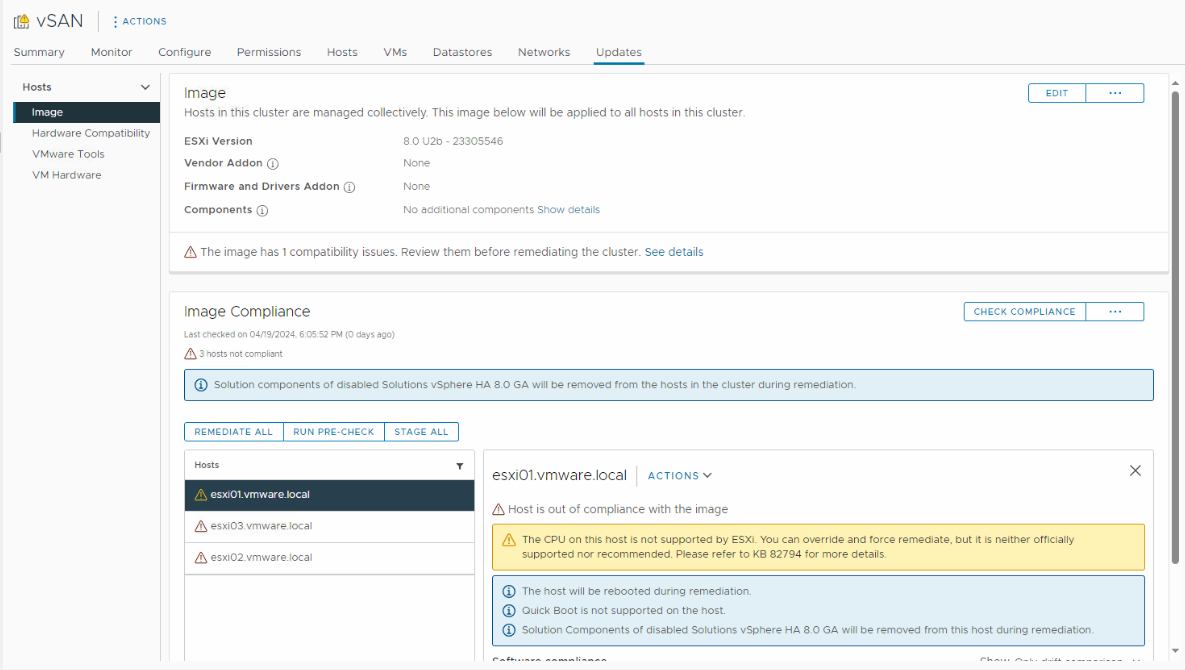
6- If the image is valid, it will be saved and then vCenter runs a compliance check against the new image. Click the Stage All to start staging hosts.
You should see no warnings, and as I mentioned before, I’ve got this warnings since I set up my home lab nested.
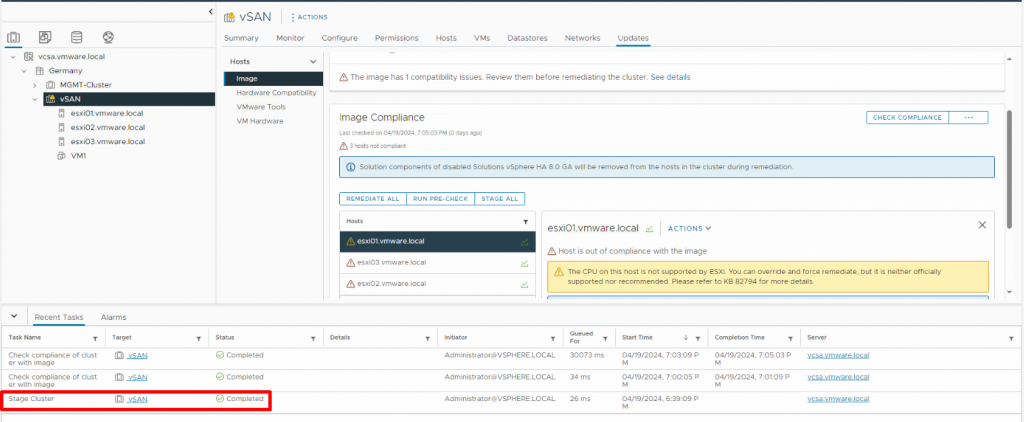
Staging is the process of downloading depot components from the vSphere Lifecycle Manager to the ESXi hosts without applying them.

7- After staging is completed, click the Remediate All to initiate update.
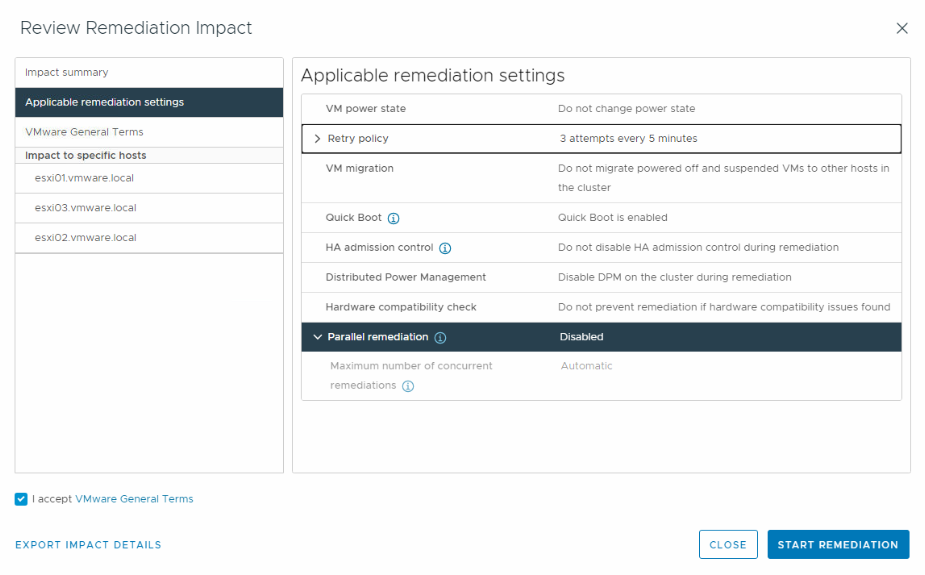
8- The Review Remediation Impact box will appear, review the information and then accept EULA and click the Start remediation.
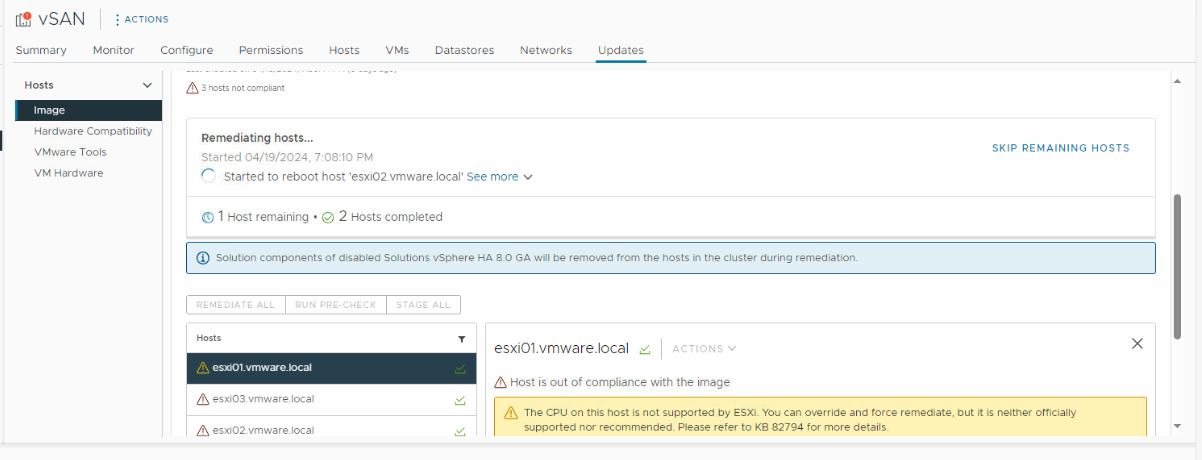
9- Updates will place ESXi hosts into maintenance mode, perform the upgrade, verify its completion, exit maintenance mode, and proceed with the the next host.
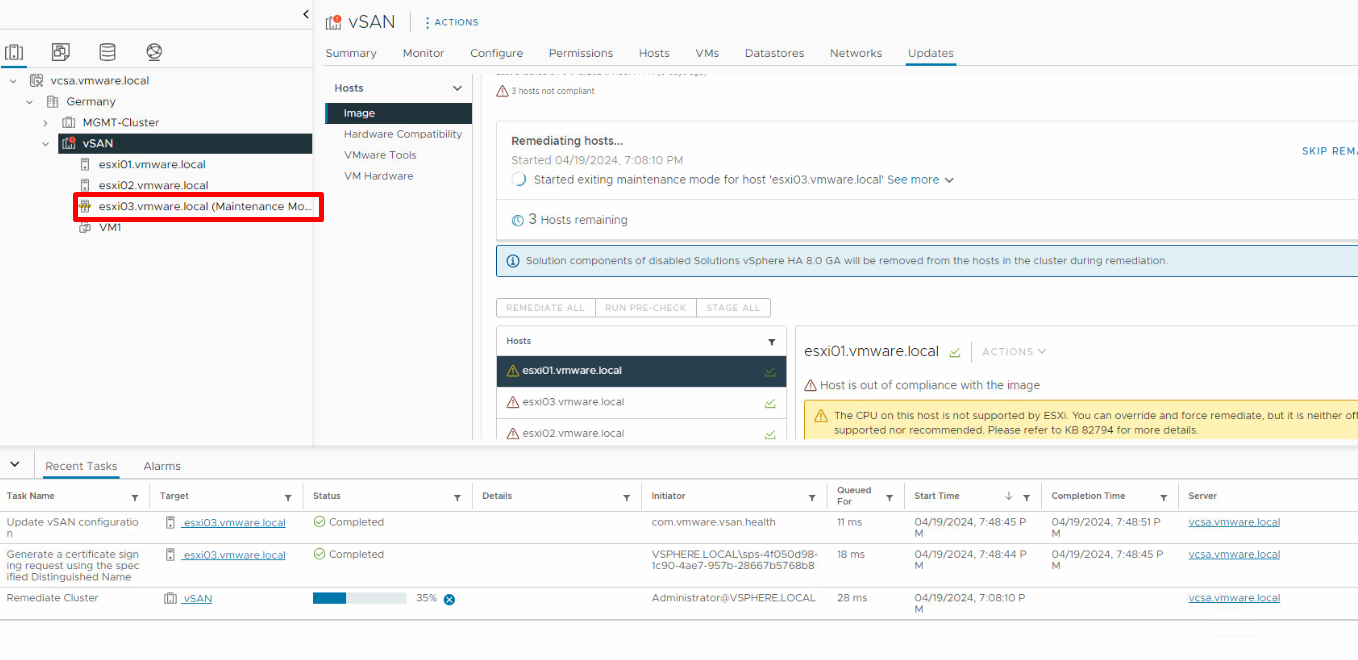
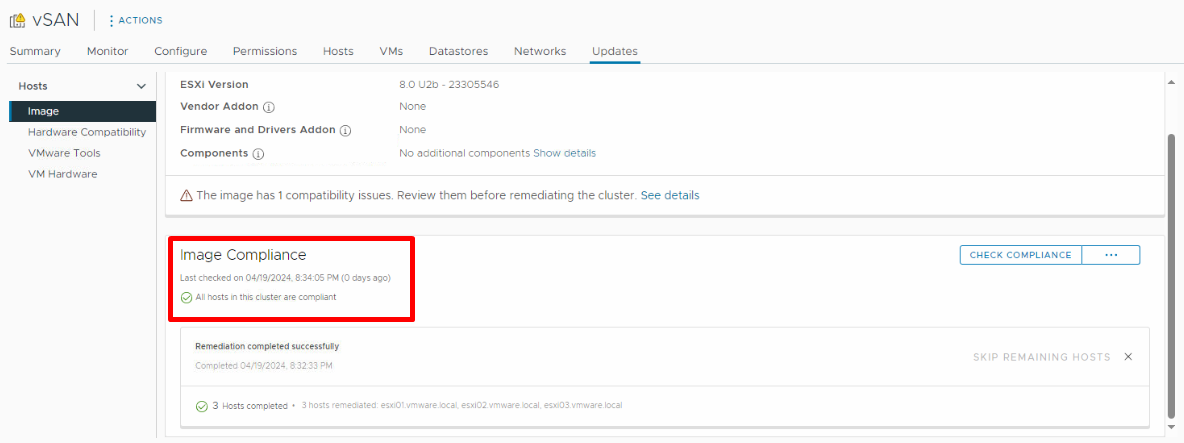
You can monitor the state of update in the Image Compliance.
When update is completed, you will see that all hosts in the cluster are compliant with the new image.
10- I finished updating vSAN hosts, so now I can perform disk format upgrade. Click Pre-check Upgrade, it will analyse the cluster to check any issues that might prevent a successful upgrade.
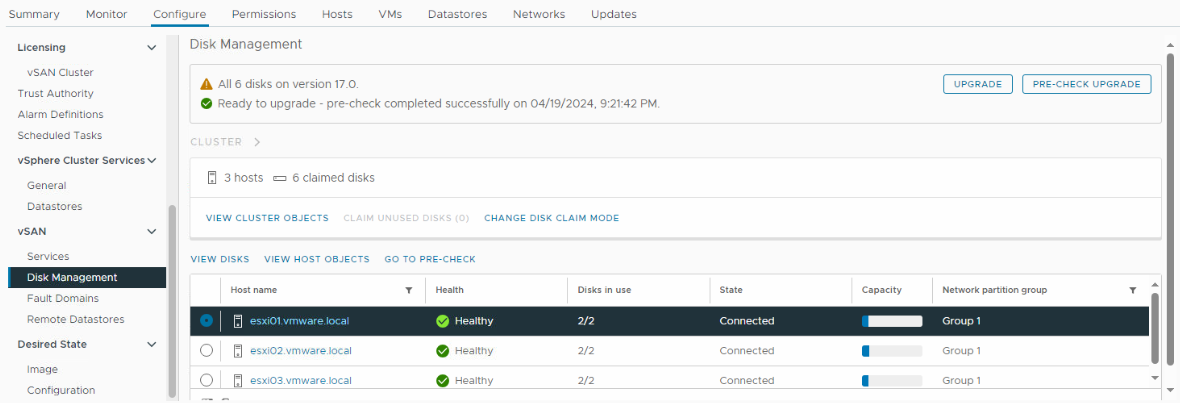
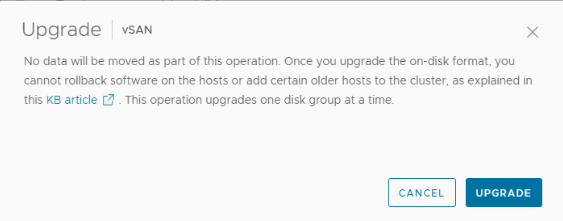
11- If you receive Ready to Upgrade, click Upgrade to initiate upgrade to new the version of vSAN disk format.
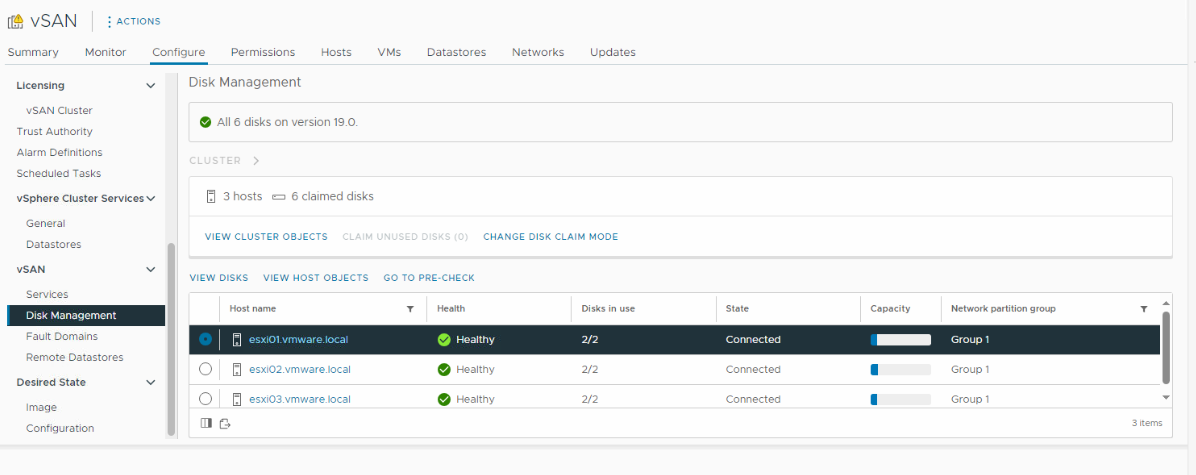
As you can see, all my 6 disks successfully upgrades the new version.
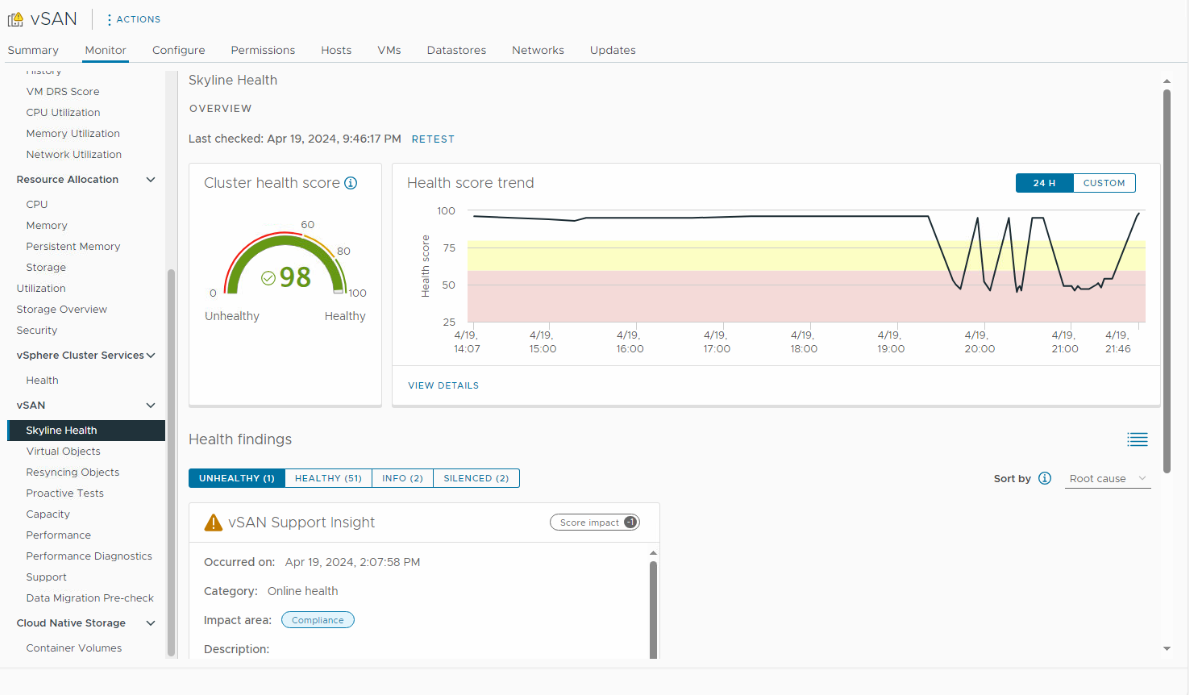
12- If you check Skyline health, you will see the new version of this feature. You can monitor the status of cluster components, diagnose issues, and troubleshoot problems. I really like the new design because it makes troubleshooting and health checks much easier.
You successfully update your vSAN cluster to the new version!
Dear Yahia,
Many thanks for your post,
In few days i will do my first upgrade of vsan 7u3 to the last one i guess 8 u3 from, i am not confident because i don’t have enough documentation but also with no experiences, could you please advise me on how to proceed, the customer have 2 sites: the 1st one has 4 hosts the 2nd has 2 hosts with the witness on the 1st site.
Waiting for your response
Thanks
Hi!
I would recommend having an experienced consultant assist you—especially since this is a production environment and your first time doing a vSAN upgrade.
In general, start by reviewing the official VMware documentation and best practices. This article is a good starting point:
https://knowledge.broadcom.com/external/article/326927/vmware-vsan-upgrade-best-practices.html
While upgrading a cluster is usually straightforward, it’s not something I would advise doing on your own without prior experience.
Good luck!