Data Domain is a purpose-built backup appliance used by many organizations to store backup data. The Data Domain appliance can be used as a Common Internet File System (CIFS)/Server Message Block (SMB) or Network File System (NFS) file share. Data Domain can also be integrated into various traditional backup applications. This makes it an excellent option for enterprises to use as a target for a wide range of backup applications. You can find more information about Data Domain in the following link.
https://en.wikipedia.org/wiki/Dell_EMC_Data_Domain
EMC released Data Domain Boost for Microsoft Applications in the first half of 2014. This tool has a SQL Server module that is implemented as a SQL Server Management Studio (SSMS) plug-in or used as a command-line tool that can be called from SQL Agent jobs or Maintenance Plans. The tool allows SQL Server database data to be deduplicated on the SQL Server before being sent to the Data Domain appliance, reducing the amount of data sent over the network and stored on disk.
In this post, I want to show you how to configure Data Domain and SQL Server, to transfer SQL backups directly on Data Domain and how to restore from Data Domain.
Configure Data Domain DD Boost
Log in to the Data Domain system as the sysadmin user:
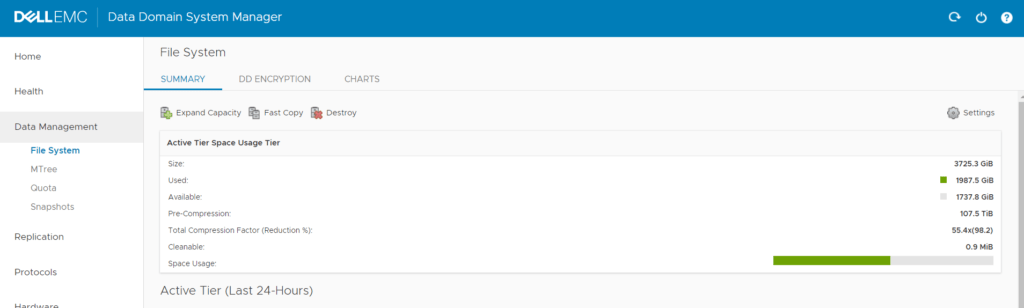
If this is your first time logging into this device, you need to create the file system and then enable it in order to create a storage unit. In the above figure, because we have already created the file system, this option is no longer available, but if you have not yet created a file system, this option is visible to you.
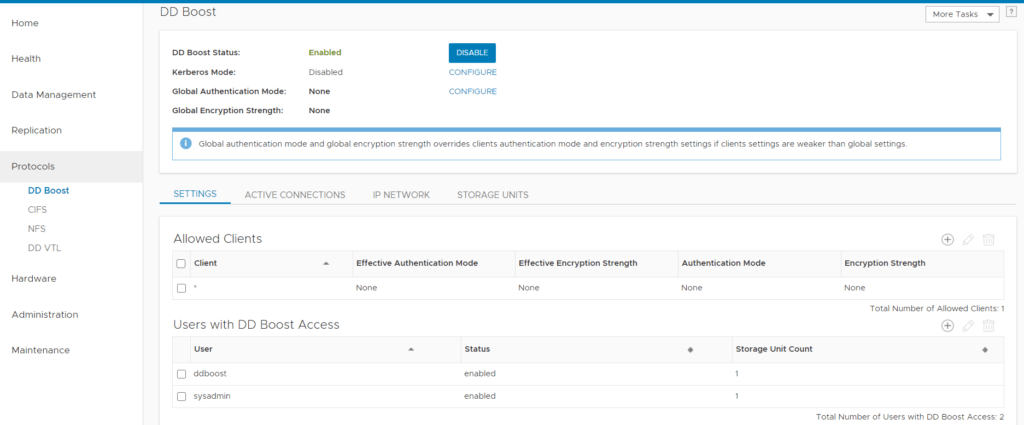
Then navigate to Prorotocls and then DD Boost to create a DD Boost user and password. Click on the plus sign in the Users with DD Boost Access section.
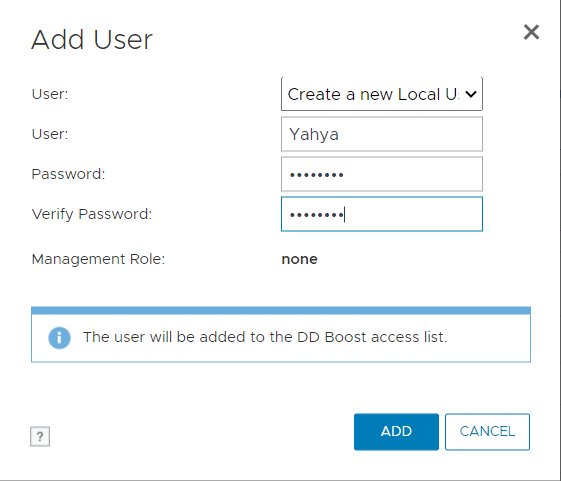
Provide the required information and click on Add.
Now enable DD Boost, at the moment this is enabled for us, but if it is disabled, you will see ENABLE in place of DISABLE.
To create a Data Domain storage unit for SQL backup data, go to the STORAGE UNITS tab and click on the plus sign in the Storage Units.
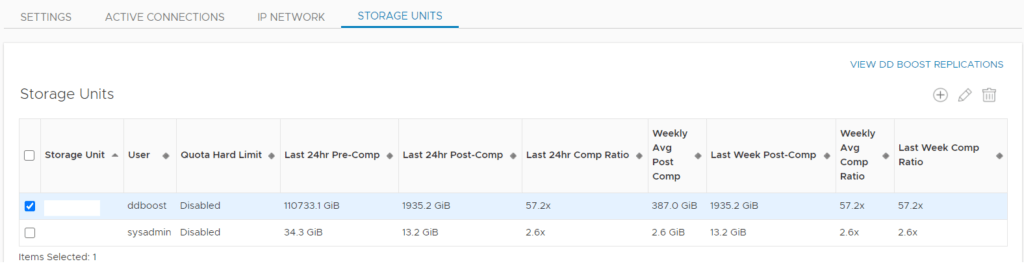
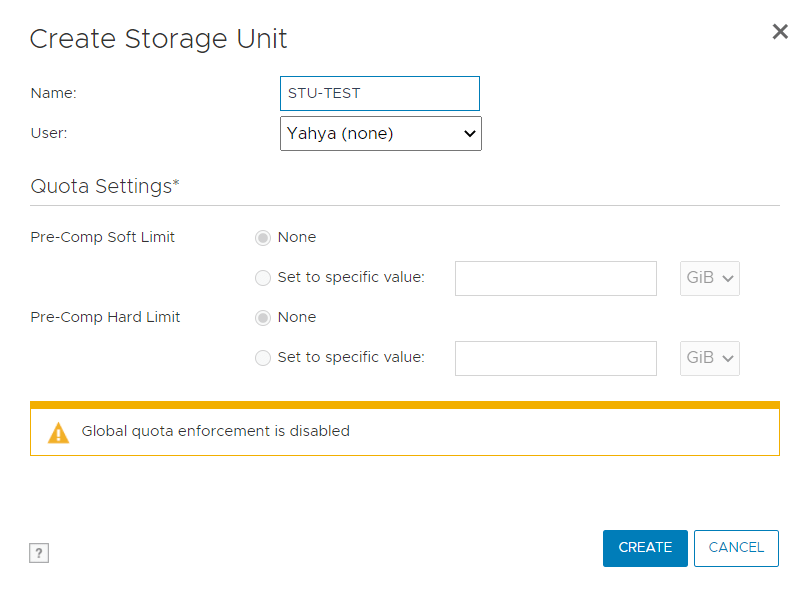
Provide a name for your storage unit and select the user who wants to access this storage unit and then click on OK.
Install Microsoft Application Agent
Storage settings completed, now it is time to configure the SQL server. You must install and configure the Microsoft application agent in order to backup and restore to and from the data domain using ddboost. Download the Microsoft application agent software package from Dell EMC, and transfer the agent software to the SQL server to install it.
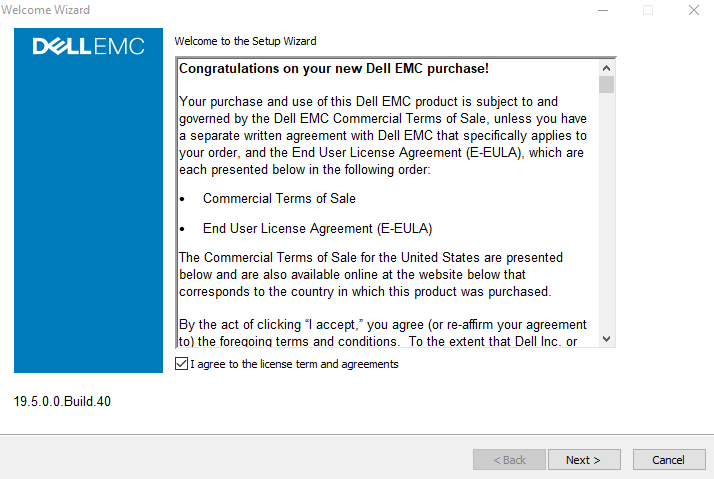
Run the installation and agree the license agreement and then click Next.
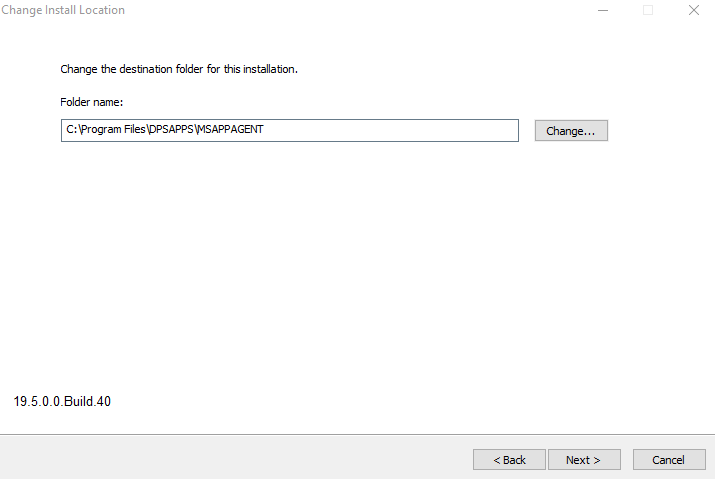
Specify the location and then click Next.
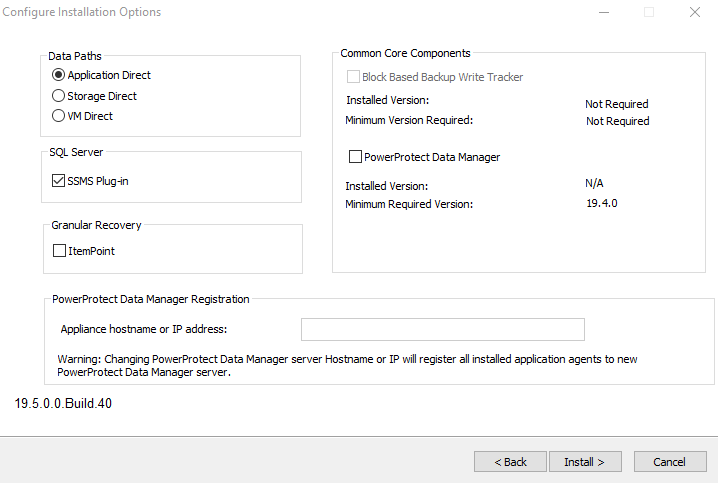
Select SSMS Plug-in to install the SQL Server Management Studio plug-in, which lets you perform SQL Server backup and restore operations from SSMS. Leave the other options as default and click Install.
Backup SQL to Data Domain
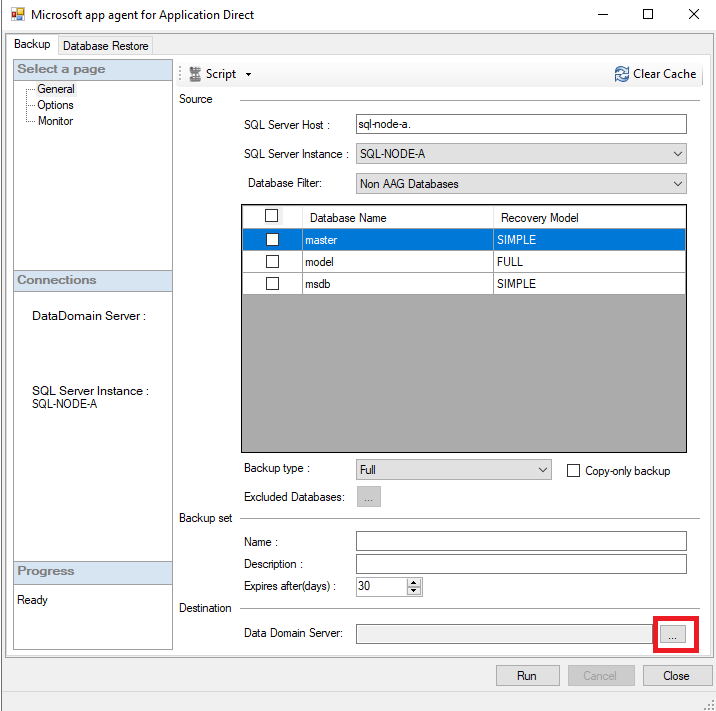
After the installation has been finished, run the SQL Management studio to perform backup and restore, and then click on the Microsoft app agent.

In the Destination section, click on … to add your data domain details.
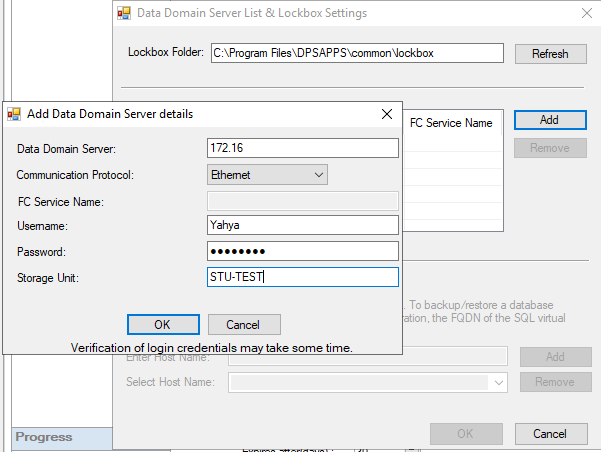
Click on Add on the “Data Domain Server List & Lockbox Settings” page to enter your data domain details, provide the information,s, and click OK and again OK.
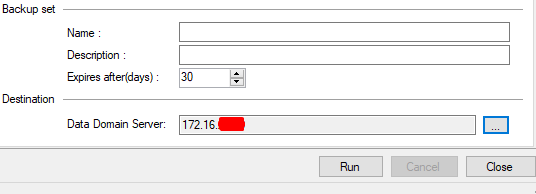
Now you see your data domain as a destination, Let’s take a backup from a data base to the Data Domain.
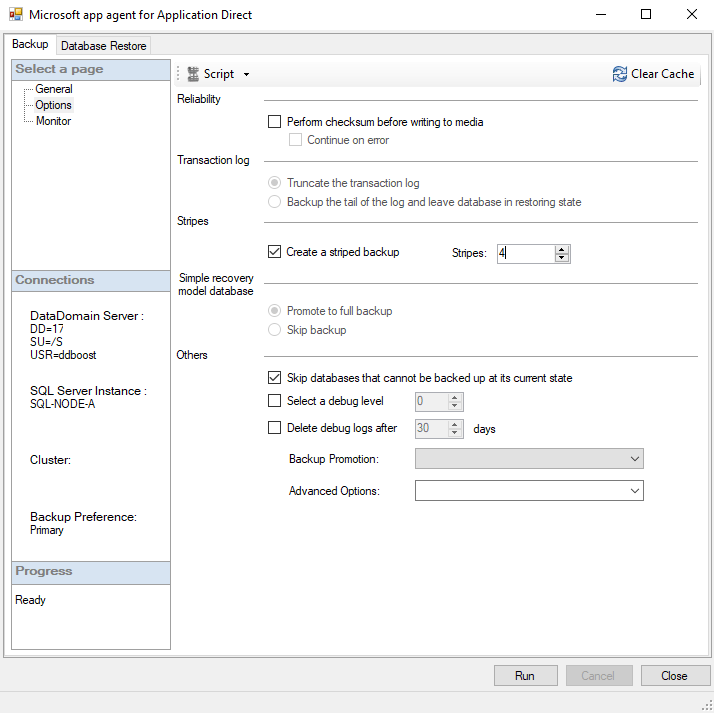
On the General page, select your database and the type of backup you want and specify the expiration date and go to the Options page for advanced configuration.

On the Options page, select stripes number to improve the backup procedure, the maximum number is 32. Based on my experience and my environment I set it to 4. Configure other parameters if you want, but for now, click on Run to start the backup procedure.
After the backup job has been completed, you see the following figure.
Restore SQL from Data Domain
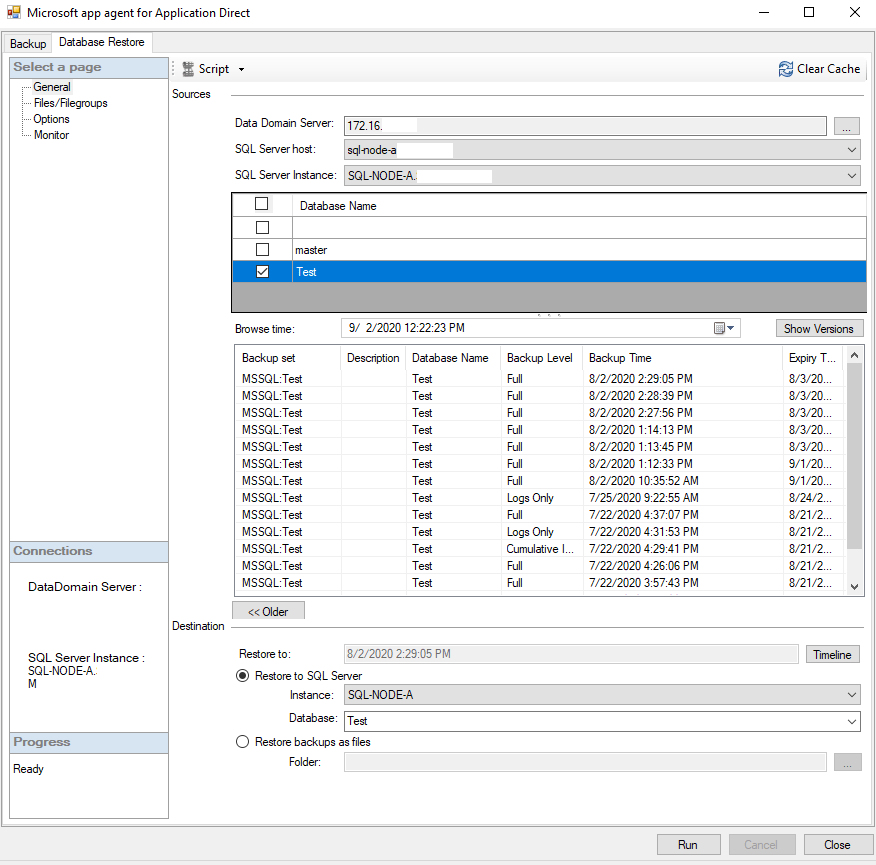
In order to restore the database from Data Domain, go to the Database Restore tab and select the Data Domain Server, SQL Server host, and desire instance. Now all the databases that have backups are shown and select your database and specify the time you want to restore and click on Run to start the restore procedure. Leave other options as default.
As you see the restore completed successfully.
I hope this is informative for you.
Thanks for very informative posts and work you been doing . I have question related to ppdm sql application agent . I am trying to install the agent on one of the sql server but installation is failing with connection error but when I telnet i can see the connection between ppdm and host . On PPDM gui I notice the server ip is different when I check with network team they said it is NAT ip of that sql server I think ppdm register sql on managment ip of host . Please clarify what is the correct way to registered this sql server .
Thanks .
Thank you for your comments. Unfortunately, I have not had the opportunity to install PowerProtect Data Manager (PPDM) and therefore may not be able to assist you with your query. However, I suggest checking the logs to identify the root cause of the issue.
Thanks