This is part of the VMware vSAN guide post series. By using the following link, you can access and explore more objectives from the VMware vSAN study guide.
In my previous two posts, I discussed vSAN policies and the various customization options offered by vSAN for configuring policies for your virtual machine objects. In this blog post, I will begin by guiding you through the process of creating a new vSAN policy with specific requirements. Following that, I’ll show you how to update that policy by adding new options, allowing you to observe its behavior and functionality in action.
Create and Assign a new vSAN policy
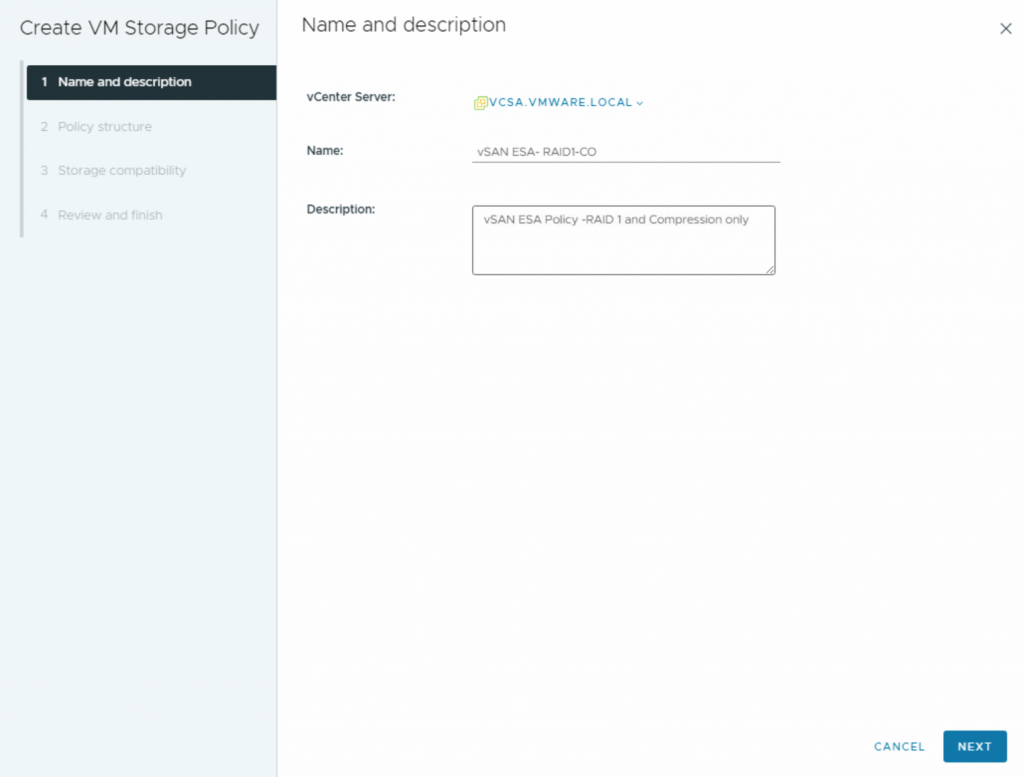
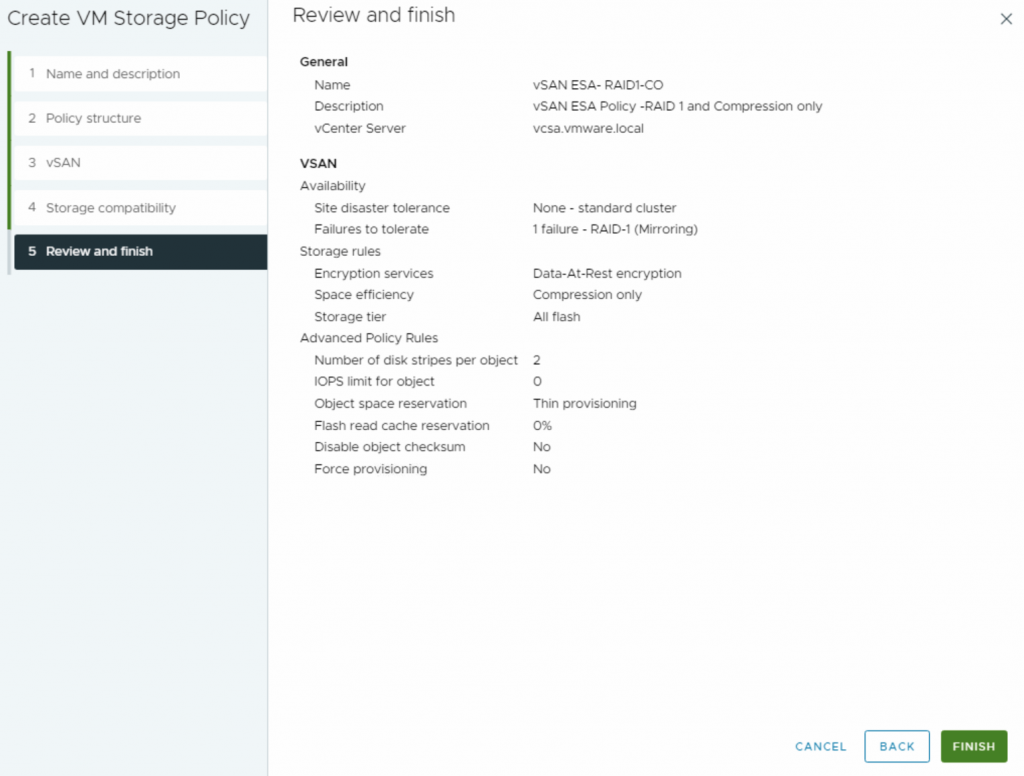
I want to create a new vSAN policy with the following requirements:
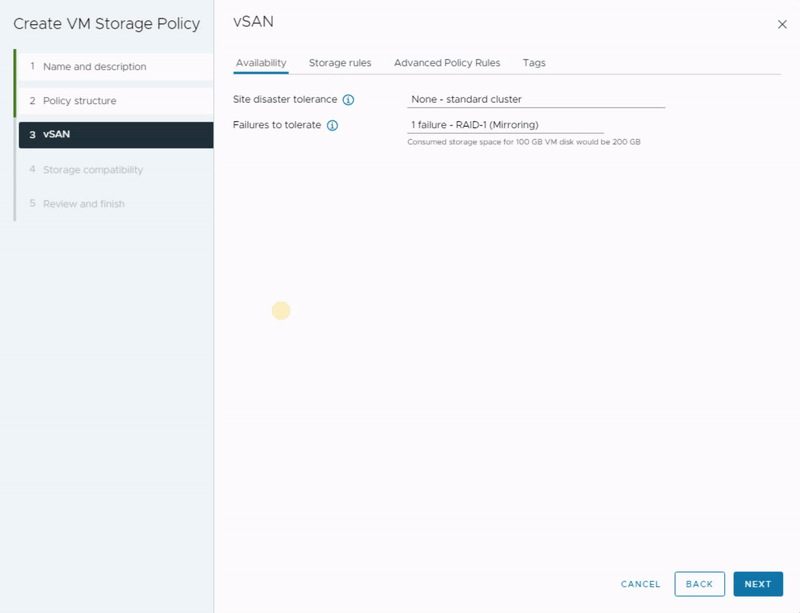
- Site disaster tolerance: None (standard cluster)
- Failures to tolerate: 1 failure – RAID-1 (Mirroring)
- Encryption Services: Data-At-Rest encryption
- Space Efficiency: Compression only
- Storage Tier: All Flash
- Number of disk stripes per object: 2
- Object space reservation: Thin provisioning
1- Navigate to the Policies and Profiles section, and select VM Storage Policies. Here, you can create and manage your vSAN storage policies. Click the Create a new VM storage policy.
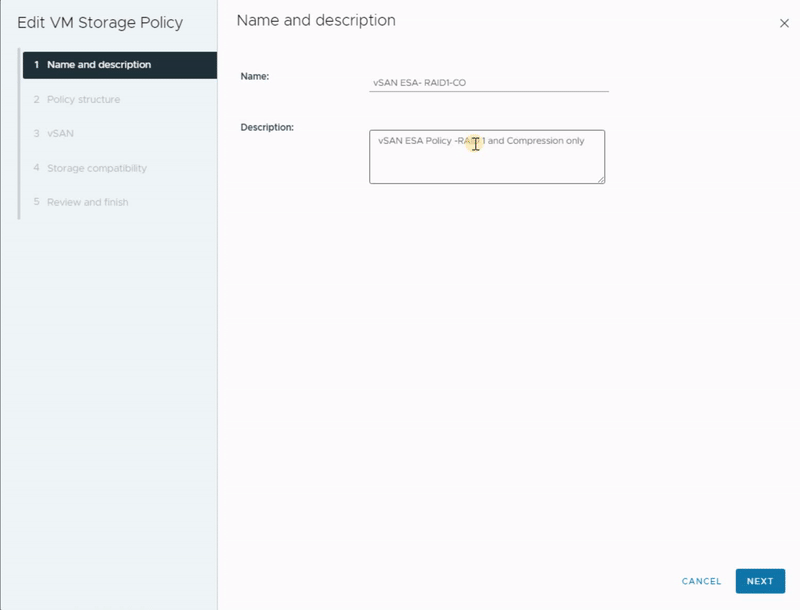
2- Enter a name and a description for this storage policy and click Next.
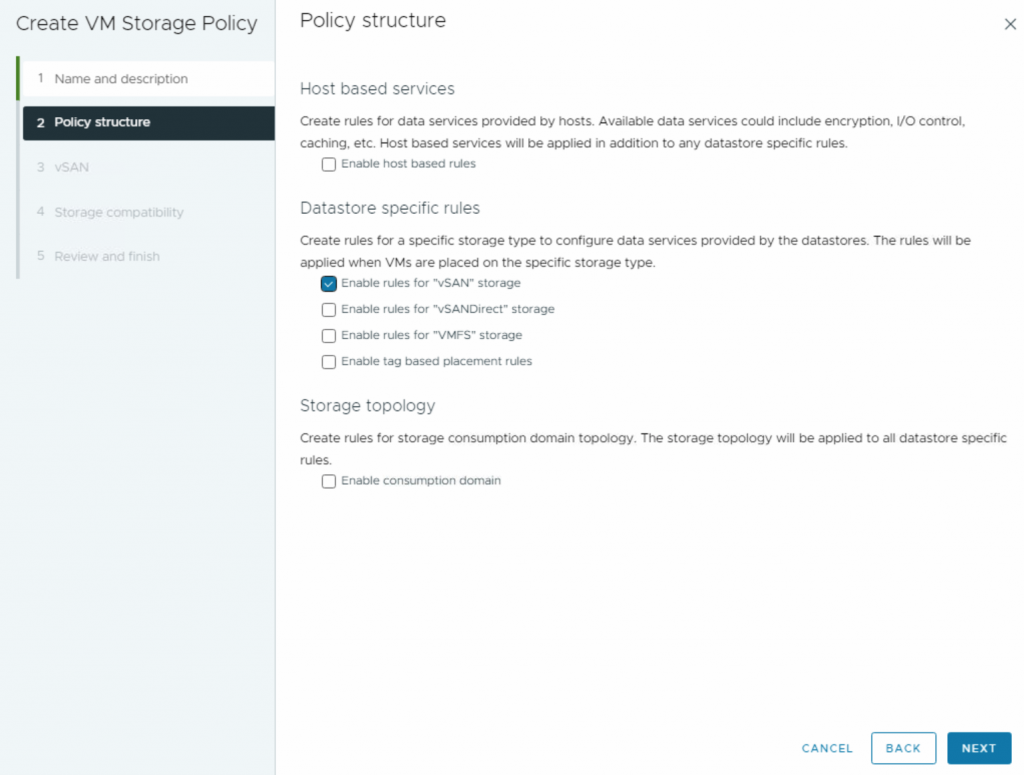
3- Select Enable rules for “vSAN” storage, and click Next.
4- In my previous posts, I have explained all of these options. Now, in accordance with the specified vSAN policy requirements, I will proceed to select them as demonstrated in the GIF, and then click Next.
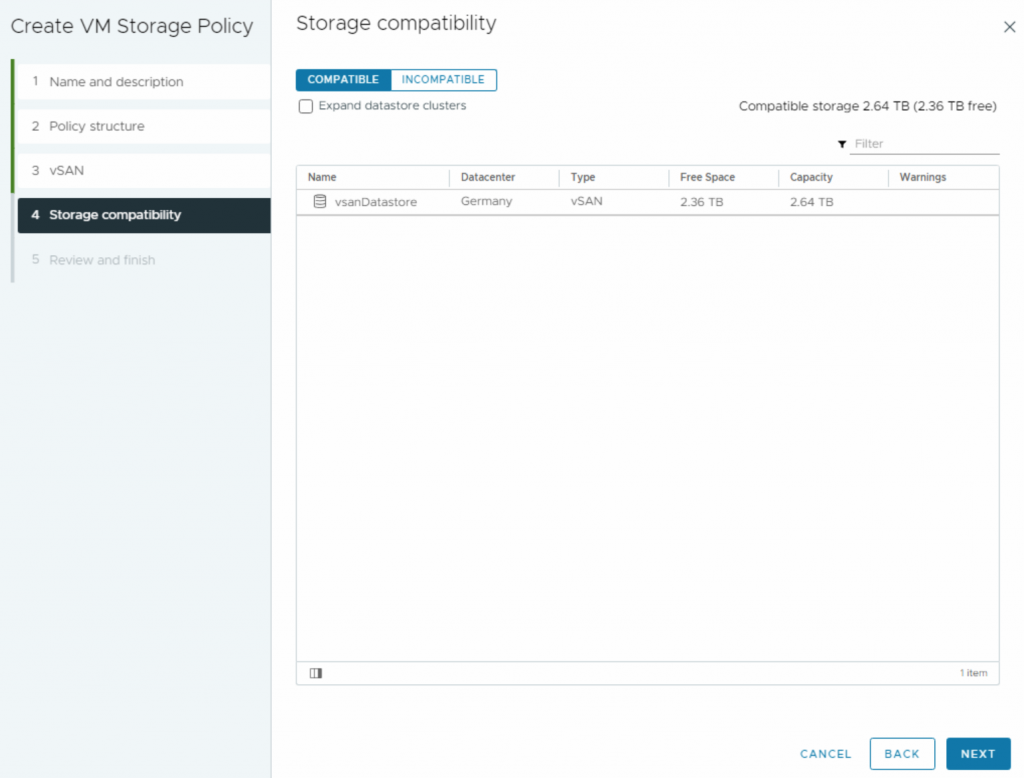
5- You see the list of datastores that match this policy and click Next.
6- Review the policy settings, and click Finish.
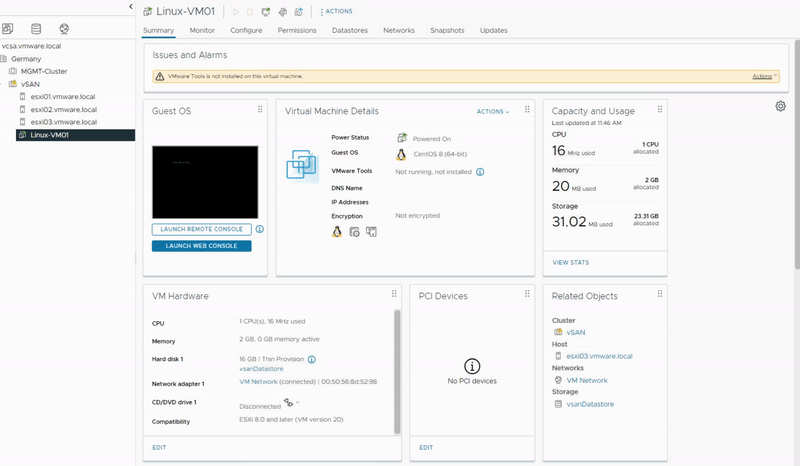
7- Now that you’ve successfully created your custom policy, it’s time to assign it to the virtual machines that need to use it. Select the virtual machine you want to apply the policy to and from the Configure tab, under the VM Storage Policies section, click on Edit VM Storage Policies.
8- From the list of available policies, select the custom policy you’ve just created, and click OK. You will notice that the VM Storage policy will be changed to the new one after a few seconds.
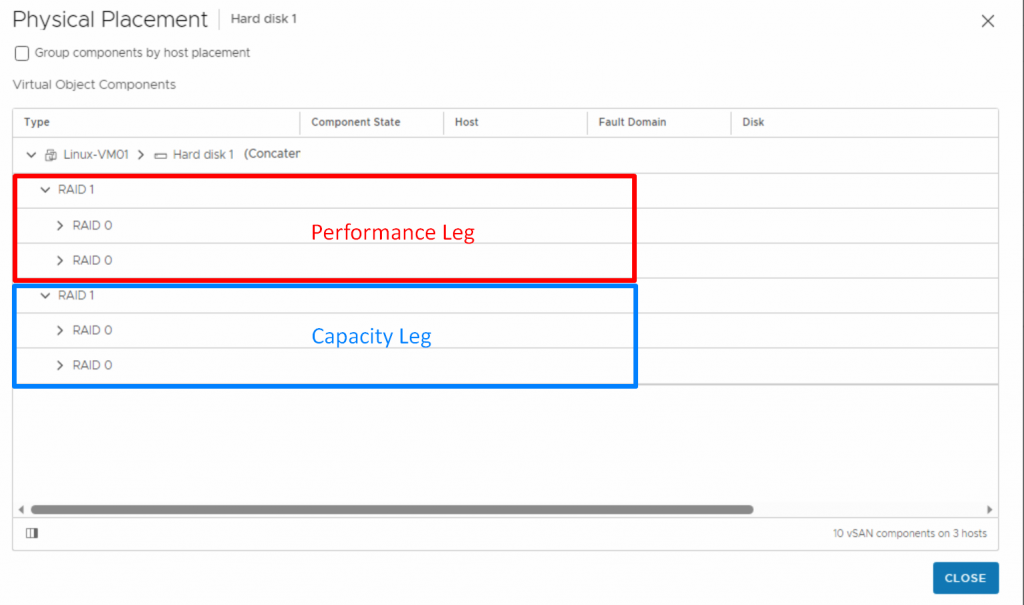
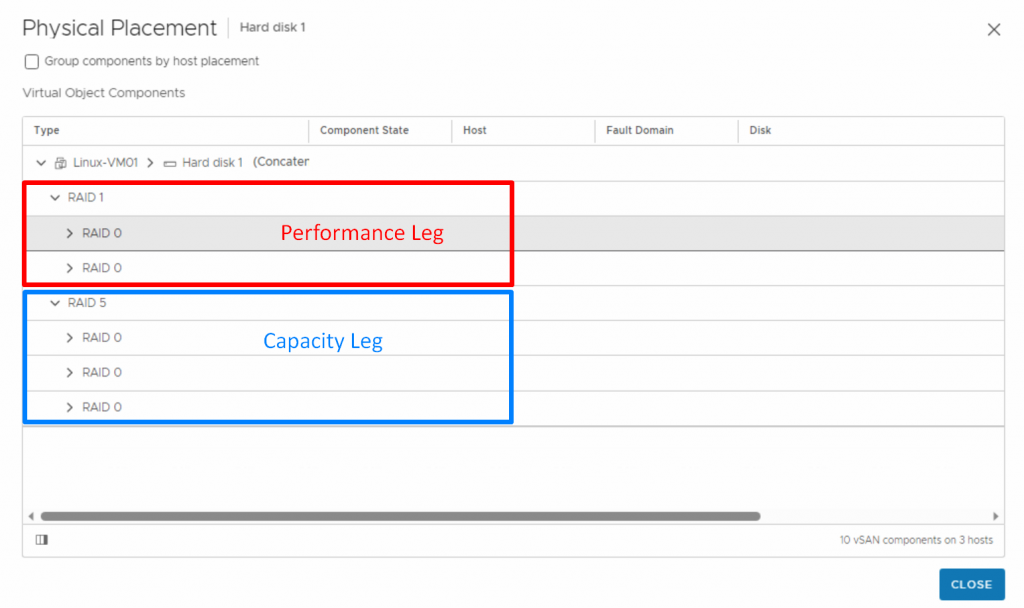
9- After that, If you examine the virtual object placements in the vSAN monitor tab, you will notice that the performance leg employs RAID 1, and the capacity leg also uses RAID 1. As mentioned in the earlier posts, the Performance leg always uses RAID 1, while the capacity leg depends on the vSAN policy in use.
Modify and Reapply the vSAN policy
1- Let’s now make some configuration changes to this policy and apply it once more to the virtual machine. Navigate back to the Policies and Profiles section, and select VM Storage Policies. I select the vSAN policy I created previously and click Edit to modify the settings based on new requirements.
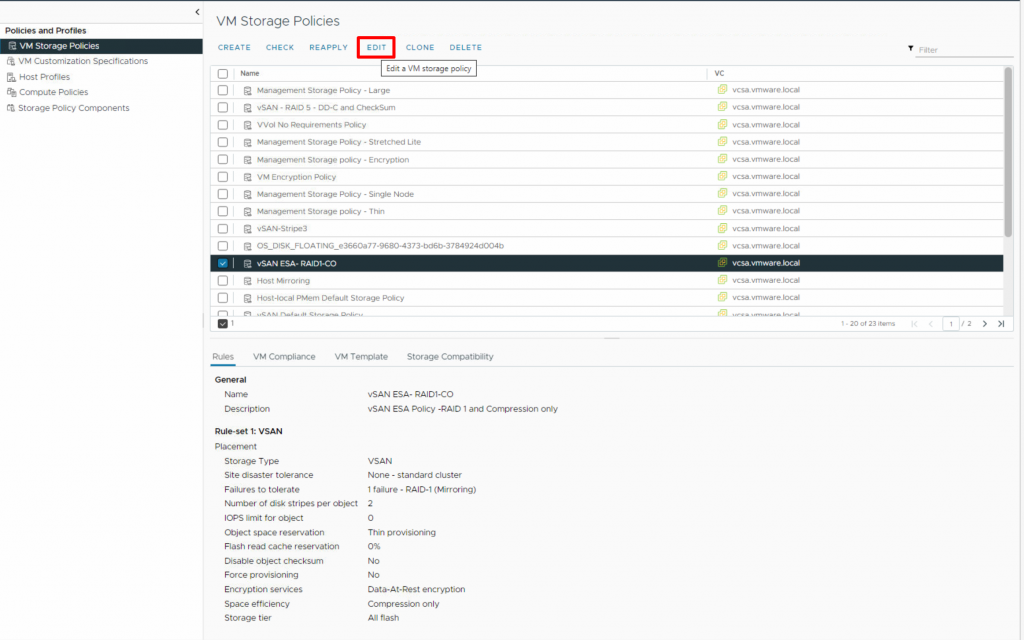
New requirements:
- Name: vSAN ESA- RAID5
- Description: vSAN ESA Policy – RAID 5 – No Compression
- Failures to tolerate: 1 failure – RAID-5 (Erasure Coding)
- Space Efficiency: Compression disabled.
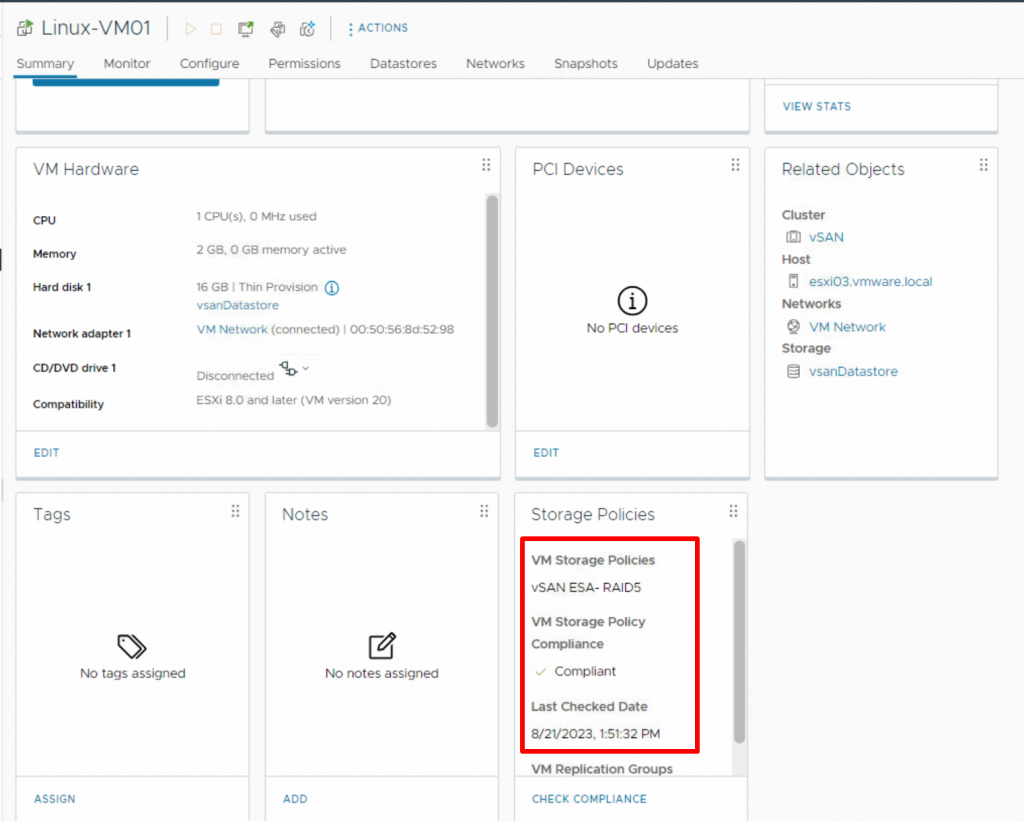
2- You can either apply the new vSAN policy settings immediately after editing or choose to do so at a later time. In this scenario, I reapplied it to the VMs (which, in this case, refers to a single virtual machine) immediately. Once you’ve done that, you’ll be able to see the new vSAN policy under the Storage Policies card.
3- Now, when examining the placement of virtual objects, you will observe that the Performance leg still employs RAID 1 as before, while the capacity leg utilizes RAID 5 (the new RAID 5 settings).
I have attempted to cover various aspects of vSAN policies to provide you with a comprehensive understanding of this topic. I hope you find this information informative.