As an IT professional, you have heard about the word Ransomware time and time again and it has become a major concern of all types of organizations, from small to large enterprises. When Colonial Pipeline was hit by ransomware in 2021 and finally forced to pay for ransomware after hours of attempts, it was no longer an organizational issue and became a serious national issue!
The payment for ransomware is as dangerous as the ransomware itself. Organizations are forced to pay this fee for plausible reasons, in some cases, they believe that data recovery is costly and time-consuming! But sometimes the story gets beyond and event backups are encrypted so that organizations can no longer perform operations and have no choice but to pay!
Businesses need to review their security and backup strategy to recover data from secure backups in minutes. In a series of posts, I will discuss one of the new and interesting features of the Veeam Backup and Replication v11 to securely backup and restore data (Hardened Repository).
A hardened repository protects your backup files from loss as a result of malware activity or unplanned actions with the help of Single-use credentials and Immutability. Single-use credentials are used to only install Veeam Data Mover and it does not store credentials in Veeam infrastructure, so when the backup infrastructure is comprised, the repository is in a safe state; and immutability is a feature when you enable for a while, it prevents data deletion or modification from the corresponding repository.
Requirements and Limitations
To use a hardened Linux for immutability, you must meet the following requirements:
- You need a physical server or a virtual machine to act as a repository. However, I strongly recommend using a physical server (security!).
- A 64-bit Linux distribution due to Veeam Data Mover requirements.
- The Linux distribution file system is recommended to be XFS for performance and space efficiency reasons (block cloning support or Fast Clone).
- Veeam Backup and Replication version 11 and later
The most important Limitations for this type of repository are:
- The backup type can not be reverse or a forever forward incremental backup mode because your backup is immutable and can not be changed or deleted. For this type of backup, you have to enable active full backup or synthetic full backup in the backup job settings.
- For backup copy jobs, you need to enable the GFS retention policy to utilize the immutability feature.
- You must use local or direct-attached storage for your Linux repository, you can not mount NFS volume and then make it a repository with immutability.
- Immutability retention overrides a job retention
Depoly a Hardened Repository
I choose Ubuntu Server 20.04.3 for this purpose and will show you have to configure properly for a hardened repository.
- Download an Ubuntu image and create an installation media (Bootable USB stick) or mount an ISO file to install the Ubuntu server.
- Select a language and then choose your keyboard layout and then click done.
- Select Ubuntu Server (minimized). In my opinion, to increase the security of the server and because this server is not an operating server that needs to be logged in regularly, I chose this option.
- Configure network settings.
- Configure proxy settings and archive mirror (Internet access is not a good idea for backup repository).
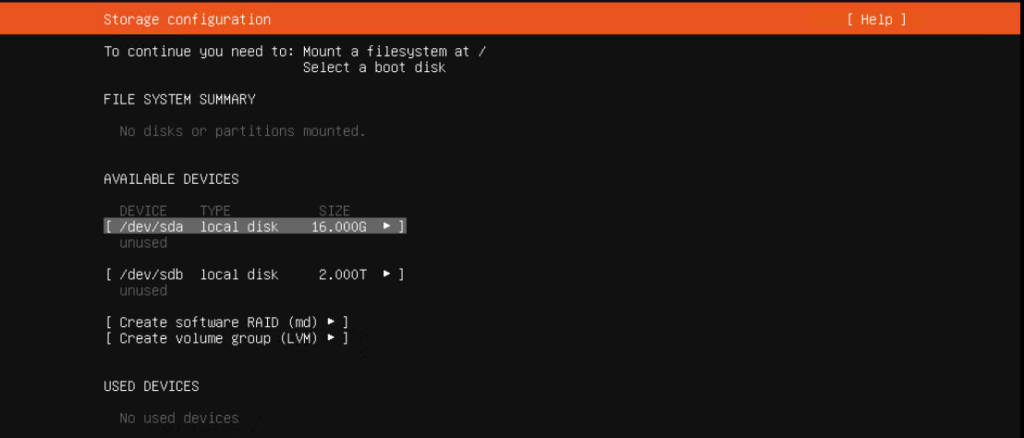
- Select custom storage layout to configure partitions for OS and backup repository. it is recommended to have a separate physical disk for OS and a backup repository. In my case, I have sda for OS and sdb for the backup repository.
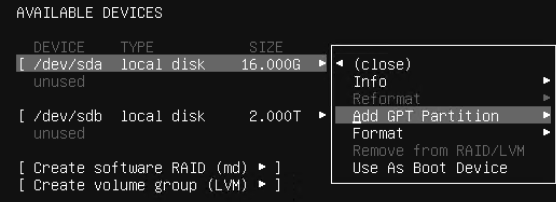
- for sda, select the disk and then Add GPT Partition, leave the default settings, and click on create.
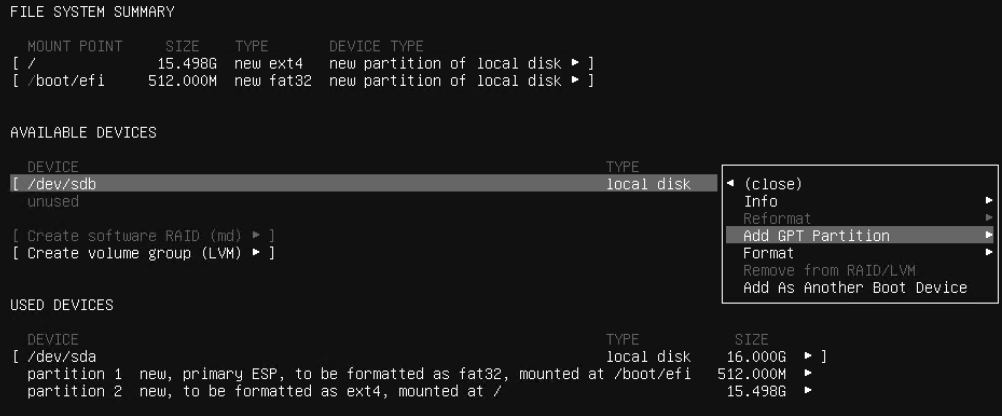
- Now you have two partitions (boot partition and root). Select the second disk and click Add GPT Partition to create an XFS partition for the backup repository.
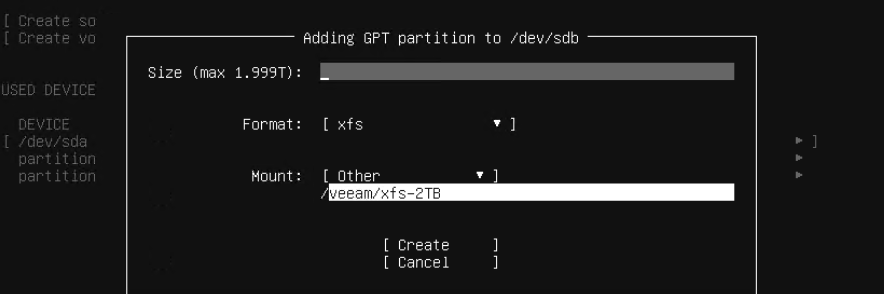
- I want to use all the capacity so I leave it blank and go to disk format and select XFS and create a new mount point ‘/veeam/xfs-2TB‘ and then click create and then click done to continue the installation.
- Enter username and password and a name for your server then click done.
- check Install OpenSSH Server and then I will disable it at the end of configuration because SSH connection is necessary only for deployment of Veeam Data Mover.
- Wait for the installation to complete and then click on Reboot Now.
- Login to the server using SSH to configure the server for backup repository.
- Create a dedicated local user for Veeam Backup and then temporarily add it to the sudo group.
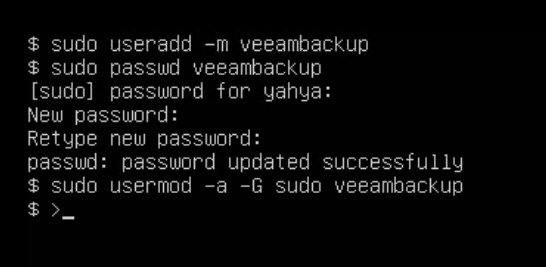
- Set the permissions on the repository directory (/veeam/xfs-2TB) for your created local user (veeambackup) and limit access to this repository only for its owner and root account.

Now it is time to add the Linux server to the infrastructure and create a Linux repository.
Add Linux server to backup infrastructure
First, I need to add a Linux server to Veeam Infrastructure and then assign it the role of the repository.
- In the Backup Infrastructure view, right-click the Managed Servers node and select Add Server and then Linux.
- Enter IP address or DNS name of the Linux server.
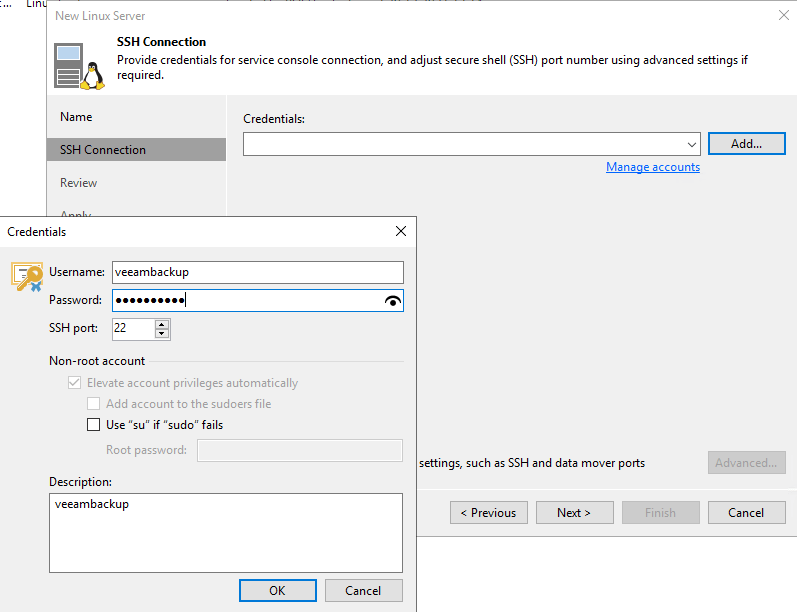
- At the SSH Connection step of the wizard, click Add and select Single-use credentials for hardened repository to prevent Veeam from storing credentials, and this credential will be used only for Veeam Data Mover deployment.
- Verify the SSH key fingerprint and click Yes.
- Review the components and Click Apply.
- When the installation is completed, click Next, then click Finish.
- You have successfully added the Linux server to the backup infrastructure.
Configure Linux Repository in Veeam
- In the Backup Infrastructure view, right-click the Backup Repositories node and select Add Backup Repository.
- Select Direct attached storage and then choose Linux as operating system type.
- Specify a name for the Linux repository.
- From the Repository server list, select the Linux server that you added recently to use as a backup repository and then click on Populate to see a list of disks connected to the server. Select the desired mount path and click Next.

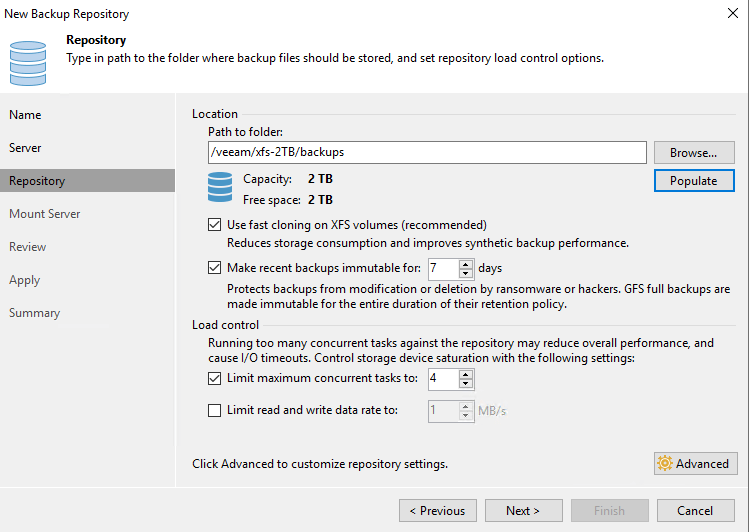
- Click Populate to check capacity and available free space and select Use fast cloning on XFS volumes to enable Fast Clone. Specify the immutability period in the Make recent backups immutable for check box to prevent deletion of blocks of data from the backup repository.
- Specify Mount server and leave the default setting and click Next.
- Review the components and Click Apply.
- When the installation is completed, click Next, then click Finish.
- As you can see, you have successfully created the backup repository.

Enable immutability for backup job
You can create a new backup job or edit the old one ( send new backups to this repository). For this purpose, I create a new VM backup job and show you how immutable backup works.
- In the Home view, right-click the Jobs node and select Add Backup Repository, Virtual machine, and then VMware vSphere (select Microsoft Hyper-V if you are using Hyper-V virtualization)
- Specify a name for the backup job.
- Select VMs to backup, since this is just a demo, I selected one VM (my domain controller) and click Next.

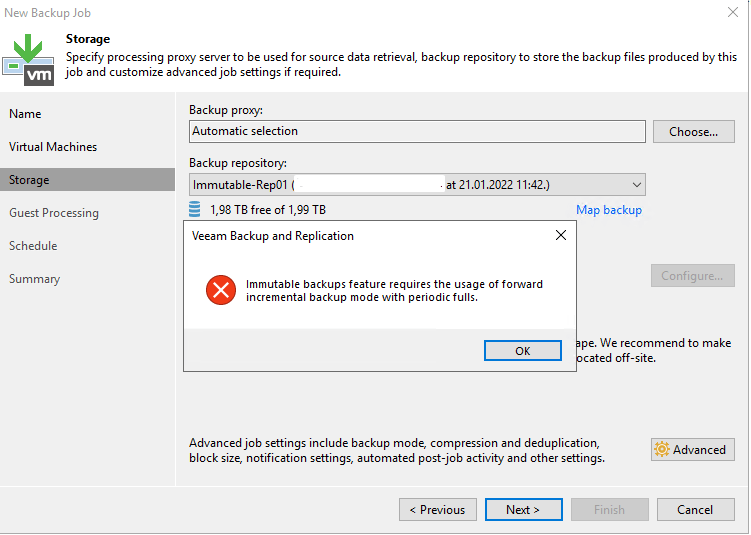
- Specify backup proxy and backup repository for this backup job. For the retention policy, you cannot enter a value lower than “Make current backups immutable for“, which I entered when I created an immutable Linux repository. As I mentioned earlier, you can’t select reverse or a forever forward incremental backup mode, you need to enable active full backup or synthetic full backup.
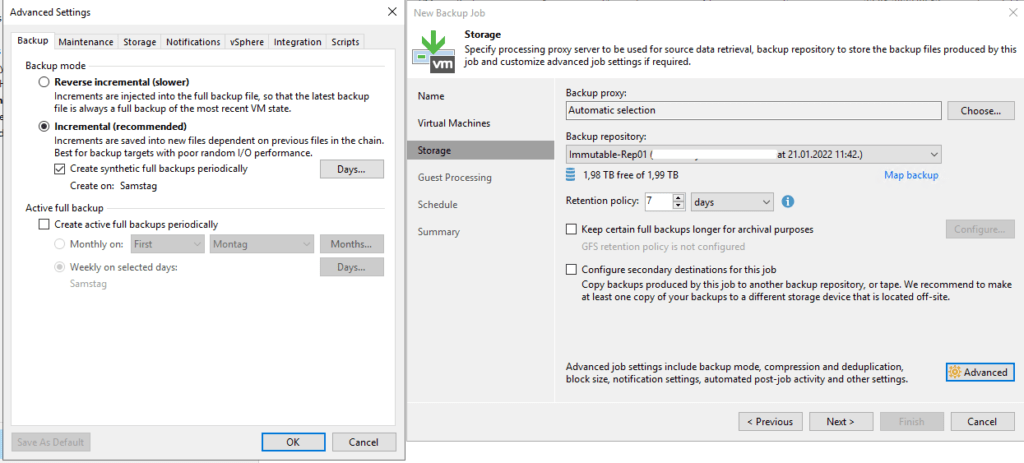
If you do not activate one of them, you will get the following message when you click Next.
- Specify guest processing settings, if you wish. (I leave it at the default setting).
- Specify the job schedule and click Apply.
- Select the Run the job when I click Finish box to start the job immediately after clicking Finish.
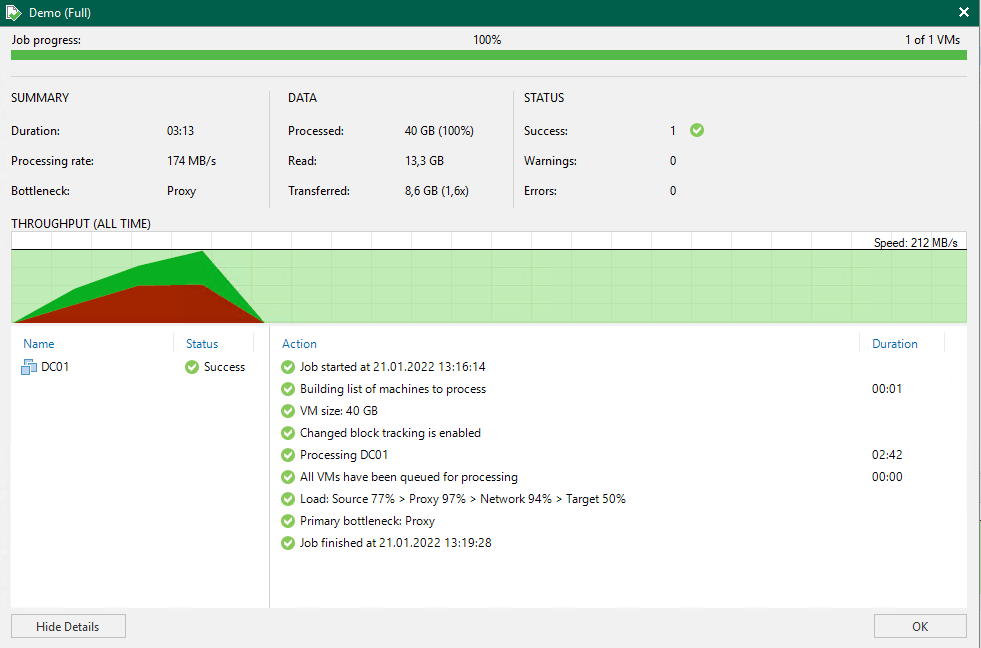
- Double click on the backup job to see the backup progress, as you can see, the backup job successfully finished.
Now is the time to check the immutability
Check immutability
Let’s test to see if the backup administrators can delete backup files! I expected when we are using the immutable repository also backups admins can not delete these backup files.
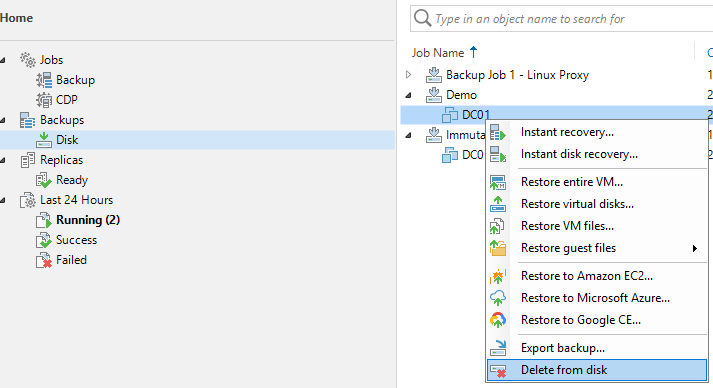
- In the Home view, select Backups and then Disk and choose your backup job object in order to delete it.
- Click Yes to start the procedure.
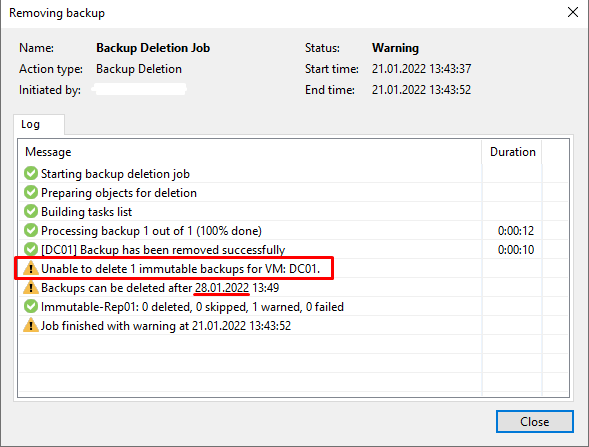
- As you can see, it is not possible to delete backup files from the Veeam console due to immutability. As shown, the backup files can be deleted after January 28, which is 7 days after January 21 (I have set an immutability period of 7 days)
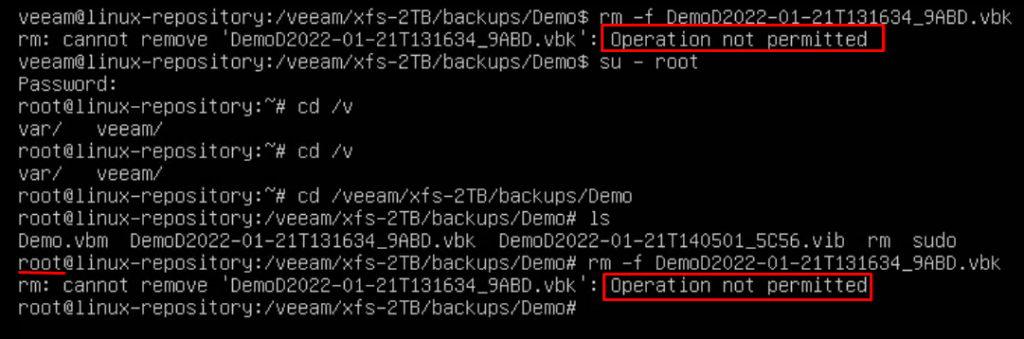
Let’s check this also with the Linux server. I ran the backup job again to create an incremental backup along with a full backup to show you all the file types (in most cases) that can be stored in the immutable directory. Login to the server with the user that was created earlier, I log in to the server with the veeam user navigate to the folder of backup files and try to delete files. As you can see in the following photo, there are three file types in this directory: vbk (full backup file), vib (incremental backup file), and vbm (backup metadata file). I expected that vbk and vib cannot be deleted or edited by the veeam user or even the root user, but vbm can be modified since it is used to write job attributes during each backup run.

I have tried to delete a file with -f to force delete a file but it shows me an error so I change my user to root to delete it again and as you can see I can’t delete it even with the root user.
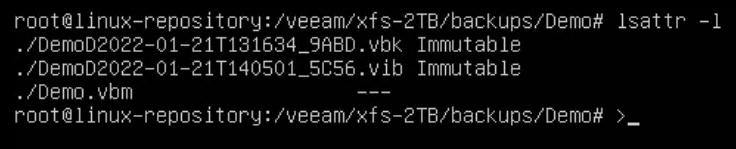
We can also use the command ‘lsattr -l’ to find out which files are immutable and which are not.
Fast Clone
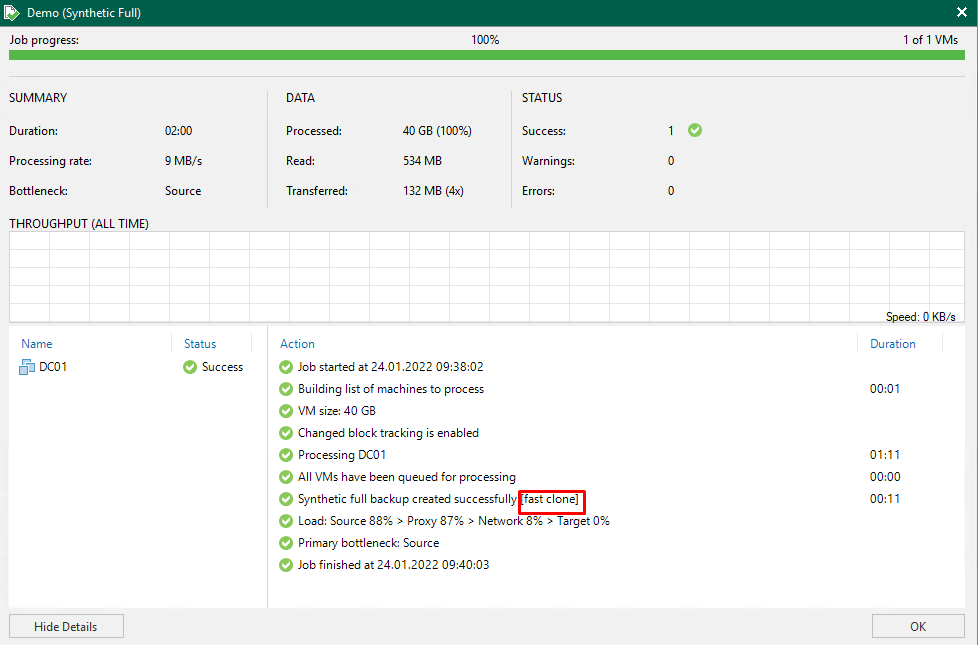
As I mentioned in the steps above, I formatted the backup partition in XFS format to take advantage of the Fast Clone feature and I also enable Fast Clone for the repository (check box ‘Use fast cloning on XFS volumes ‘) during the creation of the repository. Fast Clone increases the speed of synthetic backup creation and transformation, reduces disk space requirements, and decreases the load on storage devices.
When the synthetic job is run according to your schedule, you should see in the job report if it was done using Fast Clone, as shown in the image below. As you see, my synthetic backup job has been successfully done using Fast Clone.
Secure Linux Repository
In this section, I want to provide you with items that are due to experience or techniques for securing the backup structure.
- Remove the user from the sudo group with this command ‘sudo deluser veeam sudo‘ (please replace veeam with your local user account)
- As mentioned erlier SSH is only used to deploy Veeam Date Mover, so it is recommended to disable it.
- systemctl stop ssh
- systemctl disable ssh
- Disconnect all physical connections to this server except the connection between Veeam Backup and this repository. For example, you don’t need ILO or IDRAC, etc. If you google, you will find that there are risks with these connections as well.
- Disable unnecessary services or install mimized-server to reduce the potential for attack.
- Allow connection to the server only from the backup server and only for the requirements port and block other connections.
Refrences:
https://helpcenter.veeam.com/docs/backup/vsphere/hardened_repository_limitations.html?ver=110
https://helpcenter.veeam.com/docs/backup/vsphere/hardened_repository.html?ver=110
https://www.veeam.com/blog/v11-immutable-backup-storage.html
https://helpcenter.veeam.com/docs/backup/vsphere/used_ports.html?ver=110