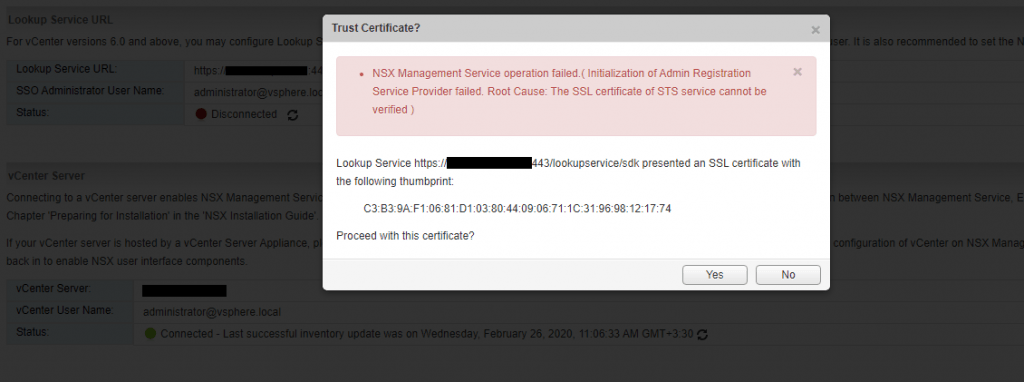
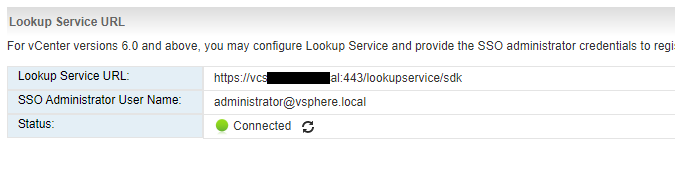
After I replace my new VCSA certificate with embedded PSC, I see the disconnected status in the NSX Manager dashboard in the Lookup Service section.
When I try to configure Lookup Service in the NSX Manager I got the following error and after googling I find this KB, as in this KB mentioned, I check the port again but everything seems to be ok. However, I thought it was a certificate problem because before replacing the certificate it worked correctly.
Until I came across this article, which helps me a lot and I summarize it here. Although this article is for external Platform Services Controller(PSC), it is also applicable to the vCenter server with embedded platform services.
The reason for this problem is after we replaced the new VCSA certificate, the corresponding service registrations with the VMware Lookup Service are not updated and when solutions like NSX want to connect to vCenter Server or Platform Services Controller, they look at the service registration, which includes the service URL and the sslTrust string of old certificate even if you have replaced the certificate successfully. Here we provide solutions for vCenter with embedded PSC, if you have external PSC steps are a bit different, so follow this article.
My Steps to fix this problem are as follows:
1- Login to the vCenter Appliance via SSH.
2- Type Shell and run following command to get the current sslTrust anchor stored for the Platform Services Controller
/usr/lib/vmidentity/tools/scripts/lstool.py list --url https://localhost/lookupservice/sdk --no-check-cert --ep-type com.vmware.cis.cs.identity.sso 2>/dev/null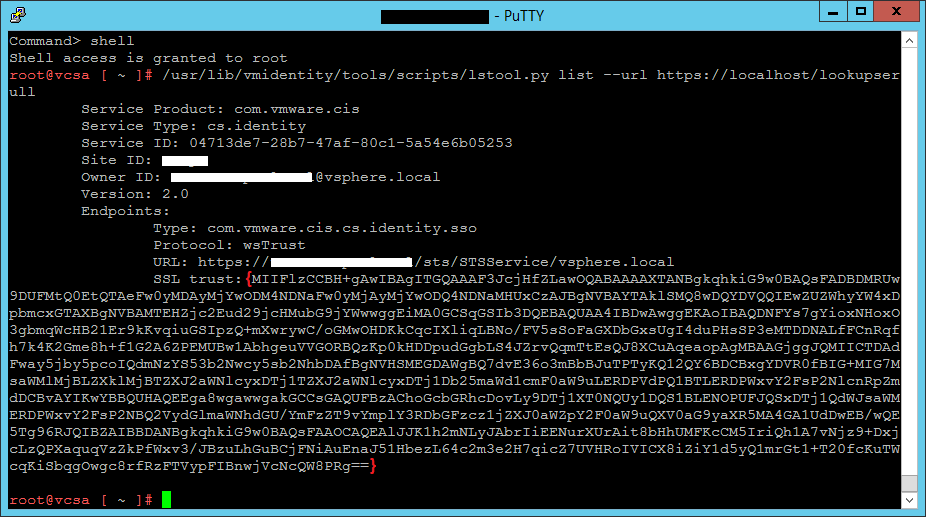
3- Run this command to get the current SSL certificate used on port 443 on the Platform Services Controller:
echo | openssl s_client -connect localhost:443
4- Verify if the returned SSL certificates match or not, in my environment, they did not match, so I needed to update the services with the new certificate.
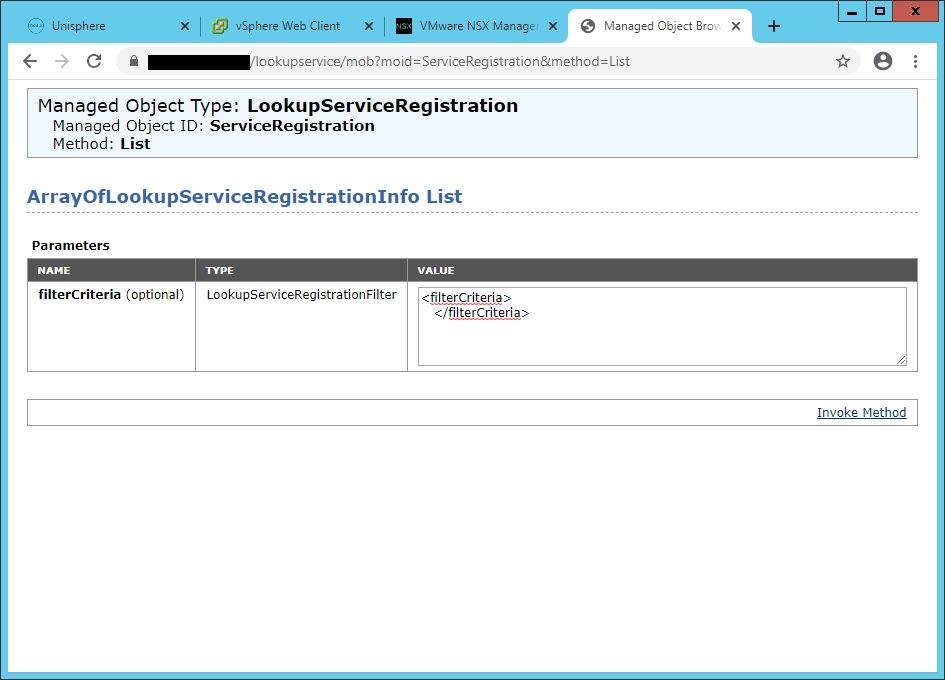
5- Go to the following address in a browser and log in with the administrator@vsphere.local.
https://vCenterAddress/lookupservice/mob?moid=ServiceRegistration&method=List6- In the filterCriteria text field, modify the value field to show only the tags and click Invoke Method.
7- Search for “https://vcenteraddress:443/sdk” and copy the content of the sslTrust field into a text document..
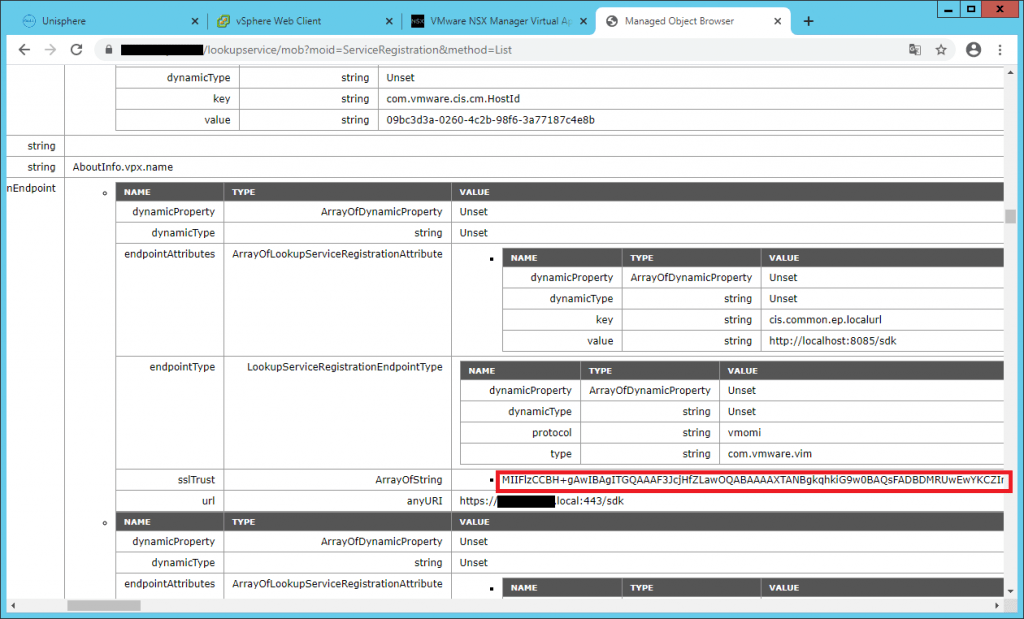
8- Append —–BEGIN CERTIFICATE—– to the beginning of the text string, and append —–END CERTIFICATE—– to the end of the text string and save this document as old_machine.crt.
-----BEGIN CERTIFICATE-----
MIIFlzCCBH+gAwIBAgITGQAAAFnb+ntdj99qvwABAAAAWTANBgkqhkiG9w0BAQsFADBDMRUwEwYKCZImiZPyLGQBGRYFbG9jYWwxFTATBgoJkiaJk/IsZAEZFgVXT0NQUzETMBEGA1UEAxMKV09DUFMtQ0EtQTAeFw0yMDAyMTkwODIxMTZaFw0yMjAyMTkwODMxMTZaMHUxCzAJBgNVBAYTAklSMQ8wDQYDVQQIEwZUZWhyYW4xDzANBgNVBAcTBlRlaHJhbjEMMAoGA1UEChMDQVBLMRswGQYDVQQLExJWTXdhcmUgRW5naW5lZXJpbmcxGTAXBgNVBAMTEHZjc2Eud29jcHMubG9jYWwwggEiMA0GCSqGSIb3DQEBAQUAA4IBDwAwggEKAoIBAQDFtrsFaWFIvXMqrcegC3fJPEVNTEzTMAzwOs3+H3kg+js9R0hoqKH5D7zhMiVXHi/8idOj+LzK8rcBPBEj9t7ZhrLPdv1h9kr+1H1S4BsR9Fm89kOzm9Nbd8vJmRr8vvNeBTZtUp5sMyme1+S1oeab6M4wxtMDNK5VUQe46zSUMObL06JN7eF9mJYFeF3rcfm/dmz/lVyKJV7AZfDSRp9QATb/9tKvosBnY/264Vk5jPshDrVJ/OknsSQ4QKRwWaiq2I02RT7/2KVEJ5uxmFb4ERYGq+joixCe8pr/2wvBDqOdW5WL2om9kfIDHJg+mS7j4mYxd6xlH+iNdU9NS2bjAgMBAAGjggJQMIICTDAdBgNVHQ4EFgQUn4X1+/H+GBJBm9beDtq4xBqUTbMwMwYDVR0RBCwwKoEWeS56YWhlZGlmYXJkQGFway5jby5pcoIQdmNzYS53b2Nwcy5sb2NhbDAfBgNVHSMEGDAWgBQ7dvE36o3mBbBJuTPTyKQ12QY6BDCBxgYDVR0fBIG+MIG7MIG4oIG1oIGyhoGvbGRhcDovLy9DTj1XT0NQUy1DQS1BLENOPURDLTAxLENOPUNEUCxDTj1QdWJsaWMlMjBLZXklMjBTZXJ2aWNlcyxDTj1TZXJ2aWNlcyxDTj1Db25maWd1cmF0aW9uLERDPVdPQ1BTLERDPWxvY2FsP2NlcnRpZmljYXRlUmV2b2NhdGlvbkxpc3Q/YmFzZT9vYmplY3RDbGFzcz1jUkxEaXN0cmlidXRpb25Qb2ludDCBvAYIKwYBBQUHAQEEga8wgawwgakGCCsGAQUFBzAChoGcbGRhcDovLy9DTj1XT0NQUy1DQS1BLENOPUFJQSxDTj1QdWJsaWMlMjBLZXklMjBTZXJ2aWNlcyxDTj1TZXJ2aWNlcyxDTj1Db25maWd1cmF0aW9uLERDPVdPQ1BTLERDPWxvY2FsP2NBQ2VydGlmaWNhdGU/YmFzZT9vYmplY3RDbGFzcz1jZXJ0aWZpY2F0aW9uQXV0aG9yaXR5MA4GA1UdDwEB/wQEAwIF4DA9BgkrBgEEAYI3FQcEMDAuBiYrBgEEAYI3FQiBi9kEhemTZ4SRlTOEzqIkhqzDA3GGqO5Tg96RJQIBZAIBBDANBgkqhkiG9w0BAQsFAAOCAQEAFKZiMGOy4k8pCQZW300HyQNzEpXkRJN9abtaG8ZCnaj9PbPcE3TH7T3nJyHWKkPTF6YQMzOzTj0sdXfkNGFtfqPpmdu6Elt9Vk2ew/m+o/LnXmSBAf04ijllH8wdrESjGKJKTUsBG6XtA+XDkD260EtihyAm6H9HGLG4Zv6cWfy4xVTm8BW+maLFGk0T0PihUOpv8xtySptpbmUGCBhHmRuPYDorFrG2FLDFNic6BzEyMk9feue5UBH0Tb3M21fNjXrH6hl41JfgKZQNqdiAjTqXdhnpnYpiJD/1rRAFuIQTuveshCnWiXKBUJHVlq8eTj5FRliuyfecnAjMEN2N1Q==
-----END CERTIFICATE-----
9- Upload the certificate to a location in VCSA like /Certs/old_mahine.crt and come back to VCSA SSH and run the following command.
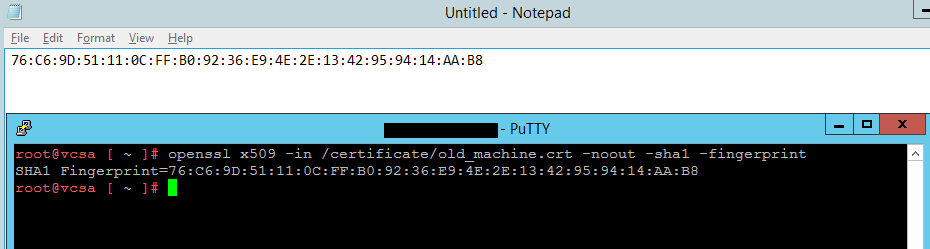
openssl x509 -in /certificates/old_machine.crt -noout -sha1 -fingerprint10- Extract the thumbprint and save it on a text file.
11- Retrieving the new certificate from the vCenter Appliance and export it on a location like /Certs/new_mahine.crt.
/usr/lib/vmware-vmafd/bin/vecs-cli entry getcert --store MACHINE_SSL_CERT --alias __MACHINE_CERT --output /certs/new_machine.crt

12- Now we have the new certificate and thumbprint of the old vCenter Server Server Appliance. We must run an update in order to apply the new certificate completely. Go to the following directory and run the next command.
cd /usr/lib/vmidentity/tools/scripts/
python ls_update_certs.py --url https://vcenterserver/lookupservice/sdk --fingerprint 11:11:AF:D8:CF:27:6B:EF:F7:49:20:3E:D7:90:8C:F6:A0:A2:E2:30 --certfile /certificate/new_machine.crt --user Administrator@vsphere.local --password "Password"
Once completed, you see a message similar to the above figure. Now come back and try to configure Lookup Service in NSX Manager, as you see the configuration completed.
The official VMware fix is now available.
https://kb.vmware.com/s/article/80469#trustfix