The installation is done completely through PowerShell itself using the PowerShell Gallery via PowerShellGet. To install the PowerCLI 11, you just need to open the PowerShell with administrative privilege and type the following command to run the installation.
Install-Module -Name VMware.PowerCLI -RequiredVersion 11.1.0.11289667 -Scope AllUsers
PowerCLI will automatically be installed for all users. If you want to limit the installation to a specific user, change the Scope parameter to “CurrentUser”. You will be asked to trust the PSGallery modules, as PowerCLI is one of them.
If you are running a self-signed certificate for vCenter Server, you need to run the following PowerCLI Configuration command before connecting to any vCenter server:
Set-PowerCLIConfiguration -InvalidCertificateAction Ignore
It is done and now you can connect to a VMware vCenter or ESXi host. To connect vCenter use Connect-VIServer command.
Connect-VIServer vcsa.vmware.local -user administrator@vsphere.local -pass VMware123
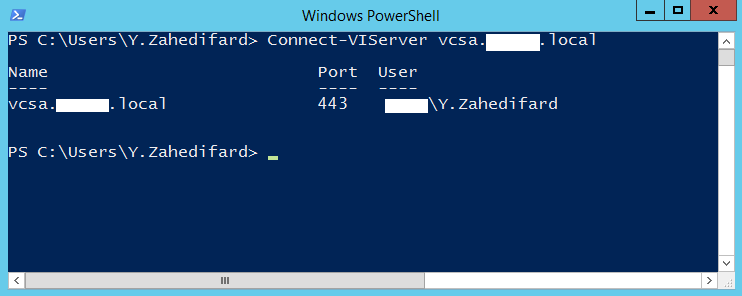
Or you can just type the following command and a pop up will be opened and you enter your credentials.
Connect-VIServer vcsa.vmware.local
As you will see the connection is established successfully and you can utilize hundreds of command to manage you virtual infrastructure.
.