This is part of the VMware vSAN guide post series. By using the following link, you can access and explore more objectives from the VMware vSAN study guide.
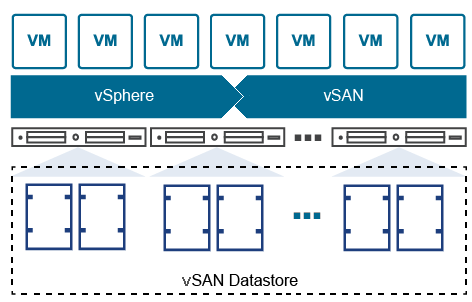
The standard vSAN cluster, also known as a single-site cluster, serves as the primary deployment type for most organizations. It comprises a minimum of three hosts situated at the same site. This deployment is ideal for general-purpose workloads due to its scalability, high performance, and fault tolerance within a single site. However, it is crucial to consider that since all hosts are located in the same geographical location, the standard vSAN cluster lacks geographical redundancy, leaving it susceptible to potential failures at the site level.
In this post, I will guide you through the process of setting up and configuring a vSAN Standard cluster. For the purpose of this demonstration, I will utilize the following configuration to establish a small environment. This setup will enable me to illustrate the step-by-step procedures involved in creating and configuring a standard vSAN cluster. Additionally, this configuration will serve as a solid foundation for conducting further tests throughout the rest of the post-series.
This is not officially supported by VMware, as vSAN ESA is only officially supported when using vSAN Ready Nodes.
- 4 nested ESXi hosts (VMware ESXi, 8.0.0, 21203435)
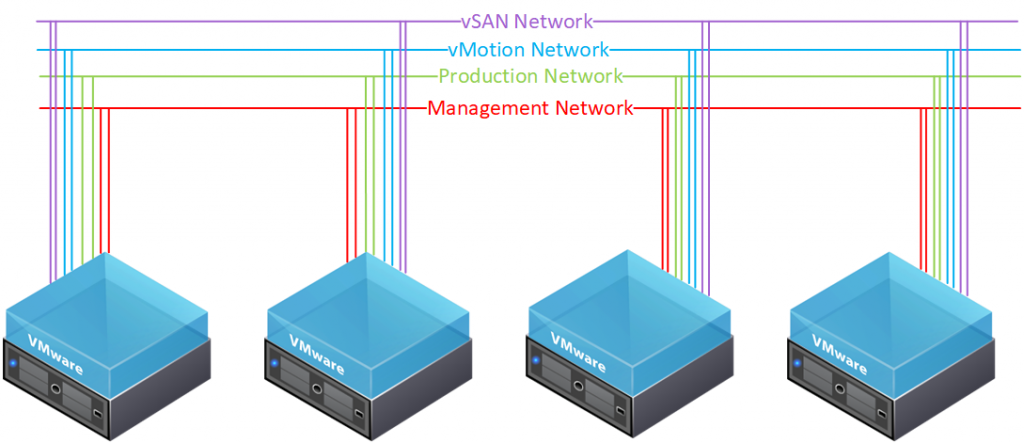
- Each host has a total of 8 network adapters
- 2 network adapters for the management network
- 2 network adapters for the production network
- 2 network adapters for the vMotion network
- 2 network adapters for the vSAN network
- Each host has one NVMe hard disk with a capacity of 100 GB for the ESXi itself
- Each host has four NVMe hard disks with a capacity of 300 GB for the vSAN datastore
- Each host is powered by an 8-core CPU
- Each host has a total of 24 GB of memory
- Each host has a total of 8 network adapters
I will utilize three of these ESXi hosts initially to establish a new vSAN cluster, with the fourth host intended for subsequent integration to showcase the cluster’s scalability. This approach will provide a practical demonstration of how the vSAN cluster expands over time, demonstrating its dynamic capabilities in accommodating additional hosts as needed.
In order to configure vSAN standard cluster, your environment must meet all requirements. See the following link for more information.
Configure Standard vSAN Cluster
The procedure closely follows our previous approach for the two-node vSAN cluster, with a few modifications in the network configurations. These changes were implemented to explore alternative methods of setting up a more efficient and robust vSAN cluster network.
1- In the vSphere Client home page, right-click the data center and select New Cluster.
2- Enter a name for the cluster and enable DRS, vSphere HA, and vSAN cluster features.
3- Select the Manage all hosts in the cluster with a single image check box to create a cluster that is managed with a single image and Click Next.
4- Select the desired image and click Next.
5- Review the cluster details and click Finish.
The following GIF demonstrates all of these steps.
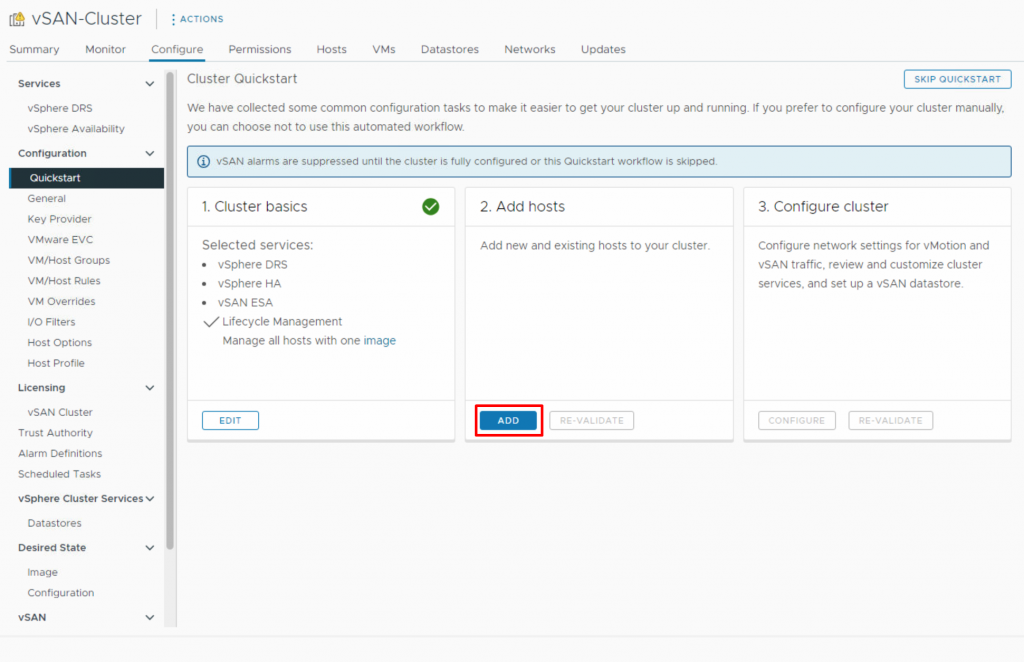
6- After creating the cluster, the Quickstart workflow will be displayed, allowing you to quickly configure a cluster. Simply click on ADD in the Add hosts card to open the Add Hosts wizard.
7- You have two options: either entering information for new hosts or selecting from the existing hosts listed in the inventory. As I did not join them to the vCenter, I enter the names and credentials of the hosts manually. Since all hosts share the same root credentials, I choose to Use the same credentials for all of hosts. Verify the host information and click Next.
8- There is no need to select or import images as this step was completed during the cluster creation process and click Next. Verify the host settings and then click Finish.
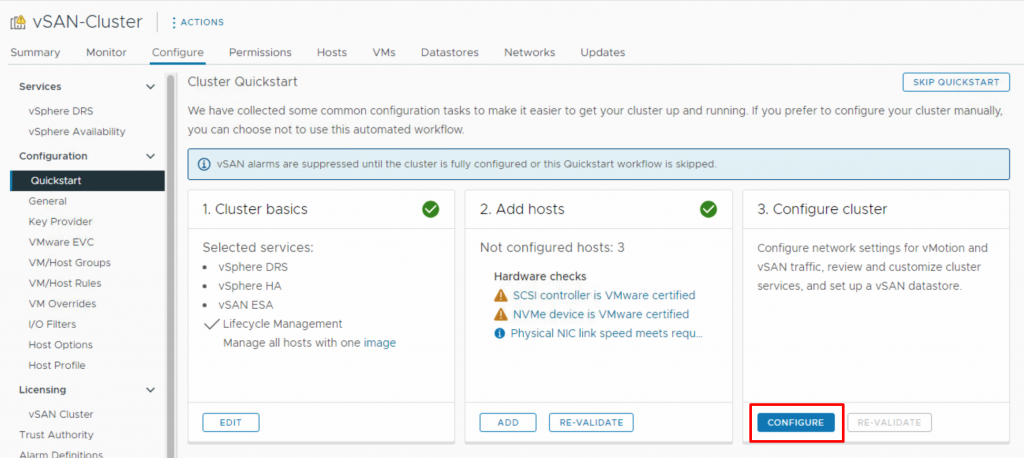
9- Now that we have successfully added hosts to the cluster, it is time to configure them. Click on Configure to initiate the configuration wizard, which will guide you through the necessary setup steps.
10- In the first step, you will be tasked with configuring the network settings, which includes setting up distributed switches, port groups, and physical adapters. You have two options: you can either establish new distributed switches or utilize existing ones. I decided to create two distributed switches, one for the vMotion Network and the other for the vSAN Network. Within each of these distributed switches, I created one port group.
For the physical adapter, I assigned vmnic 4 and 5 to the vMotion Distributed Switch, and vmnic 6 and 7 to the vSAN Distributed Switch, as clearly demonstrated in the GIF. Once the configurations are in place, click Next. This mapping to the distributed switches is applied to all hosts in the cluster.
11- Configure IP address information for vMotion traffic, you can enter the IP address manually for the first host, and then utilize the AutoFill feature to automatically populate the information for the second host or type it manually and click Next.
12 – Configure IP address information for Storage traffic, you can enter the IP address manually for the first host, and then utilize the AutoFill feature to automatically populate the information for the second host or type it manually and click Next.

13- On the Advanced Options page, you can enter information for cluster settings, including DRS, HA, vSAN, host options, and EVC. Some of these features are active because you enabled them when creating the vSAN cluster. I maintained the default settings, except in the vSAN options section, where I selected Single Site Cluster as the deployment type and enabled Data-at-Rest encryption before proceeding to the next step.
Data-at-rest encryption is a security features which protects data on the storage devices in case a storage device is removed from the cluster, I will expain it later in upcomming posts.
14- On the Claim disks page, select storage devices to create the vSAN datastore. If you are using verified and compatible disks, you can enable I want vSAN to manage the disks. Otherwise, you should select manually. Each of my hosts is equipped with 4 NVMe disks, with a capacity of 300 GB, resulting in a total storage size of approximately 3.5 TB.
15- If you take a look at the network configuration, you will notice that two distributed switches have been created, along with their corresponding VMKernel automatically. To proceed, you simply need to move the production and management networks to the virtual switch.
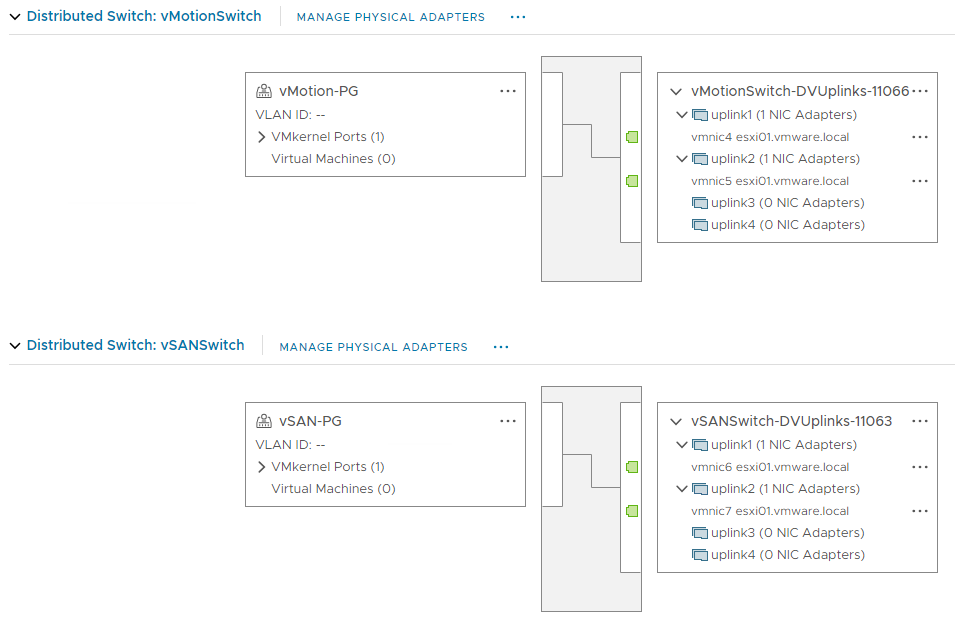
This is what my network configuration looks like for hosts inside the vSAN cluster.
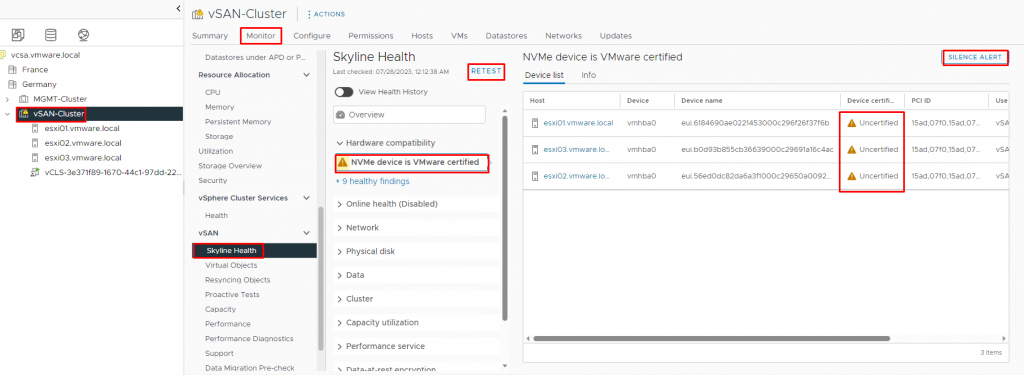
As I’m using a nested lab, it’s normal to encounter some warnings, such as my NVMe devices not being certified. However, for the purposes of the lab, I can ignore (Sielence Alerts) these warnings. In a real production environment, everything should ideally be green, without any errors or warnings. Once you’ve ensured a clean environment, you can proceed with confidence to host virtual machines in vSAN datastores
Now, after rerunning the test and checking the vSAN service, everything appears to be in order. This indicates that we are now ready to host virtual machines and perform various tasks related to vSAN ESA. When examining the virtual objects, all of them should be healthy and displayed in green. Additionally, under the Configure tab, and then vSAN –> Services, you can find the current settings and their respective statuses.
Conclusion
In this post, I aimed to guide you through the configuration process of a standard or single-site vSAN cluster. In upcoming posts, I will explain the features and capabilities in much greater depth. Stay tuned for more exciting content, and I look forward to sharing them with you soon!
Hey,
Thanks for such a great tutorial on vSAN ESA single site deployment.
My question is, can i perform this lab in a Nested environment where my Base ESXI Server has only SSDs and No NVMEs?
I read through your previous post that NVMEs and Ready Nodes are necessary for ESA deployment.
Moreover, a minimum bandwidth of 25 Gbps, either dedicated or shared is also a requirement for ESA deployment, where on my base server i have only 10 Gig ethernet ports.
Can i still deploy ESA?
Hey, Yes it is possible to have a vSAN-ESA environment (nested) on your base ESXi (even with SSDs)