Zerto Virtual Replication – Configuration
In this post, we will go through the configuration of Virtual Replication Appliance (VRA) and Virtual Protection Group (VPG) and some basic configurations of Zerto Virtual Manager. If you missed the first post of this series or you want to access the next part of this configuration, please check the following links.
- Zerto Virtual Replication – Installation
- Zerto Virtual Replication – Configuration
- Zerto Virtual Replication – Failover
- Zerto Virtual Replication – Reporting
Install Zerto Virtual Replication Appliance
Zerto Virtual Replication Appliance (VRA) is a lightweight appliance that is quickly installed on each host, capable of protecting all the virtual machines on that host. The VRA continuously replicates data from VMs and VMDKs to the remote site without a snapshot or CBT mechanism to avoid any negative impact on application performance.
Requirements for Virtual Appliance – Zerto 7.5
- 15GB storage space.
- At least 1GB of reserved memory.
- The ESXi version must be 5.1 or higher.
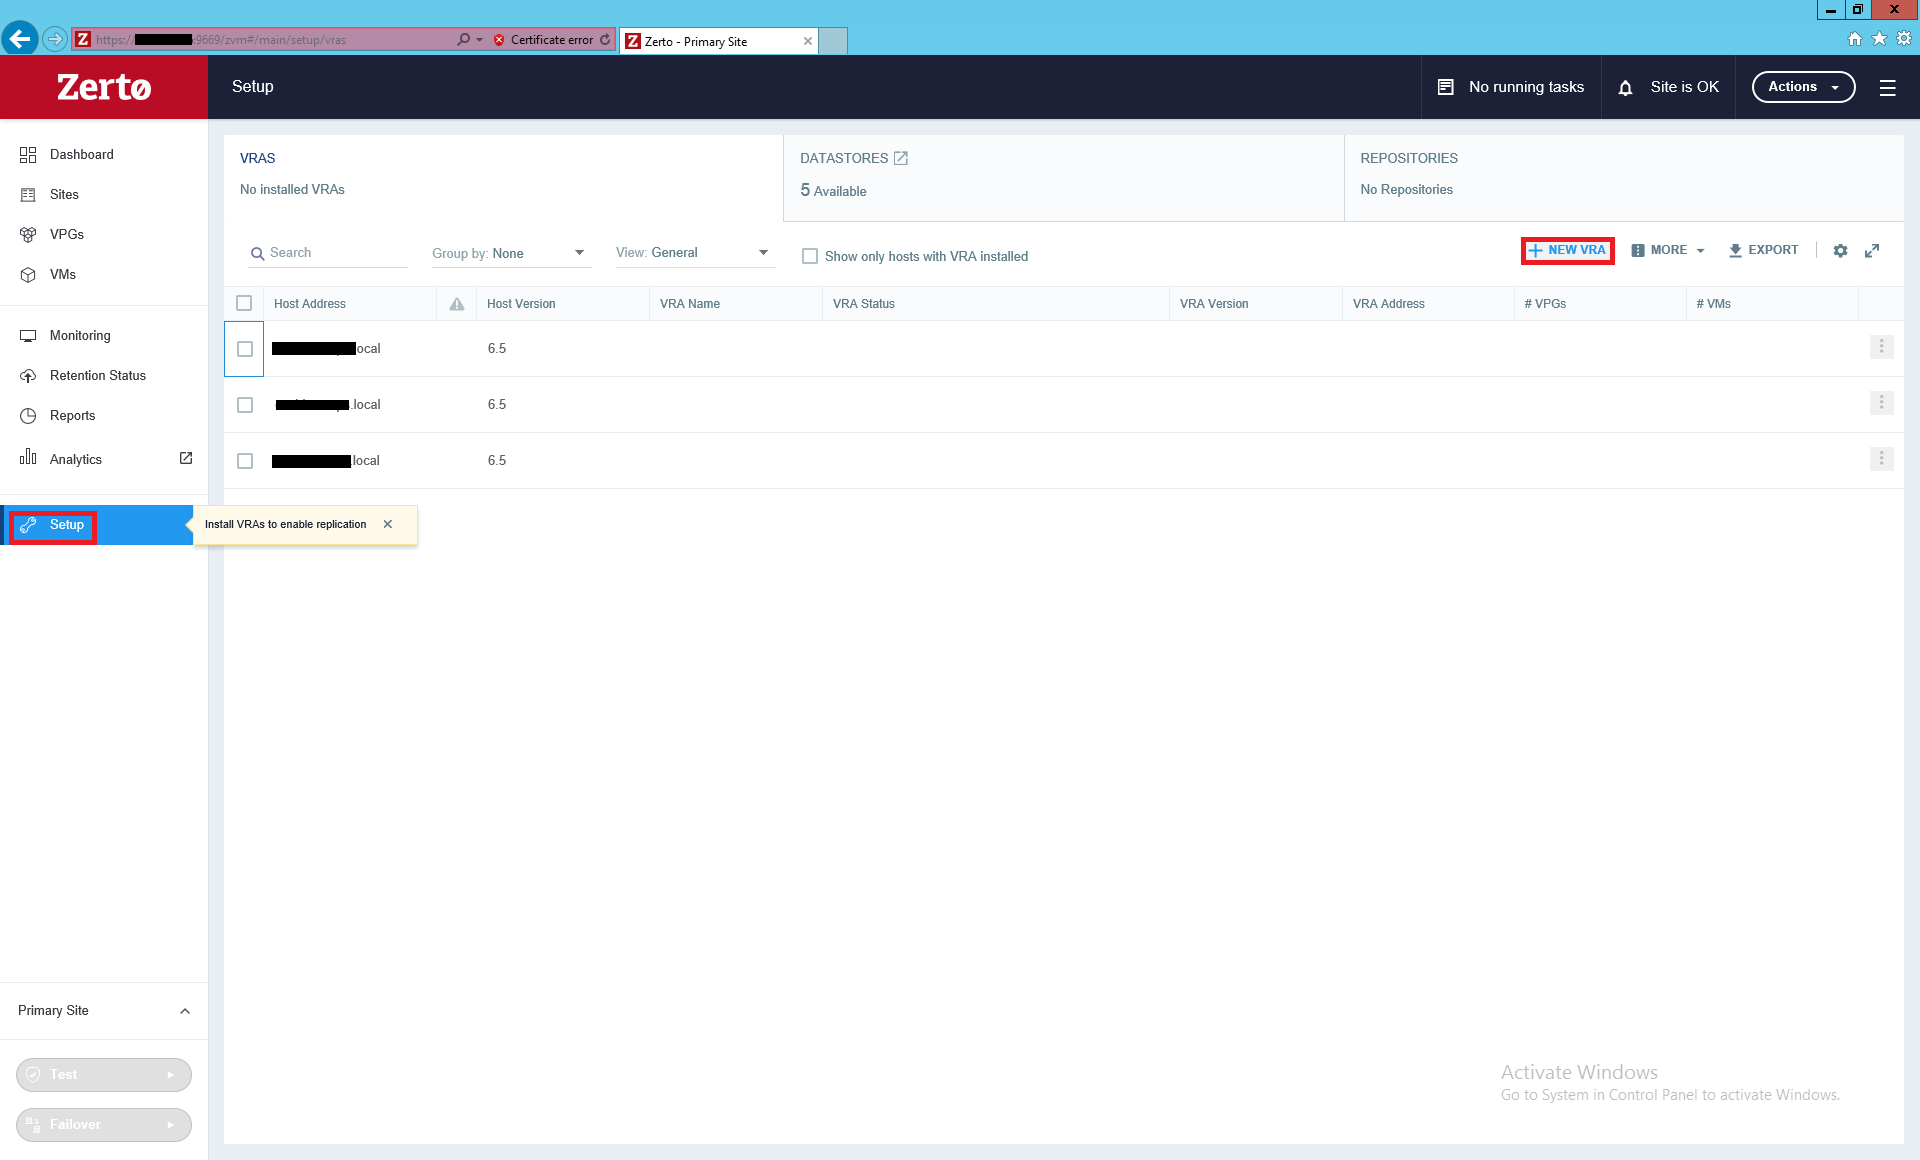
Log into the Zerto manager and from Dashboard, click on the Setup, and then New VRA.
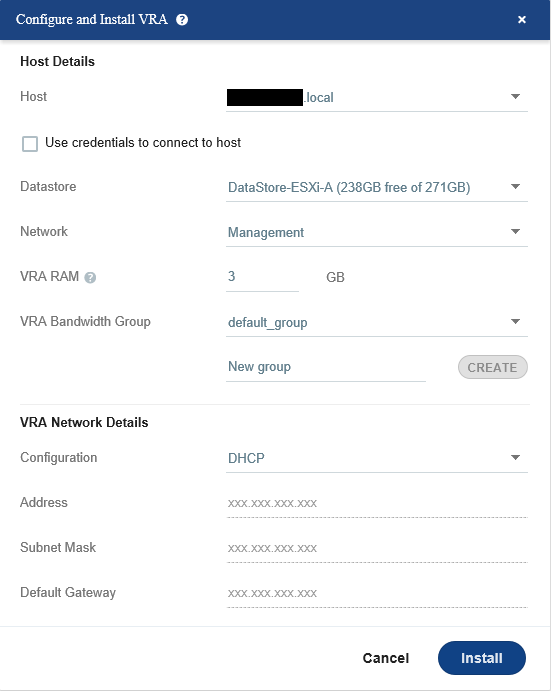
Specify the host and datastore where the VRA needs to be installed, and configure the IP address of VRA, Here we utilize DHCP to obtain an IP address and other settings.
Once VRA successfully deployed, the VRA status column in front of the host will be changed from blank to “Installed”. This procedure was a sample of configuring and installing VRA on an ESXi host, you need to install VRA on each host in the production environment to protect its virtual machines.

Configuring Virtual Protection Group and Replication
Zerto’s Virtual Protection Groups (VPGs) are a collection of VMs and their related VMDKs, which have dependencies and must be recovered with write-order fidelity. For example, a 3 tier application, where one virtual machine is used for the application, one for the database and another for the web, requires that all three virtual machines are replicated in the secondary site and they must power on or off respectively.
In my environment, I have a single vCenter server, so I am going to replicate one virtual machine in another cluster (instead of another site ) and in another datastore to demonstrate how replication and failover work.
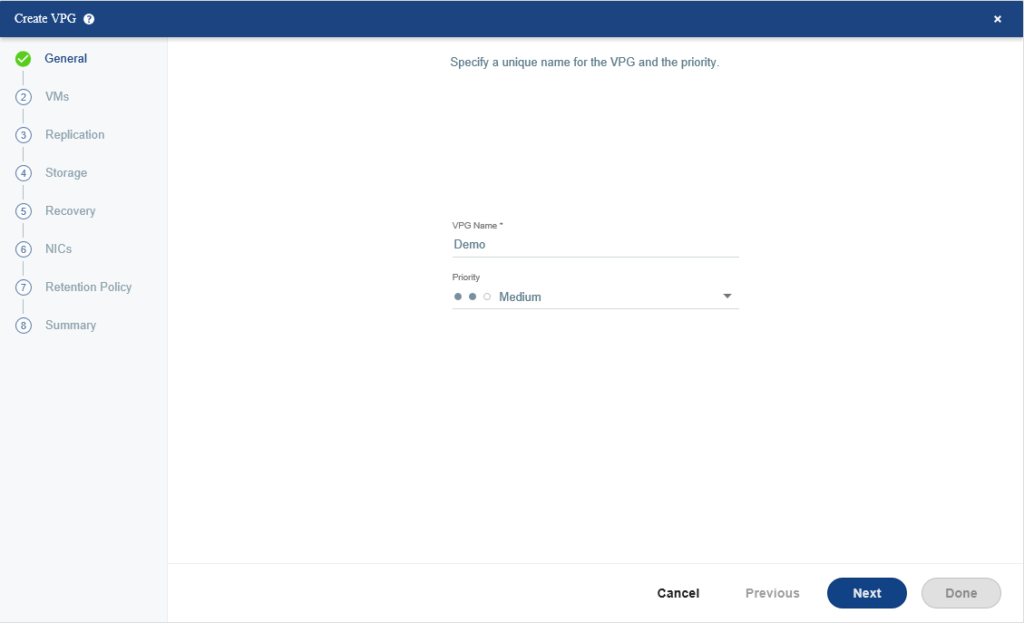
Open Zerto manager and select VPGs and the click on New VPG.

Enter the name of this virtual protection group and set the priority for this VPG. Priority comes into play when you have more than one VPG and when there is resource contention.
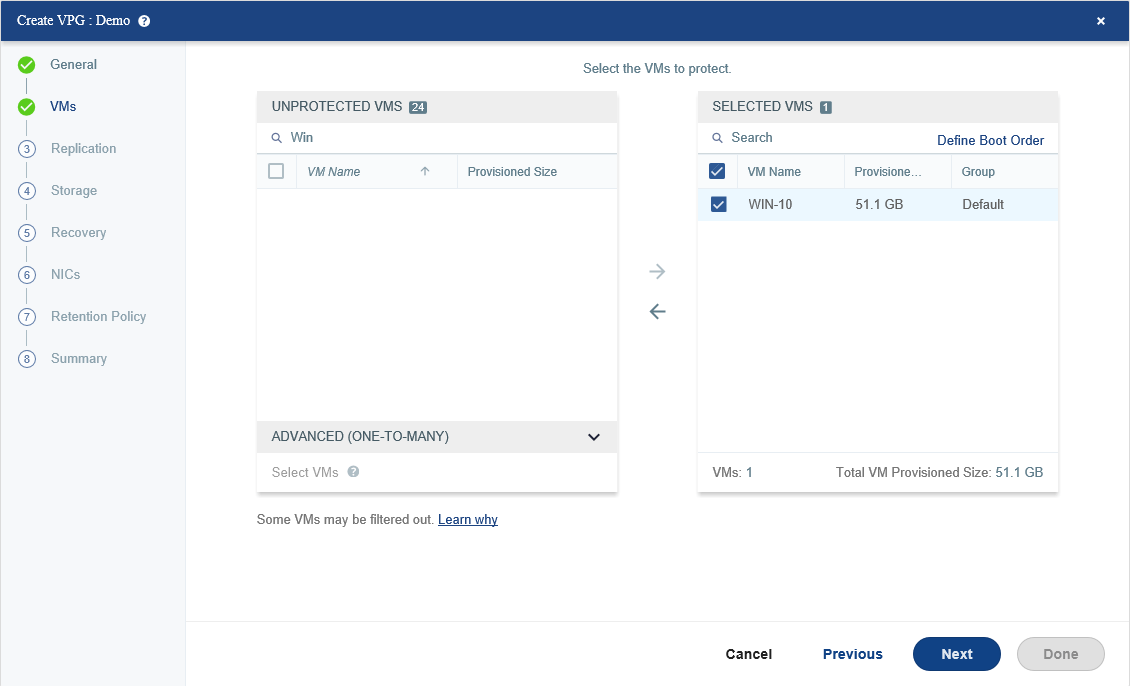
Select virtual machines you want to protect and if you select more than one virtual machine, you can define boot order using Define Boot Order.
Select default recovery servers and datastore for replicated virtual machines and then set the Journal History, Target RPO Alert, Test Reminder, and enable WAN traffic compression in your real environment to utilize your bandwidth efficiently.
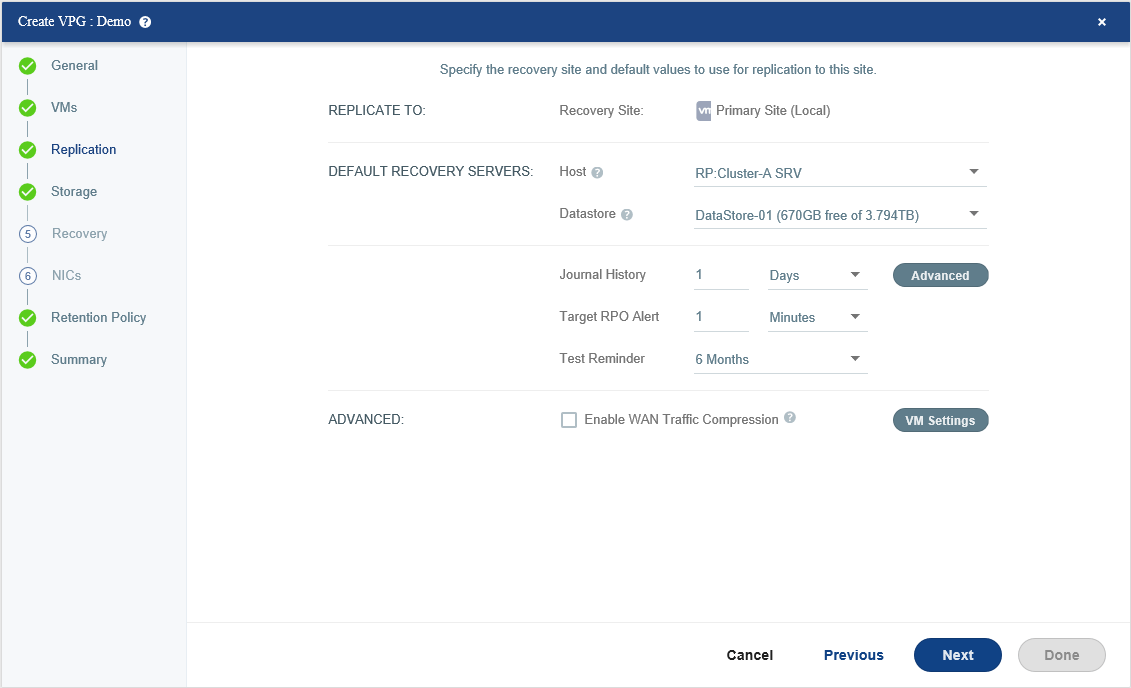
Each writes to a protected virtual machine is copied by Zerto Virtual Replication. The write continues to be processed normally on the protected site and the copy is sent asynchronously to the recovery site and written to a journal managed by a Virtual Replication Appliance (VRA). Each protected virtual machine has its own journal.
Journal history of 1 day means that Zerto will retain the last days’ worth of changes as checkpoints. After a day has passed, Zerto will phase out the oldest checkpoints and begin replacing them with new ones.
The Target RPO Alert is the RPO at which Zerto will issue you a warning to state that your VM/application is not meeting its SLA.
A Target RPO alert of 1 Minute means that Zerto will alert you when the RPO reaches 60 seconds.
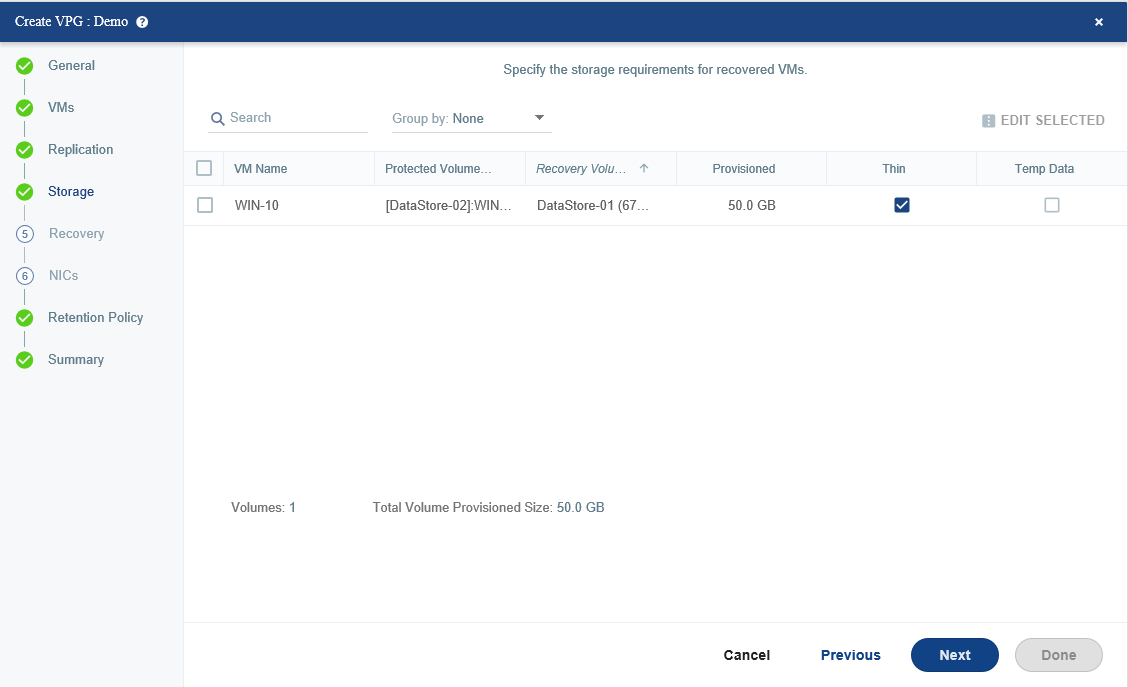
Specify storage requirements per virtual machine, Here we just select the thin disk and accept the default for other configurations.
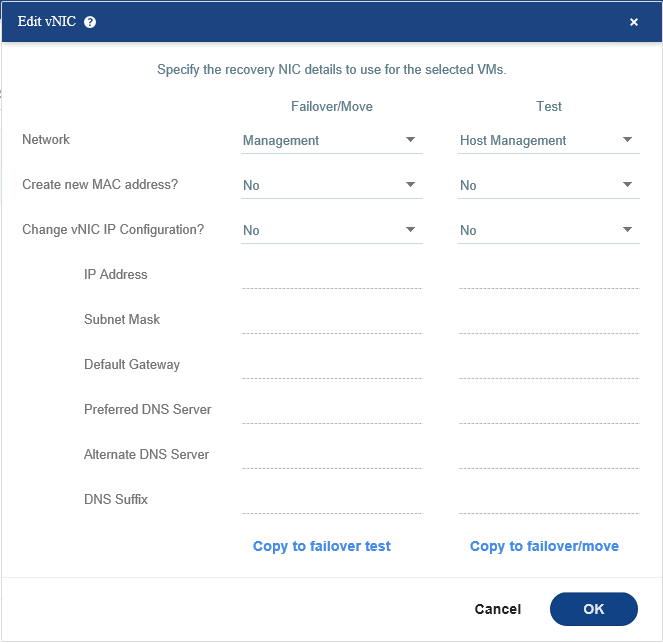
Specify which networks used for the real Failover and Failover test. we can specify a specific Recovery folder or define different recovery folders on a per-VM base by clicking the VM Settings.

You can modify the Failover IP for a virtual machine or a bulk of virtual machines by selecting them and then click EDIT SELECTED to change their network settings.

For example, you can change the mac address of protected virtual machine for Failover and Test or bind it to a new IP address, but for now, let’s leave it as default.
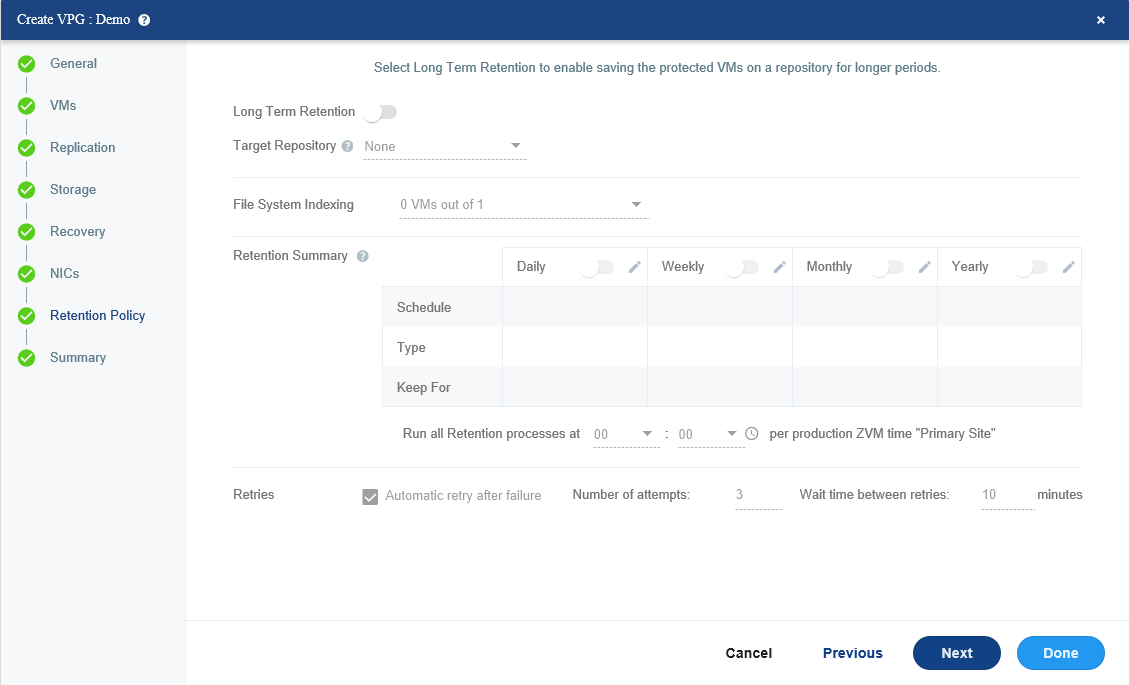
If you want to use offsite backup, here you can configure it but at the moment we leave it as default.
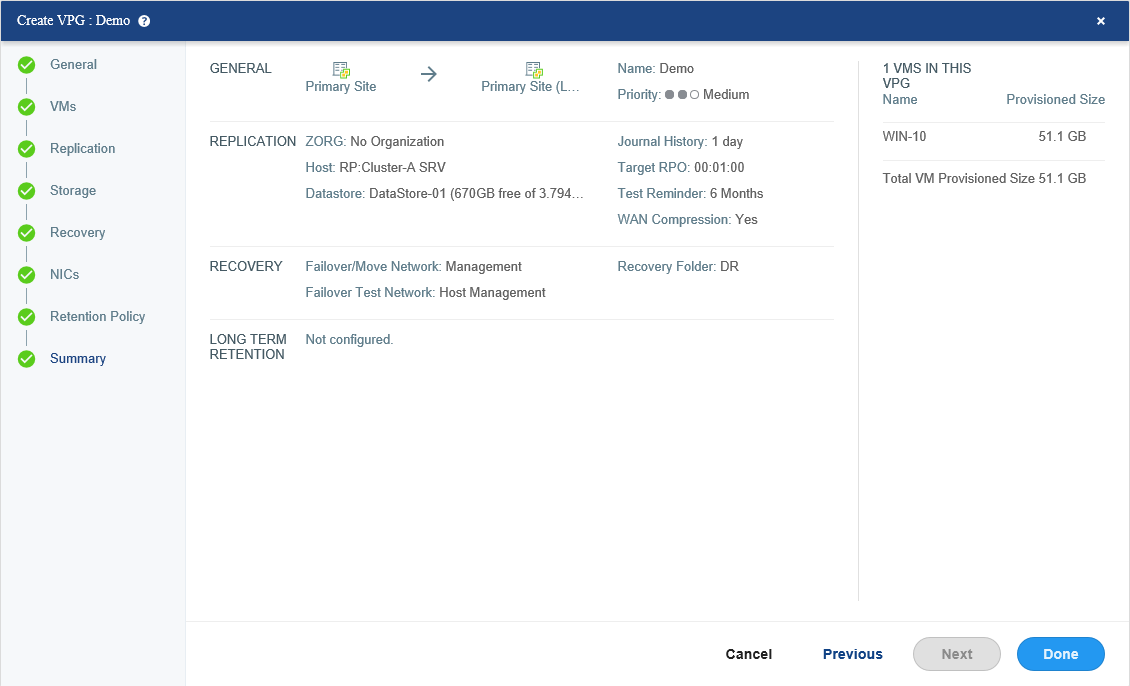
Review the configuration of VPG and then click on Done.
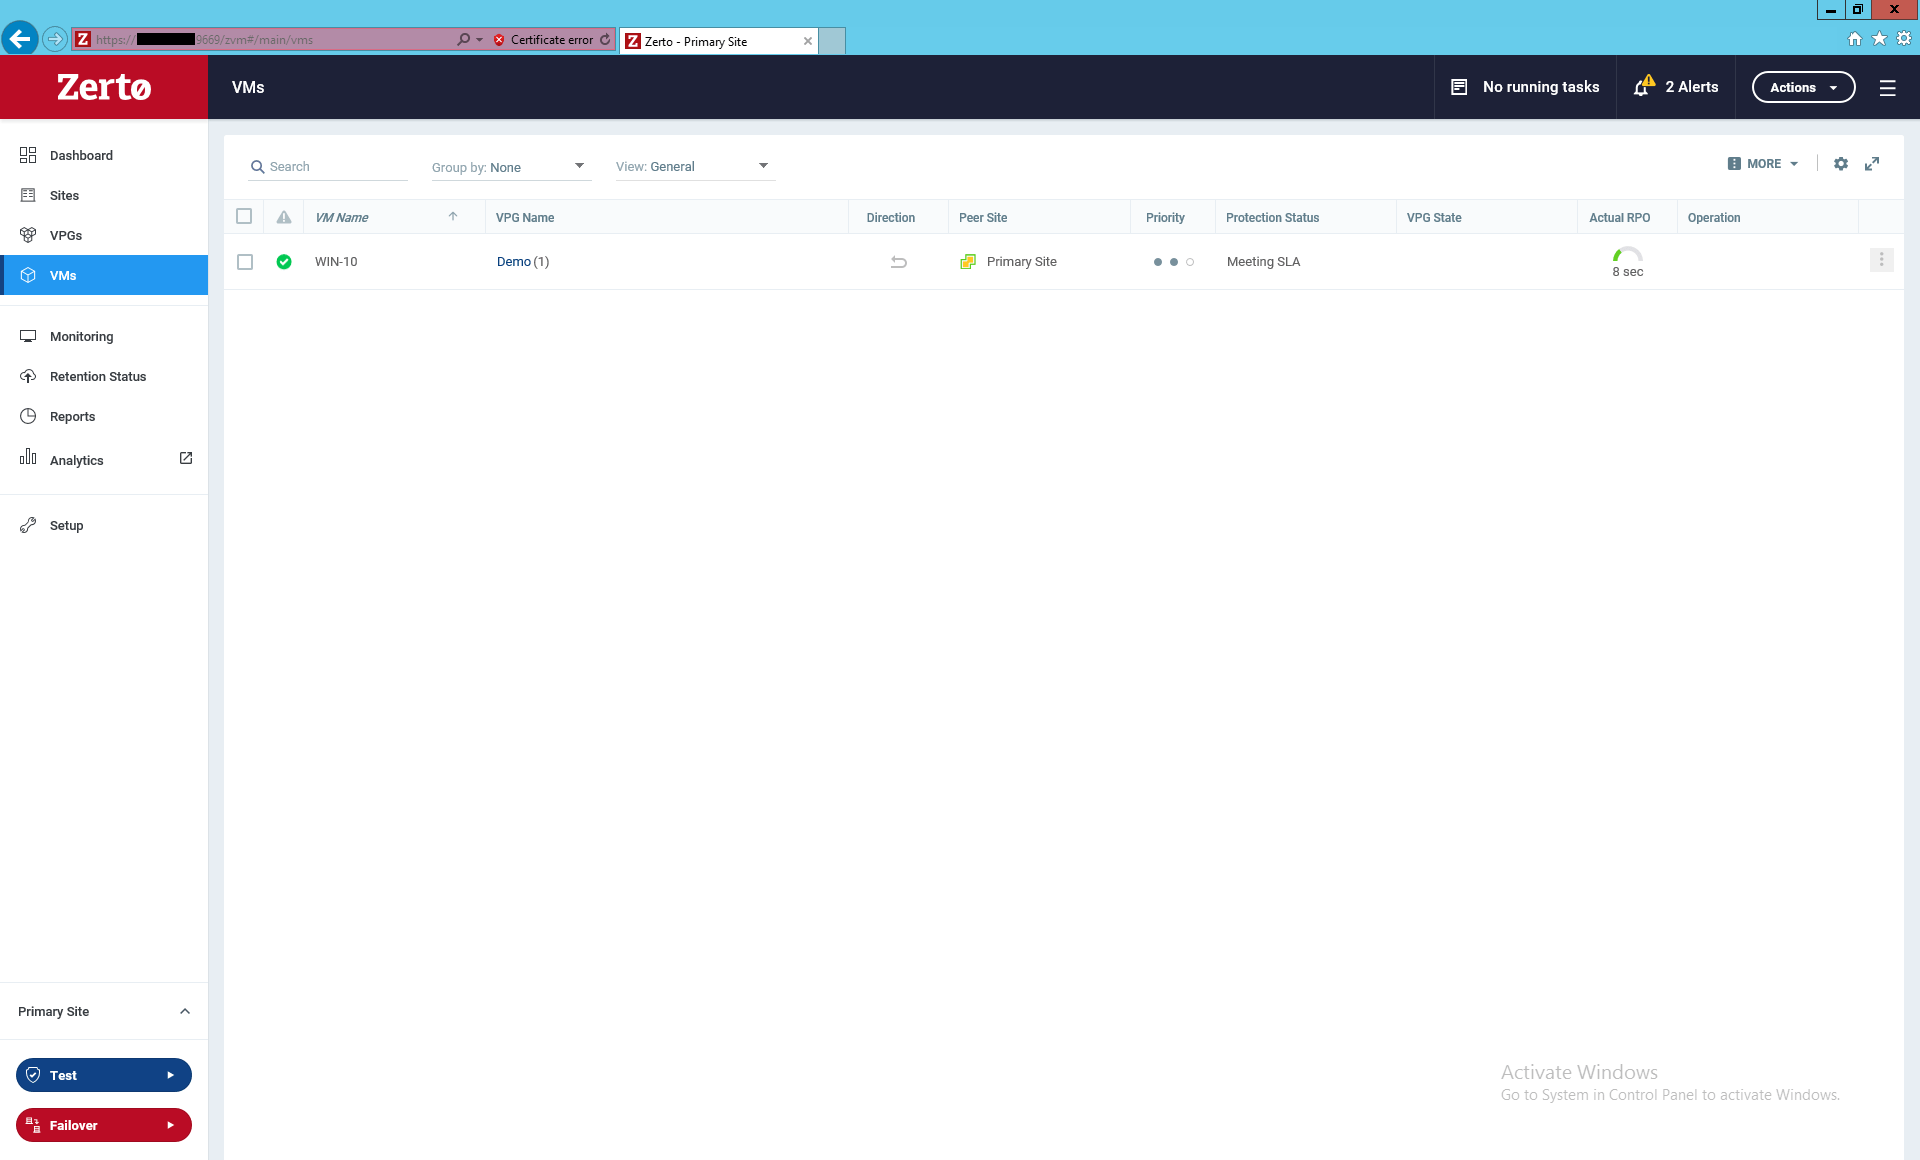
Depending on the size of virtual machines and bandwidth between sites, the initialization of VPG may take some time. After it has been replicated successfully, you can see the status of protected VM at VMs which is green, and indicate virtual machine replication is okay without any problem. Meeting SLA means the replication completed before reaching the Target RPO you defined in the wizard.
Congratulation you successfully replicated one virtual machine from one site to another or from one site to the same site but different cluster and different datastore. In the next post, I will check the replication and failover to test Zerto functionality in a real situation.


Amazing article. I gained knowledge required to perform my job.
I’m glad you found it useful.
Awesome and useful
Thanks Yahya
Happy to help Iman!