In this step, you have to fulfill some requirements to be able to install the Connection Server. If you already have an Active Directory or a SQL Server, you can skip installing a new one. One design principle is to eliminate a single point of failure, however, since this is a lab environment, we are not considering this at the moment because we lack the resources to set up a Horizon environment.
Horizon 8 Series:
- Overview Horizon
- Install Horizon Connection Server
- Horizon Initial Configuration
- Deploy an Instant-Clone Desktop Pool
- Deploying Published Desktops and Applications
- Update an Instant-Clone Desktop Pool
- Configure Dynamic Environment Manager
- Deploy and Configure Unified Access Gateway
- Configure Workspace ONE Access – Part 1
- Configure Workspace ONE Access – Part 2
- Configure Workspace ONE Access – Part 3
Requirements
- At least one VMware ESXi host and one VMware vCenter Server instance
- Active Directory, DNS, and DHCP
- SQL Server: acts as an event database for Horizon servers
- Horizon Connection Server
For the above infrastructure, you need at least three virtual machines and a Vmware environment. I assume that you already have a vCenter server and a cluster of ESXi hosts (at least one ESXi host in the cluster), so the three virtual machines are responsible for the following:
- One VM for Active Directory, DNS, and DHCP together (if you have one, skip it)
- One VM for SQL Server (if you have one, skip it)
- One VM for Horizon Connection Server
Create these virtual machines using the following specifications, and then perform the following tasks to make a virtual machine ready for its role
- Hardware specification:
- Guest OS – Microsoft Windows Server 2019
- CPU – 4
- Memory – 4 GB
- New Hard Disk – 40 GB
- New SCSI Controller – LSI Logic SAS
- Network Adapter Type – VMXNET3
- Install Windows Server 2019
- Install the VMware Tools section
- Install .NET Framework 3.5 section
- Update Windows section
- Configure IP-Settings
- Join to Domain
Installation
1- Download the installer from the Download VMware Horizon page and copy it to the server acting as the Horizon Connection Server.
2- Login to the Horizon Connection Server with an account that has administrative privileges and runs the installer to start the installation wizard.
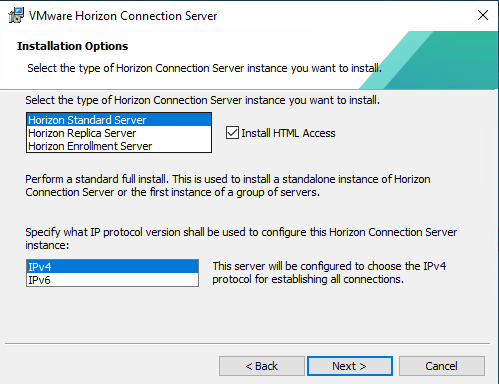
3- Follow the prompts to the Installation Options page, leave the values at the default and click Next.
You can select other types of connection servers after you first install a Horizon Standard Server. By default, HTML access is enabled, which allows users to access virtual desktops and applications through the browser without having to install an application.
4- Now you are prompted to enter a password for data recovery, enter the complex password and click Next.
The password is required when you restore the Horizon LDAP configuration from a backup.
5- Accept the default setting to configure the windows firewall automatically, and click Next.
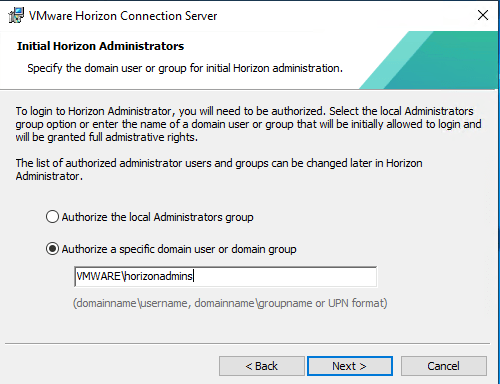
6- Specify a domain group or domain user that is responsible for managing Horizon and click Next.
7- Accept the default setting and click Next.
8- Leave the default setting, and click Install.
General indicates that you are installing the Connection Server on-premise,
9- Once the installation is complete, open a browser and enter the following URL:
https://Connection Server FQDN/admin/
a security warning is displayed because the default self-signed security certificate is used; accept it and continue.
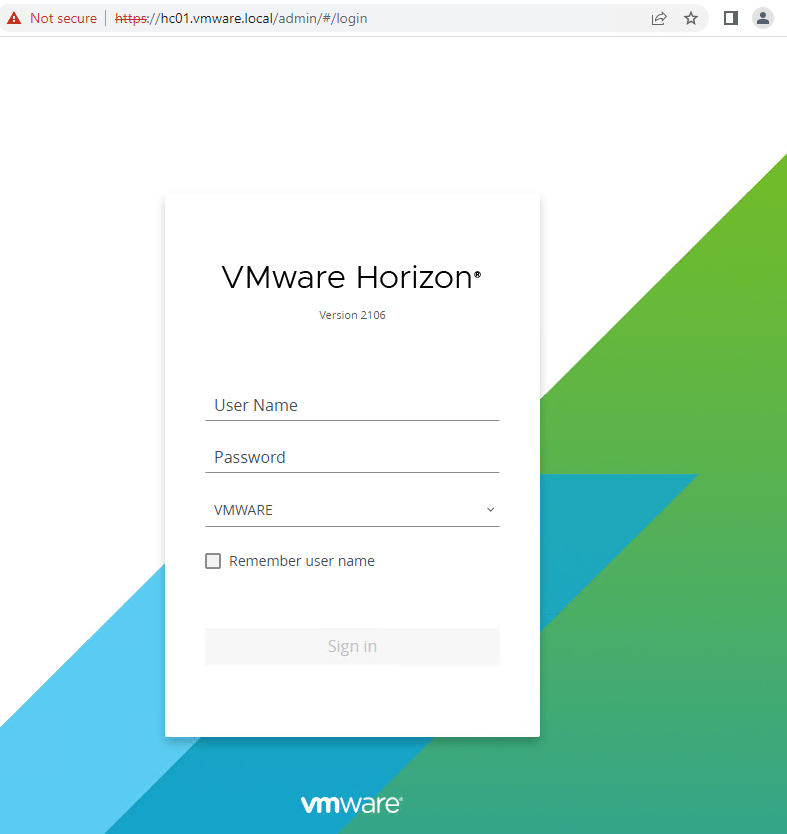
Horizon servers include a self-signed certificate that can be used for testing purposes. For a production environment, you should replace the self-signed certificate with an approved certificate signed by a certificate authority.
9- Log in to Horizon Web Console with the user account you specified earlier in step 6 of the installation.
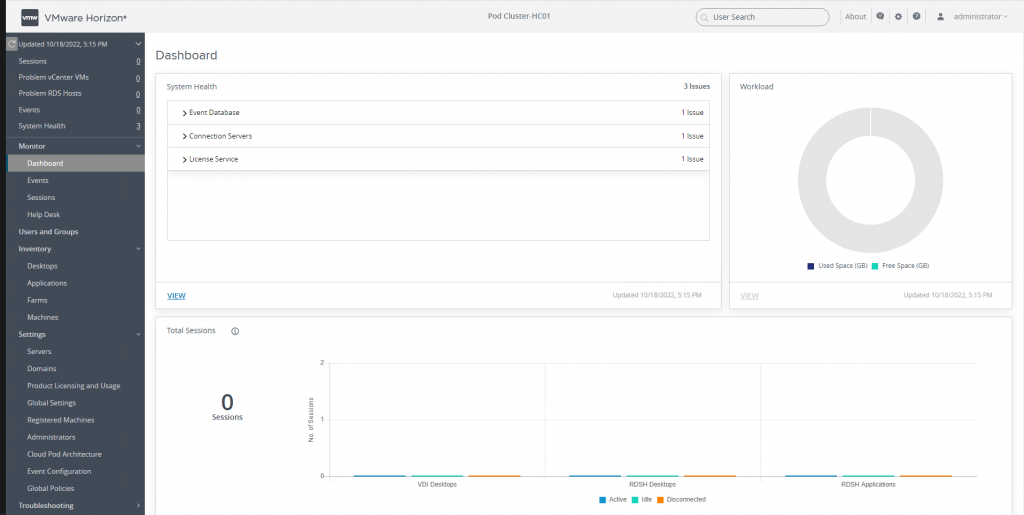
When you log in, you will notice some issues in the Dashboard that should be configured in order for the Horizon connection to work properly, in the next post, we will go through the initial configuration.
Please share this article if you think it’s worth sharing. If you have any questions please do not hesitate to contact me on Linkedin, by Email, or by commenting here.
Hi,
First and foremost, I would like to congratulate you on this excellent series of articles about Horizon. I have no knowledge about Horizon, which is my first starting point.
However, I can’t download the Horizon files. I tried to access the Omnissa customer connect page, and when I clicked on “Download Trial,” nothing happened. It is very frustrating.
Could you please help me with that? I want to create a lab to study and learn about Horizon!
Thank you,
Danilo.
Hi Danilo,
Thanks for your comment, I am afraid, I am no familiar with how trial process works in Omnissa.