Horizon Initial Configuration
In the last post, I installed Horizon Connection Server and now I want to configure the Connection Server to be able to create pools of desktops and RDSH-published applications. This configuration includes the following tasks:
- Creating appropriate domain users and OUs
- Adding vCenter Server
- Appointing an instant-clone domain administrator
- Entering the license key
- Setting up the event database
Horizon 8 Series:
- Overview Horizon
- Install Horizon Connection Server
- Horizon Initial Configuration
- Deploy an Instant-Clone Desktop Pool
- Deploying Published Desktops and Applications
- Update an Instant-Clone Desktop Pool
- Configure Dynamic Environment Manager
- Deploy and Configure Unified Access Gateway
- Configure Workspace ONE Access – Part 1
- Configure Workspace ONE Access – Part 2
- Configure Workspace ONE Access – Part 3
Creating appropriate domain users and OUs
1- Log in to the Active Directory and open Active Directory Users and Computers from Server Manager.

2- Create one organizational unit (OU) for Horizon and two sub-organizational units for users and virtual machines farm. and then create two organizational units in the farm for Desktop pools and RDSH-Servers. In order to create OU, right-click the domain name, New, and Organizational Unit.

Depending on your environment and architecture, you may need different OU structures. This is my prefer way to differentiate between different types of servers, desktop, and users to apply better policies, but it may not fit your environment.
3- Create a user account in Active Directory that is responsible for creating and deleting cloned desktops and servers.

4- This user needs to have some privileges to create and delete VMs in the organization unit. In this step, I will assign permissions to this user so that the user account can manage computer accounts in the “Farm” OU. To delegate control of OUs, right-click on OU and select Delegate Control. On the Users or Groups page, enter the name of the domain user you just created; in my example, this is Horizonuser, and click Next.

5- Select Create a custom task to delegate, and click Next.
6- Select the following checkboxes and click Next.

7- Select the following checkboxes and click Next and then Finish.

Now you are sure that control of the OU has been delegated to the right user account with the right permissions.
Adding vCenter Server
vCenter plays an important role in Horizon, it creates and manages the virtual machines used in Horizon desktop pools automatically.
It is recommended to create a new user in vCenter for Horizon and not use the predefined Administrator user for this purpose. This user must have certain privileges, which are specified in this link.
In this case, I created a new role “Horizon Administrator Role” with appropriate permissions and then assigned that role to the “horizonuser” that I created in the active directory.

1- Log in to the Horizon web console with an admin user account.
URL: https://Connection Server FQDN/admin/
1- In the Horizon console, navigate to Settings, Servers, and then click the Add button under the vCenter Servers tab

2- Complete the following fields and then click Next.
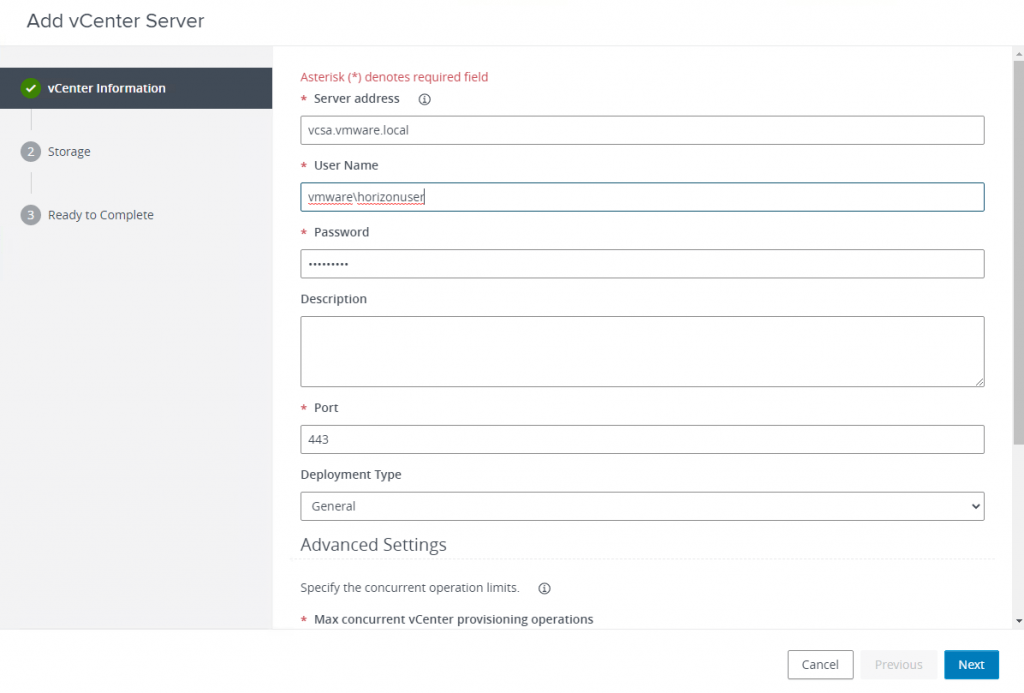
Enter the vCenter FQDN, user, and password, and leave the other text boxes as default.
3- Since I did not change the certificate in my lab, I received the message “Invalid certificate detected”, click View Certificate and then click Accept.
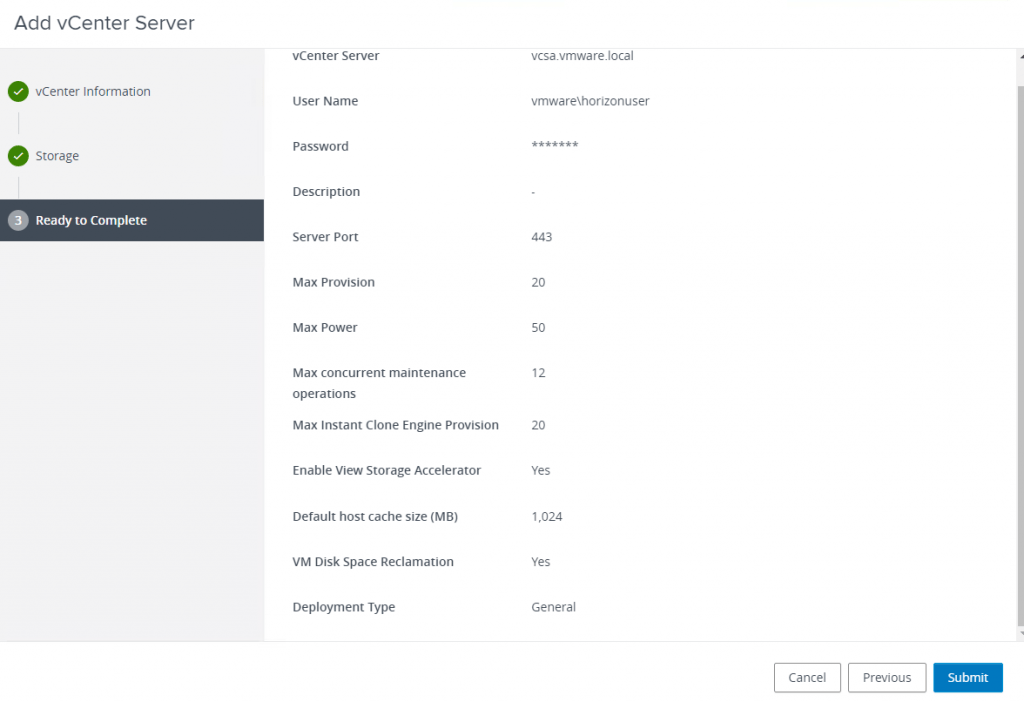
4- On the remaining pages, click Next to accept the default settings and then click Submit.
Appointing an instant-clone domain administrator
I already have created a domain user account and added vCenter to Horizon with that user. Now I want to add this user to Horizon as an instance clone domain account to be able to join the cloned virtual machines to the domain and create and manage a computer account in Active Directory.
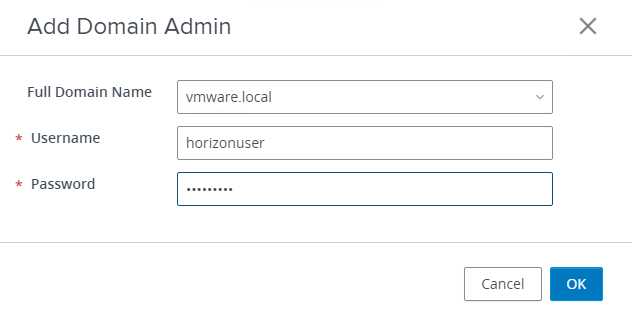
1- In the Horizon console, navigate to Settings, Domains, and then click the Add button under Instant Clone Domain Accounts tab.
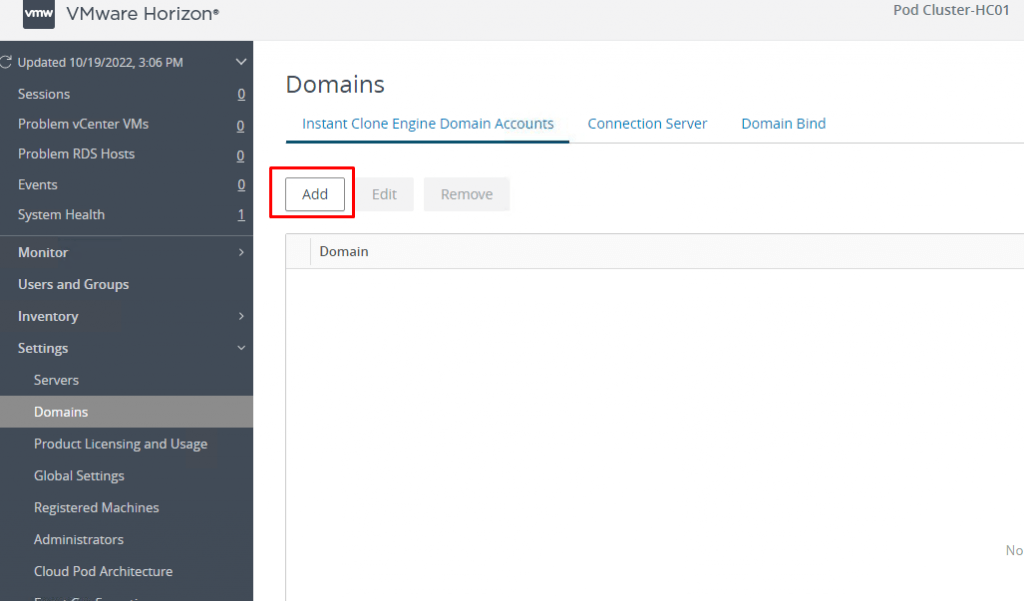
2- Enter the username and password for the user you created earlier for this purpose and click Ok.
Entering the license key
1- In the Horizon console, navigate to Settings, Product Licensing, and Usage, and then click the Edit License button under the Licensing tab.
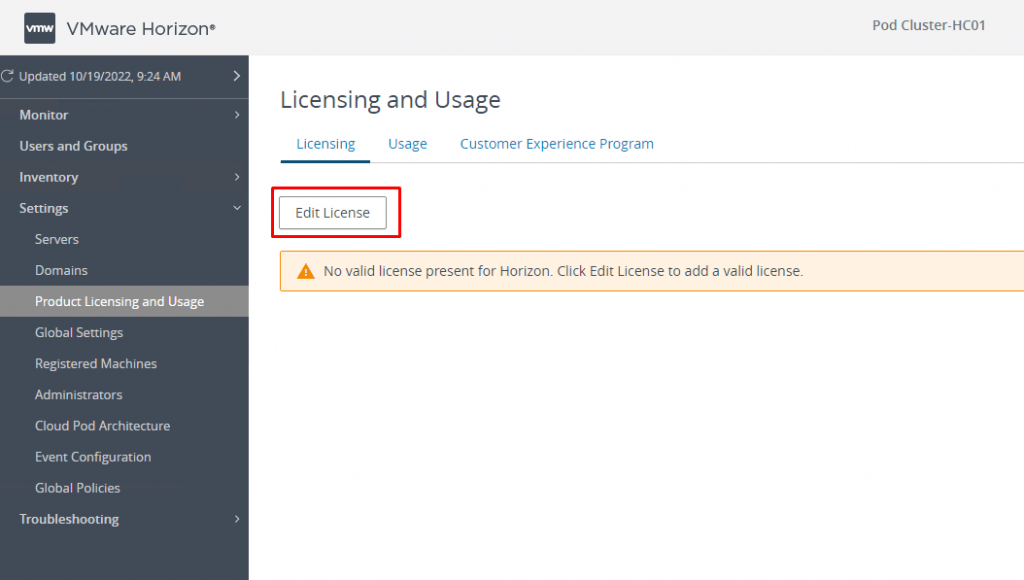
2- Enter the serial number and click OK.
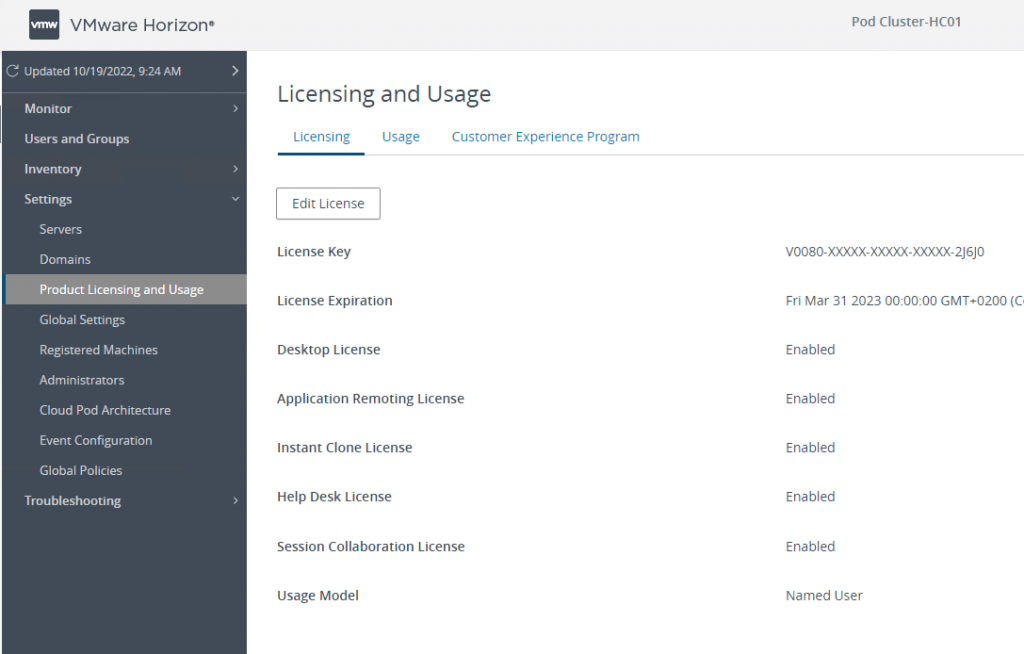
3- Verify if the license is the same as the one purchased.
Setting up the event database
You can configure Horizon to record events in a Microsoft SQL Server or Oracle database. I use SQL Server to record events such as end-user actions, administrator actions, alerts about system failures, and so on.
I have currently SQL Server 2019 installed and configured.
1- Log in to the server where SQL Server is installed and connect to SQL via SQL Server Management Studio. If you don’t have SQL Server Management, you can download it from here.
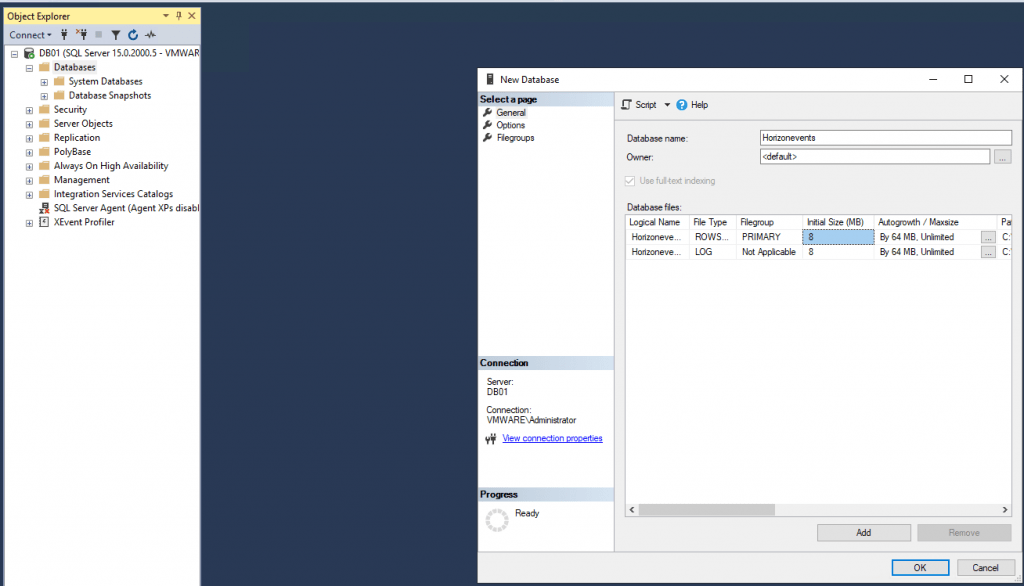
2- Right-click Databases, and select New Database.

3- Create a new Database for Horizon events and leave the other settings as default, and click OK.
4- To connect Horizon View to the SQL server, you need a login, so, expand the Security folder, right-click Logins, and select New Login

5- Enter the login name and proper password. Select SQL Server authentication and Set the default database to the database you have already created for Horizon events.
Windows authentication is not supported

6- Under Server Roles, check the sysadmin box.

7- Under User Mapping, in the Users mapped to this login section, check the box for the HorizonEvents database, and click OK.

8- Now come back to the Horizon console, navigate to Settings, then Event Configuration, and click the Edit button.
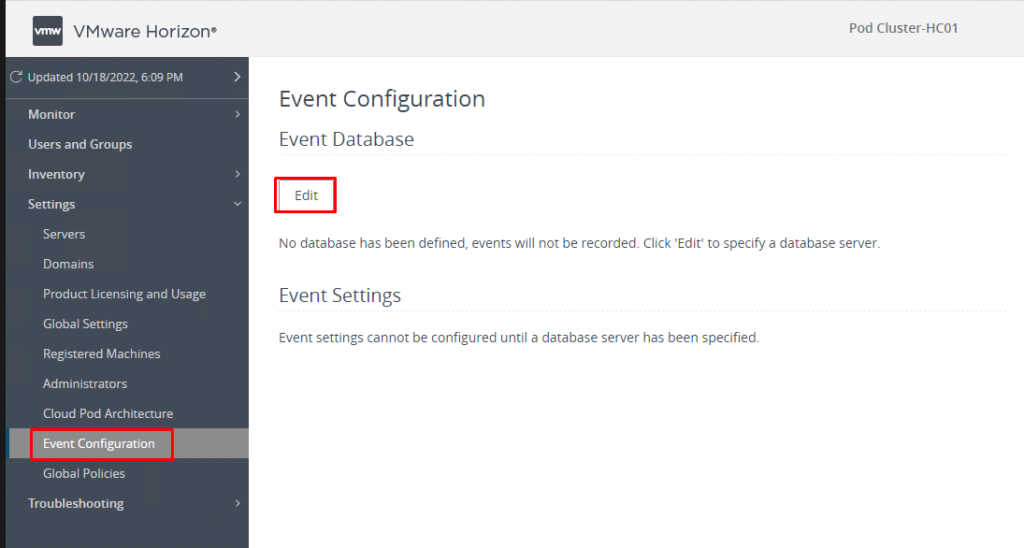
9- Complete the following fields and then click OK.

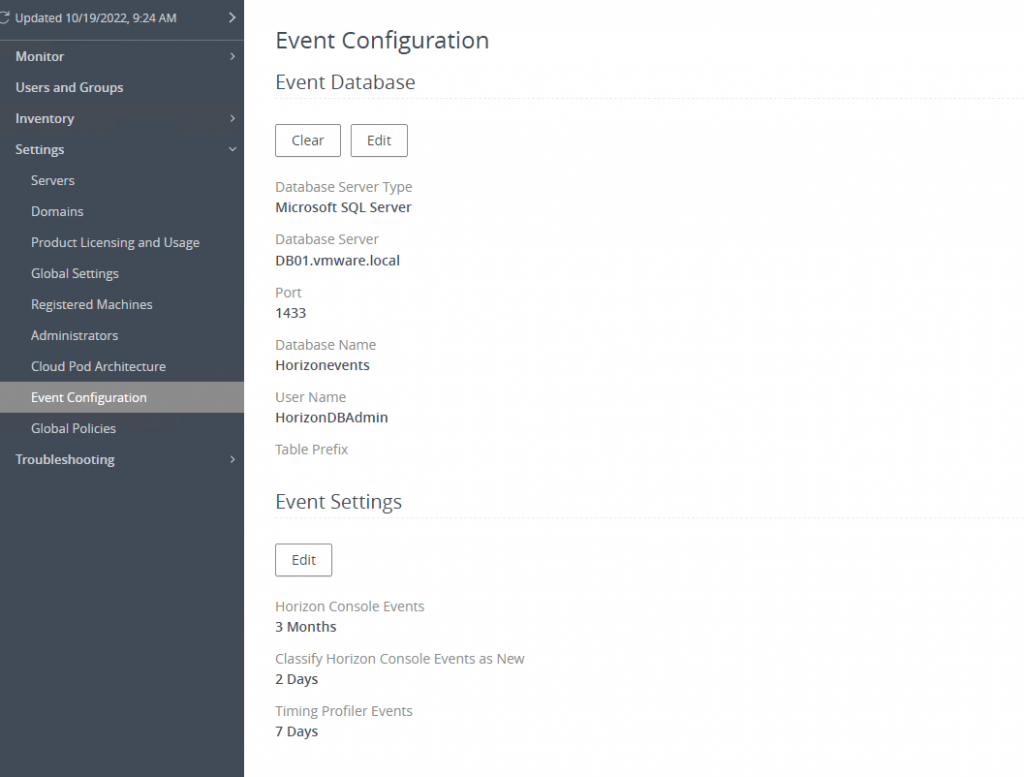
10- As you can see, the event database is successfully configured.
Now I have initialized the mandatory or important configuration of Horizon. The next step will be to create a desktop pool.
Please share this article if you think it’s worth sharing. If you have any questions please do not hesitate to contact me on Linkedin, by Email, or by commenting here.
