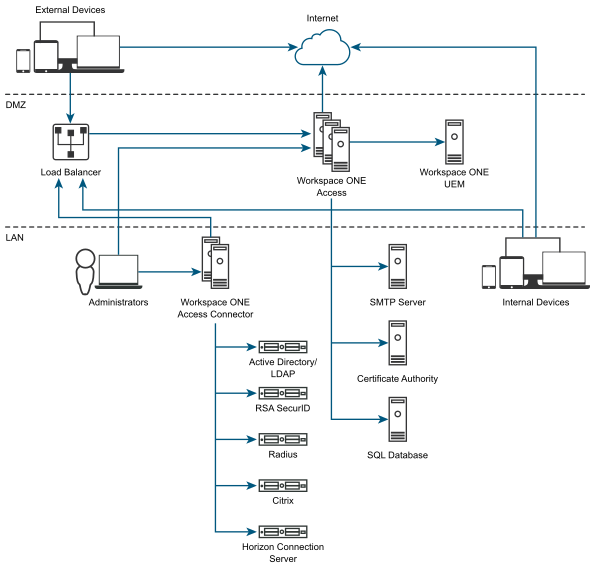
VMware Workspace ONE is an intelligence-driven digital workspace platform that enables you to simply and securely deliver and manage any app on any device, anywhere. The VMware Workspace ONE Access is part of the VMware Workspace ONE solution. Workspace ONE Access delivers multifactor authentication (MFA), conditional access, and single sign-on (SSO), and acts as an intermediary to other identity stores and providers to quickly and securely implement application and device strategies.
Workspace ONE Access allows you to manage users and groups, set up and manage authentication and access policies, manage entitlements, and manage resources including web applications, Horizon applications, Horizon desktops, and Citrix applications.
The VMware Workspace ONE Access connector is a component of VMware Workspace ONE Access that integrates with infrastructures such as Active Directory, RSA SecurID, VMware Horizon, and Citrix to provide directory integration, user authentication, and virtual application integration.
In this post, I describe how to deploy and configure Workspace ONE Access.
Horizon 8 Series:
- Overview Horizon
- Install Horizon Connection Server
- Horizon Initial Configuration
- Deploy an Instant-Clone Desktop Pool
- Deploying Published Desktops and Applications
- Update an Instant-Clone Desktop Pool
- Configure Dynamic Environment Manager
- Deploy and Configure Unified Access Gateway
- Configure Workspace ONE Access – Part 1
- Configure Workspace ONE Access – Part 2
- Configure Workspace ONE Access – Part 3
Deploy Appliance
The VMware Workspace ONE Access is a Linux distribution (Photon OS) appliance that can be installed as a new standalone server or in a cluster of nodes. In an enterprise environment, deploying a three-node cluster of the Workspace ONE Access service is recommended for high availability. But now I want to install a standalone server.
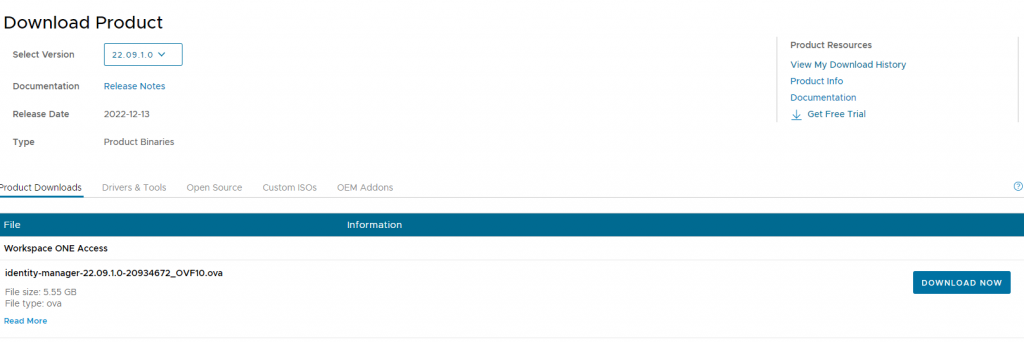
1- Download the VMware Workspace ONE Access OVA file.
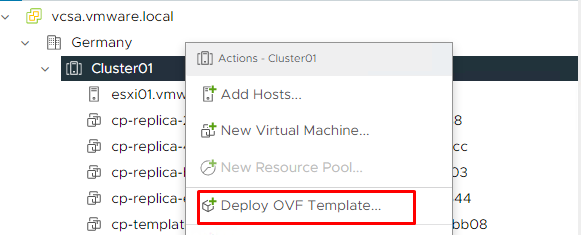
2- Log in to the vCenter. Right-click Cluster and select Deploy OVF Template.
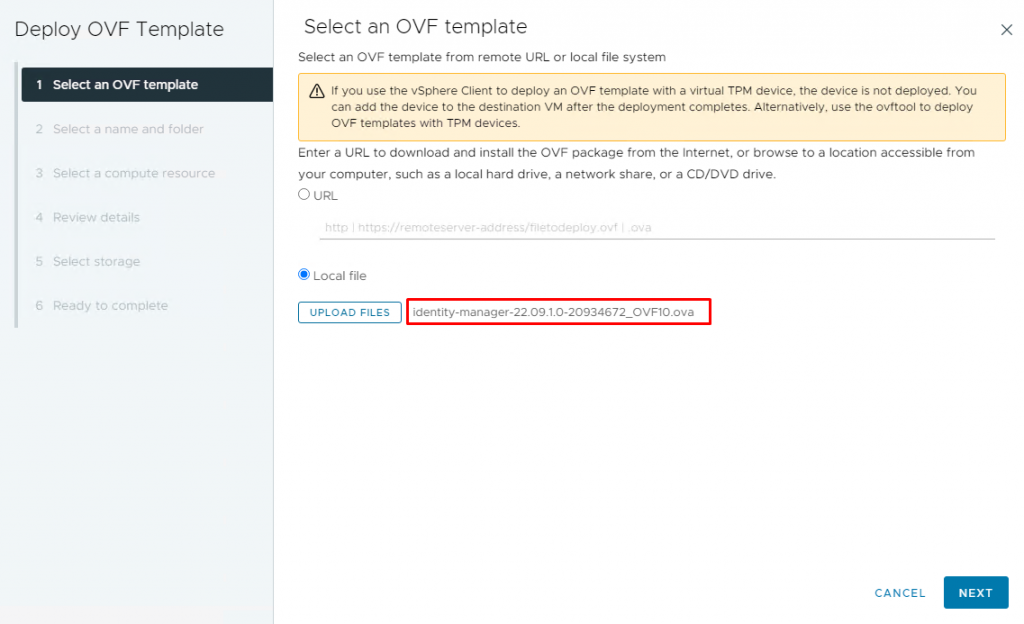
3- Select the Local file and click Upload files. Browse to the downloaded file and click Open. The file name should be displayed here.
4- Give a proper name and select a folder for the virtual machine and click Next.

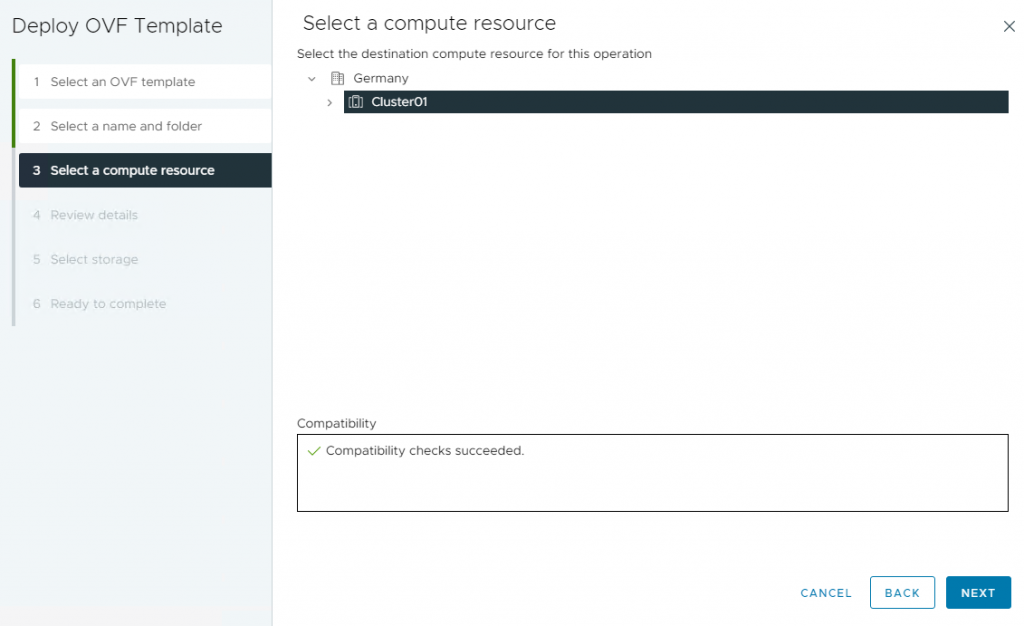
5- Select the desired host or cluster and click Next.
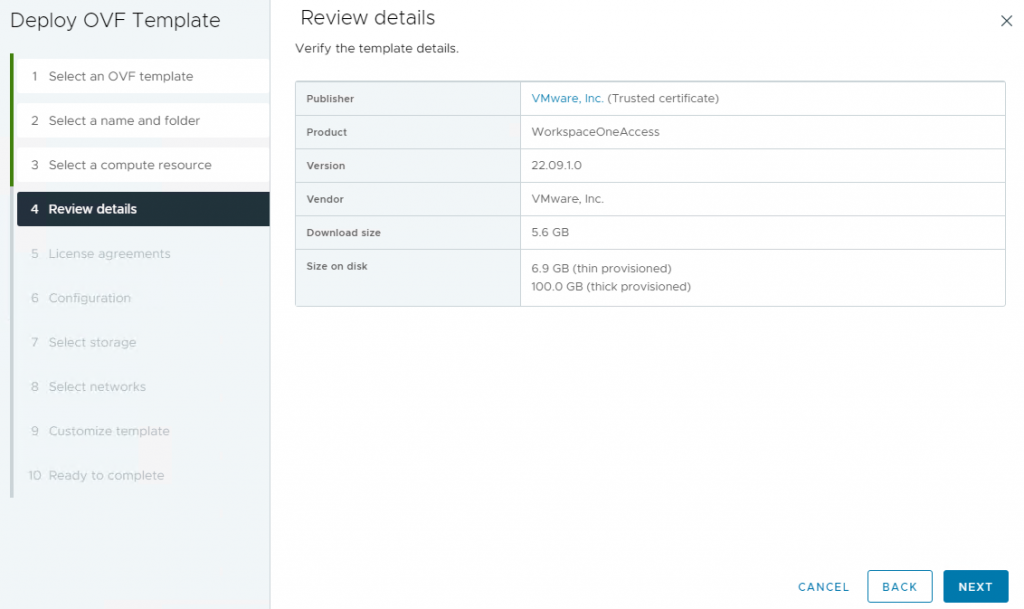
6- On the Review Details page, click Next.
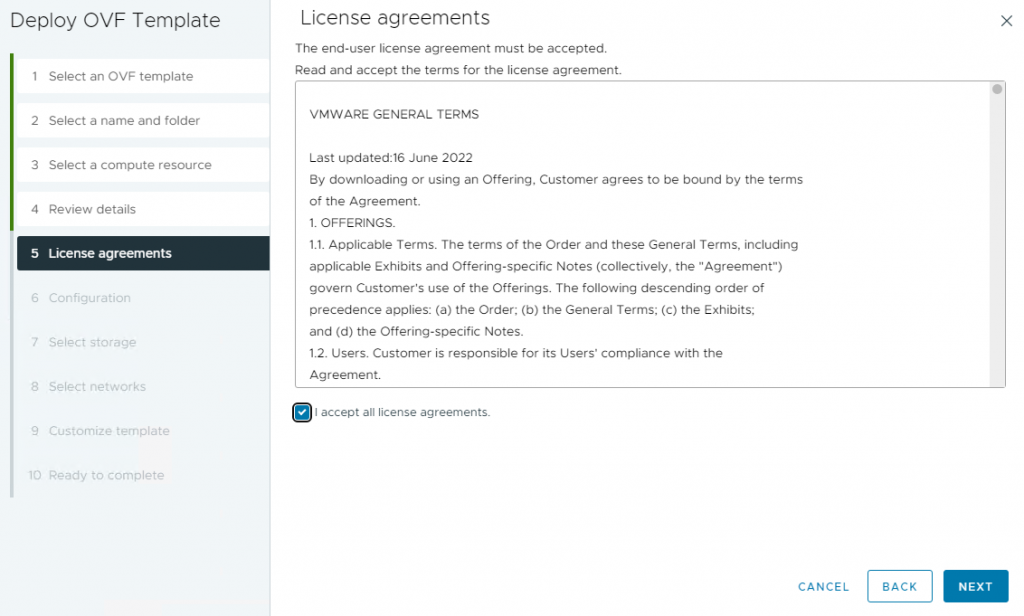
7- Accept the terms of the license agreement and click Next.
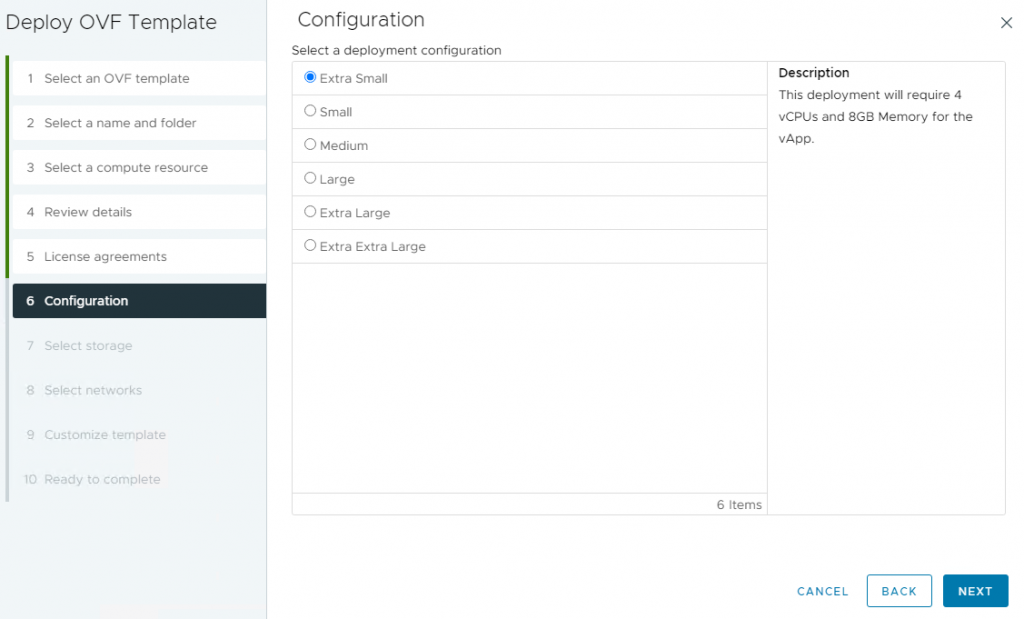
8- On the Configuration page, select your desired deployment configuration and click Next. Based on the deployment configuration, Workspace ONE Access can scale to support a maximum number of users and groups. For more information on sizing Workspace ONE Access, click here.
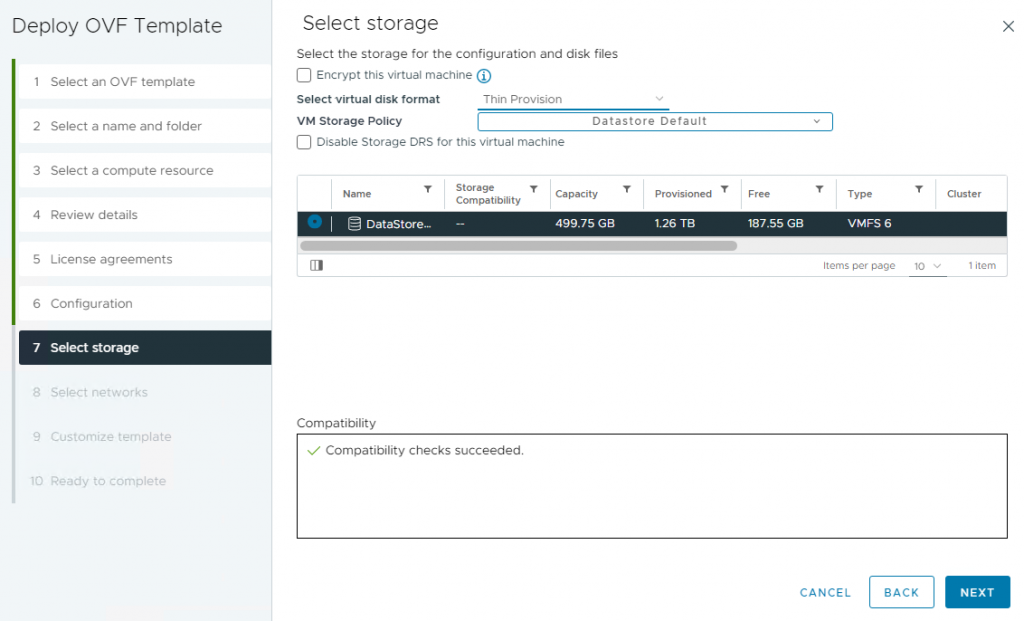
9- Select virtual disk format and a datastore, then click Next.
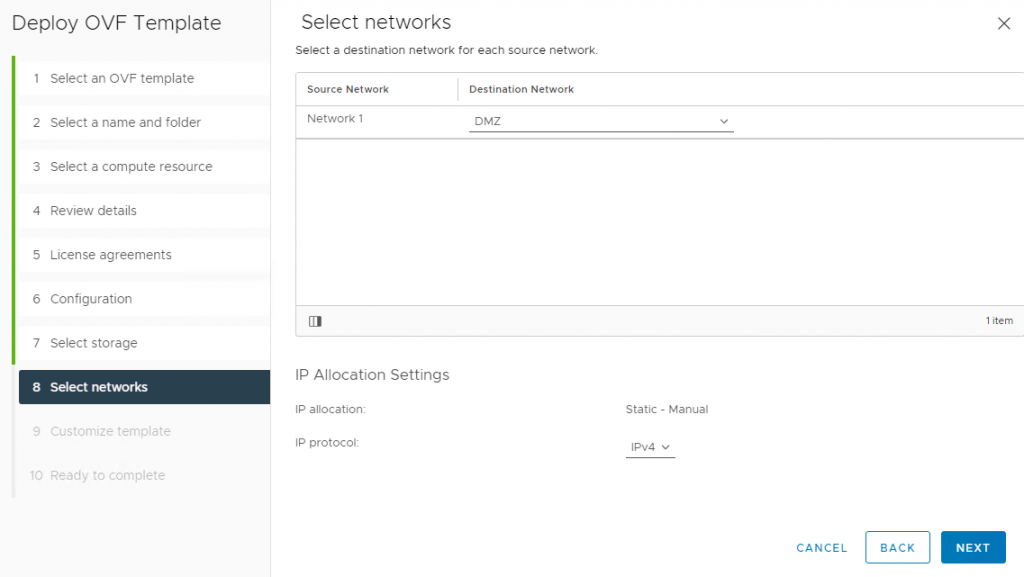
10- Select the port group for this appliance and click Next. As shown in the first image of this post, It is better to set up the appliance in the DMZ network and set up the connectors in the internal network to access the resources.
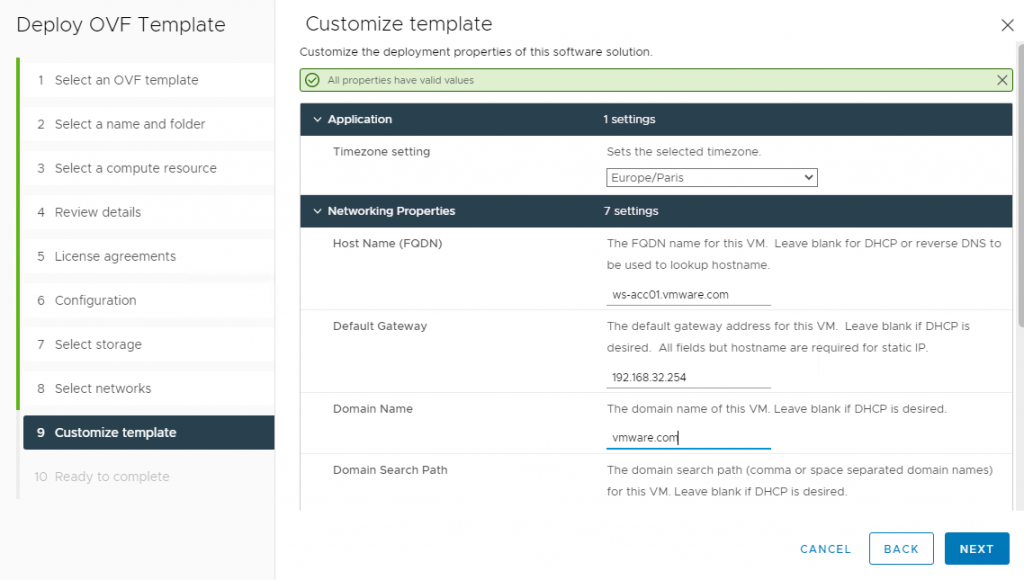
11- On the Customize template page, adjust the IP configuration for the appliance.
- Select the correct time zone.
- Enter the FQDN of the hostname.
- Enter the address for the Default Gateway, The Domain Name and Domain Search Path fields are not used. You can leave these blank.
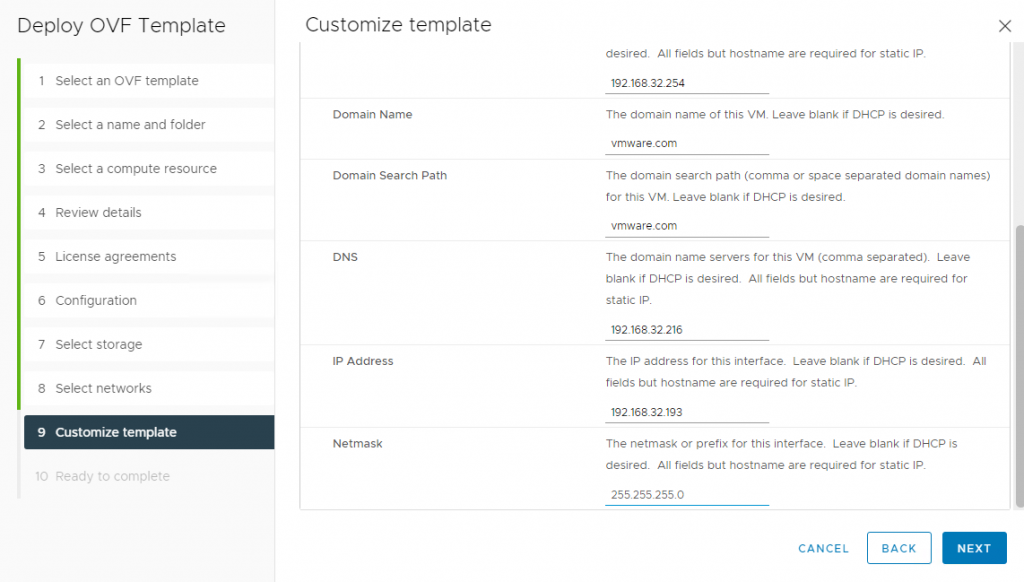
- Enter the address for the DNS, IP Address, and Netmask fields and click Next.
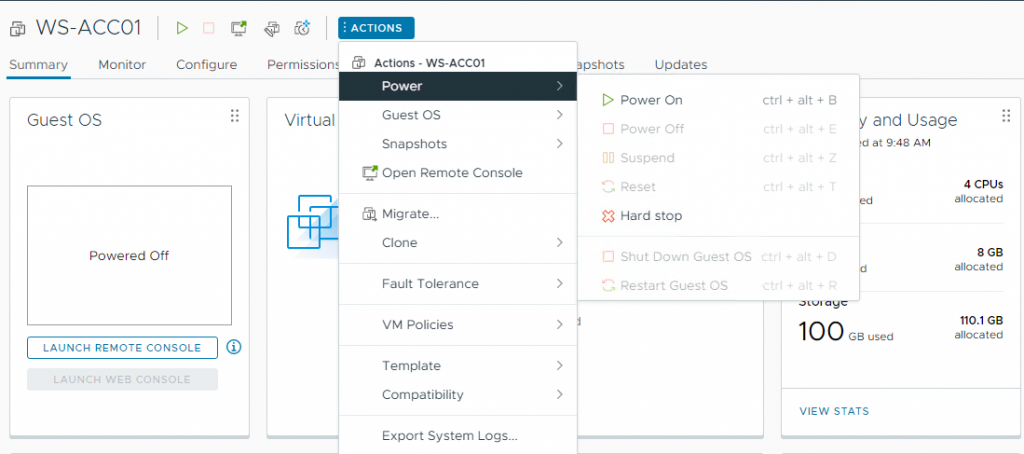
12- In the Ready to complete page, click Finish and power on the virtual machine.
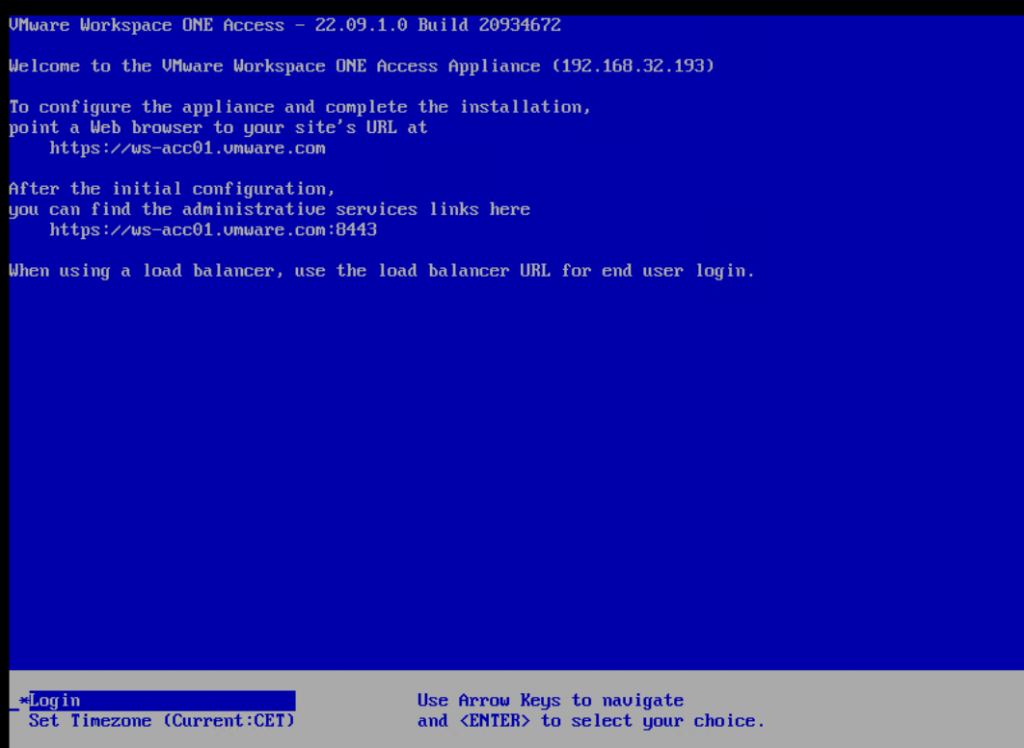
13- After successful initialization (It will take several minutes), the console screen displays the IP address and URLs that you can use to log in to Workspace ONE Access and complete the setup.
Initial Configuration
1- Open “https://FQDN of Workspace Access One” to access the Access Setup Wizard.
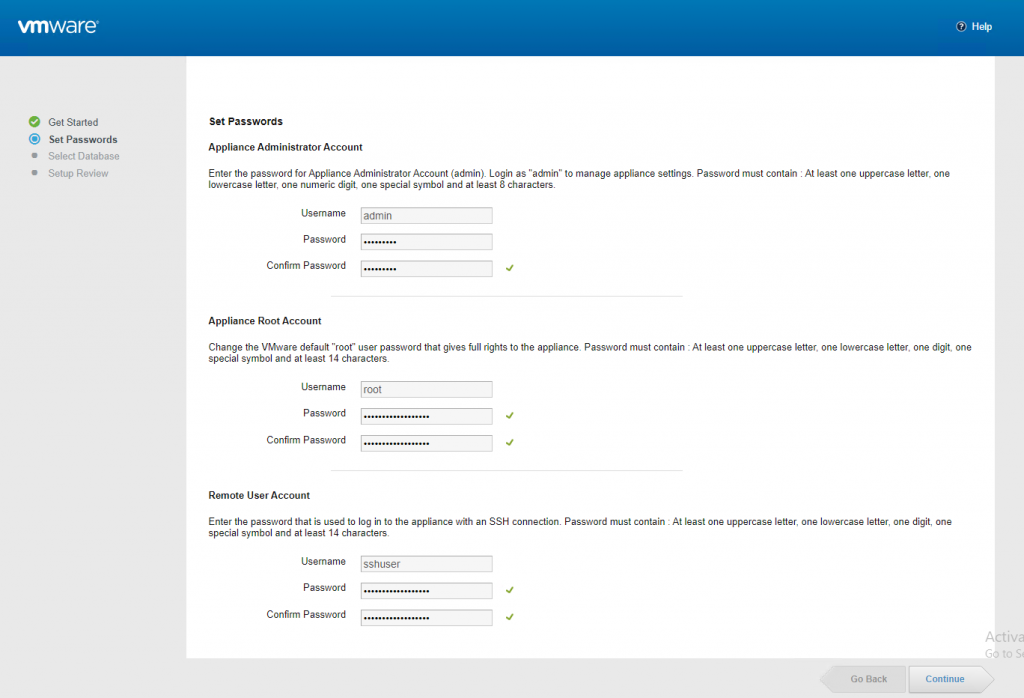
2- Set passwords for the Appliance Administrator, Appliance root, and Remote User, then click Continue.
| Appliance Administrator | Who manages the appliance settings |
| Appliance root | Who has full rights to the appliance |
| Remote User | who logs in remotely to the appliance with an SSH connection |
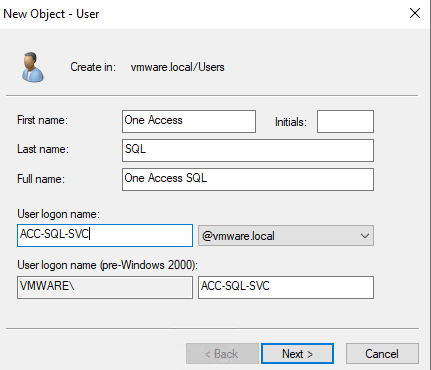
3- On the next page, select the database type, consider that the internal database is not recommended for use with production deployments. I will create a new database and a new user that will access this database in Microsoft SQL Server.
- Create a new user account in the active directory
- Connect to SQL Server via SQL Server Management Studio as a user account with sysadmin privileges.
- In the toolbar, click New Query.
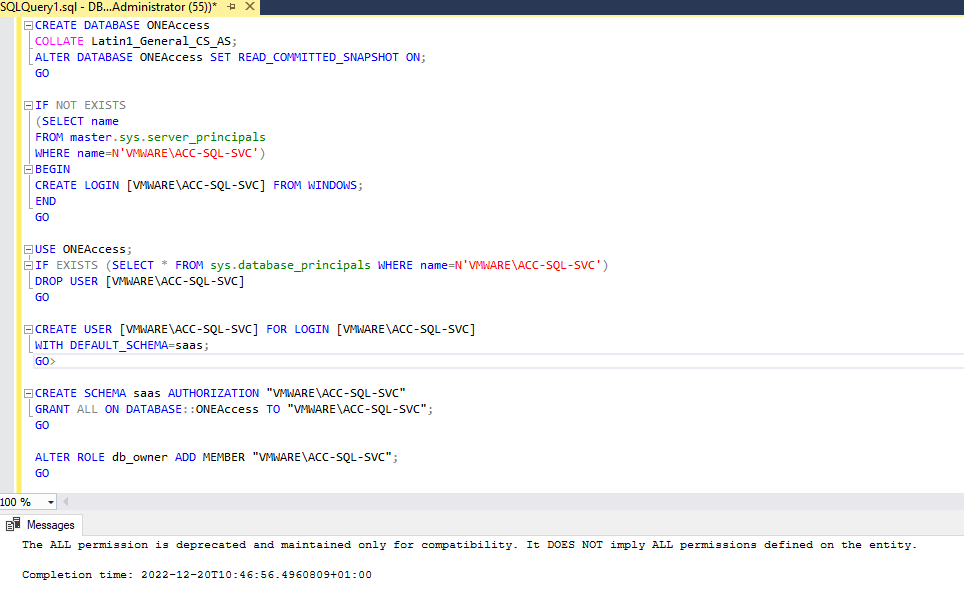
- Enter the following commands in the editor window to create the database.
CREATE DATABASE <saasdb>
COLLATE <Latin1_General_CS_AS>;
ALTER DATABASE <saasdb> SET READ_COMMITTED_SNAPSHOT ON;
GO

IF NOT EXISTS
(SELECT name
FROM master.sys.server_principals
WHERE name=N'<domain\username>')
BEGIN
CREATE LOGIN [<domain\username>] FROM WINDOWS;
END
GO

USE <saasdb>;
IF EXISTS (SELECT * FROM sys.database_principals WHERE name=N'<domain\username>')
DROP USER [<domain\username>]
GO

CREATE USER [<domain\username>] FOR LOGIN [<domain\username>]
WITH DEFAULT_SCHEMA=saas;
GO

CREATE SCHEMA saas AUTHORIZATION "<domain\username>"
GRANT ALL ON DATABASE::<saasdb> TO "<domain\username>";
GO

ALTER ROLE db_owner ADD MEMBER "<domain\username>";
GO
- The values within angle brackets “< >” are example values and they should be adjusted to your configuration, I change the user name to the one that I created for this purpose and also rename the database as you can see in the following image. Once you have replaced the example value, remove the angle brackets and run the query.
4- The SQL database server is now ready to be connected to the Workspace ONE Access. Let’s go back to the database configuration wizard. Select External Database and enter the JDBC URL of the SQL database server. Here you can find the structure of the JDBC URL in Windows authentication mode.
jdbc:jtds:sqlserver://db01.vmware.local/ONEAccess;integratedSecurity=true;
domain=vmware.local;useNTLMv2=true
jdbc:jtds:sqlserver://db01.vmware.local;DatabaseName=ONEAccess;
integratedSecurity=true;domain=vmware.local;useNTLMv2=true
Both of them are correct.
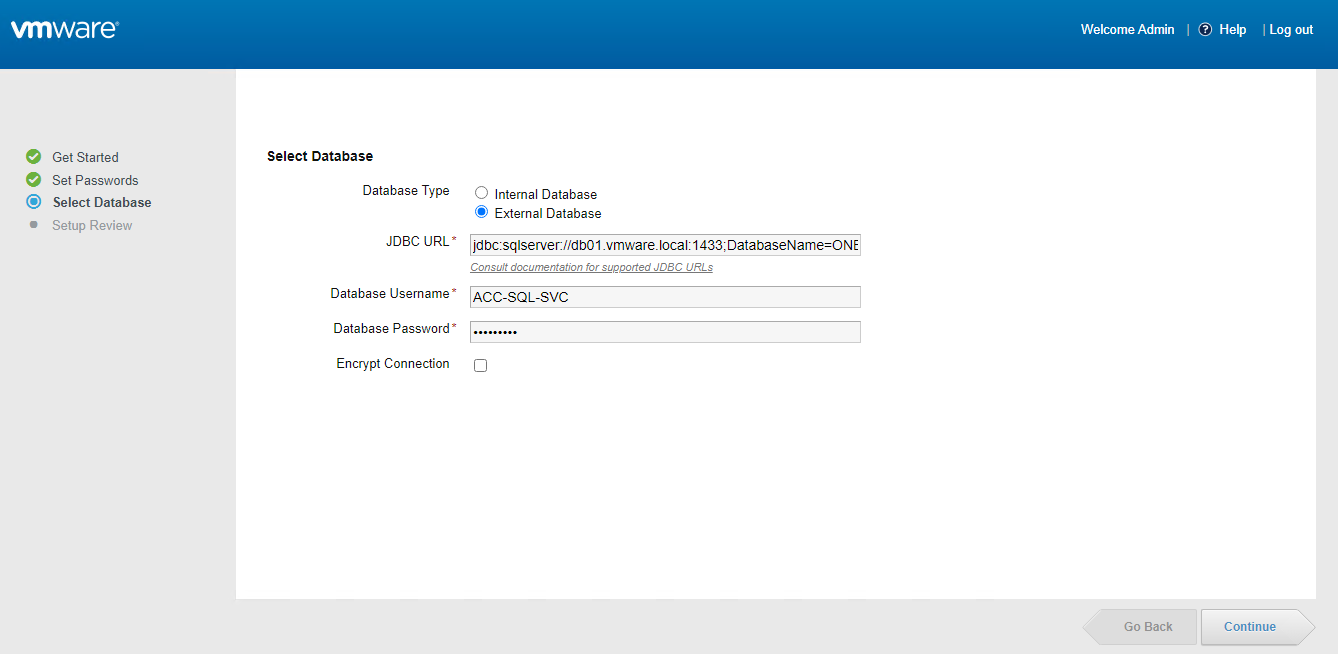
6- Enter the username and password you created earlier for this purpose and click Continue.
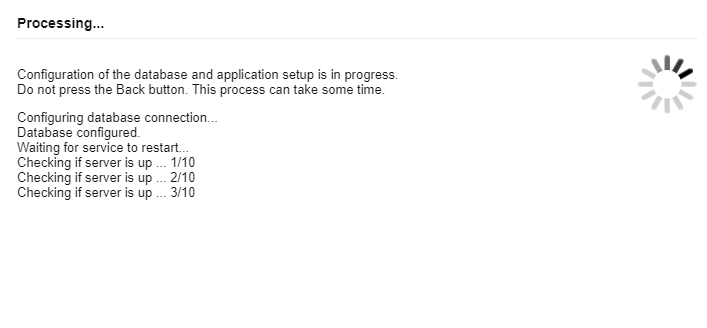
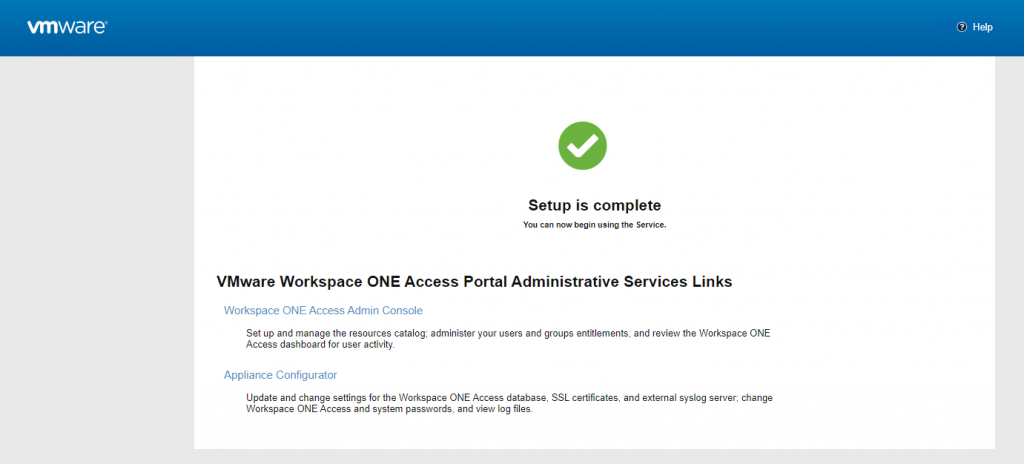
7- The configuration of the database takes time. Once the process is complete, the Setup is complete page appears. Click the Appliance Configurator to replace the self-signed certificate with a valid certificate in the next step.
8- On the left pane, click Install SSL Certificates.
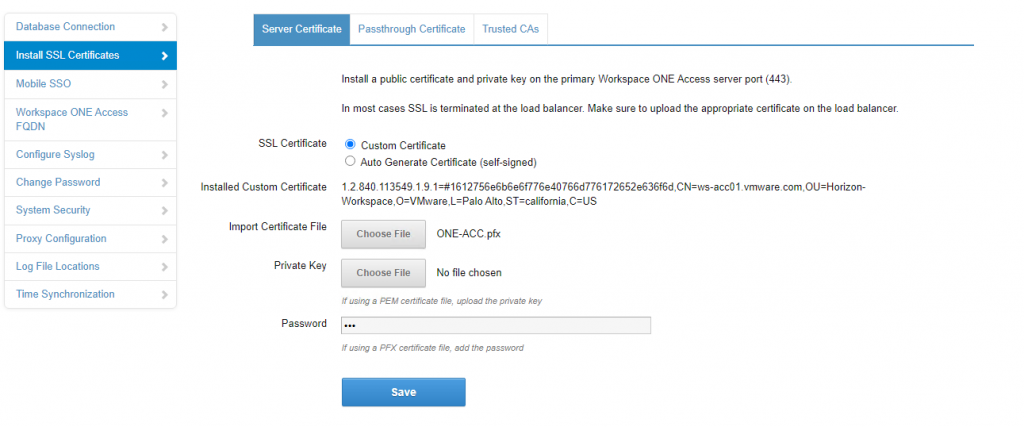
9- Select Custom Certificate and import the certificate file and click Save. The appliance will be restarted and no certificate warning will be displayed anymore.
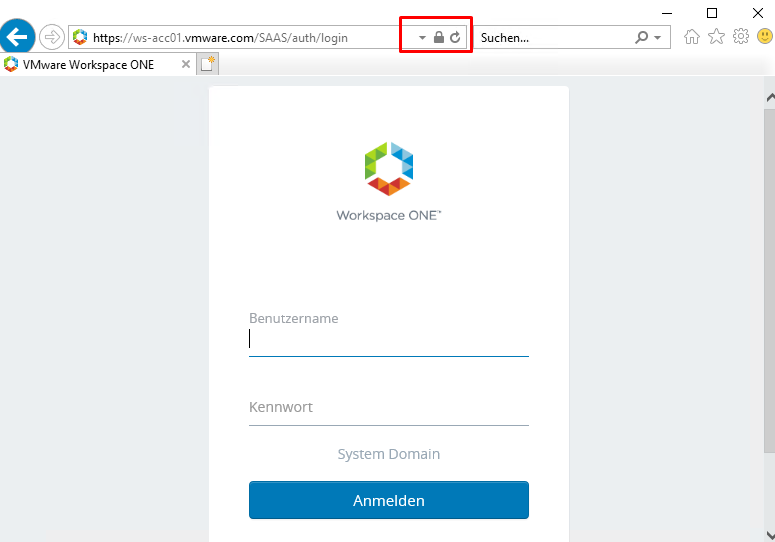
10- Go to “https://FQDN of Workspace ONE Access/SAAS/admin” to log in to the Admin Console.
In the next post, I explain how to install and configure the Workspace ONE Access Connector.
I hope this is informative for you.