User profiles are an important part of desktops that should be considered in a virtual desktop infrastructure. A user profile consists of user-specific settings (desktop shortcuts, background, app settings) that are unique to a specific user so that every user gets his familiar environment when logging in to a desktop.
This is especially important if the user has more than one type of desktop, such as session-based and desktop-based, because the user will get a new profile for each of them, or in a situation where you are using a floating assignment pool, the user gets a new desktop each time they log in.
VMware offers integrated user profile management with Dynamic Enviroment Manager. VMware Dynamic Environment Manager (formerly known as User Environment Manager) combines the ease of managing application and persona settings with providing end users a personalized desktop experience across any virtual, physical, and cloud-based Windows desktop environment. The main features of Dynamic Enviroment Manager (DEM) are as follows:
- Provide consistent & personal desktop experiences
- Simplify profile management
- Accelerate desktop & app delivery
- Improved login times
Horizon 8 Series:
- Overview Horizon
- Install Horizon Connection Server
- Horizon Initial Configuration
- Deploy an Instant-Clone Desktop Pool
- Deploying Published Desktops and Applications
- Update an Instant-Clone Desktop Pool
- Configure Dynamic Environment Manager
- Deploy and Configure Unified Access Gateway
- Configure Workspace ONE Access – Part 1
- Configure Workspace ONE Access – Part 2
- Configure Workspace ONE Access – Part 3
In this post, I’ll show you the general configuration and deployment tasks for VMware Dynamic Environment Manager. In short, this configuration includes the following tasks:
- Create Share Folders
- Install Dynamic Environment Manager Agent
- Install Dynamic Environment Manager Console
- Group Policy Settings
- Dynamic Environment Manager Configurations
- Test User Personalization
Create Shared Folders
DEM uses two share folders to store configurations and user data. The configuration shared folder contains policy configuration data and is updated by administrators. Profile archives shared folder is used to store and maintain custom user settings and log files, which are ZIP files. DEM reads personal user settings from the profile archives when a user logs in to the environment and writes the modified settings when the user logs out.
To shorten the login time, it is recommended to redirect some folders such as Documents, Downloads, and Desktop to a shared folder (Folder Redirection). So, when DEM reads the ZIP files from the shared profile archives, it takes less time to load the user’s profile when the user logs in to his desktop. So for this purpose 3 shared folders with the following NTFS and share permissions for each folder are needed.
- Configuration Share (DEMConfig)
- NTFS permissions
- Horizon Admins = Full Control
- Horizon Users = Read
- Domain Computers = Read
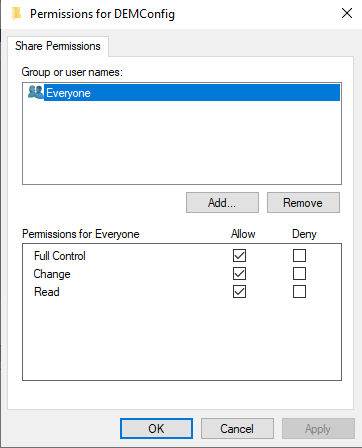
- Share permissions
- Everyone = Full Control
- NTFS permissions
- Profile Archives Share (DEMProfile)
- NTFS permissions
- Horizon Admins = Full Control
- Horizon Users = Read/Execute, Create Folders – this folder only
- Creator Owner = Full Control
- Share permissions
- Everyone = Full Control
- NTFS permissions
- Folder Redirection Share (FolderRedirection)
- NTFS permissions
- Admins = Full Control
- Domain Users = Read/Execute, Create Folders – this folder only
- Creator Owner = Full Control
- Share permissions
- Everyone = Full Control
- NTFS permissions
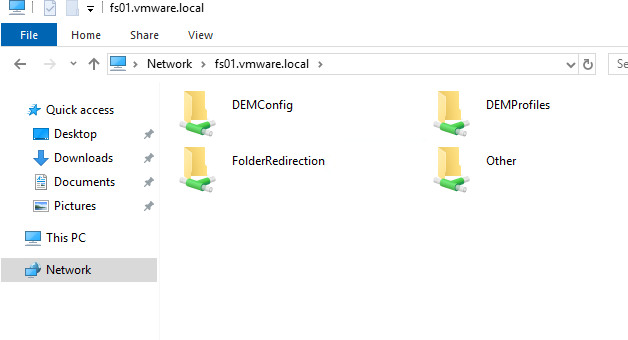
1- On the server acting as File Server, create three folders and name them DEMConfig, DEMProfile, and FolderRedirection.
Since the procedure is the same, I’ll only follow the step-by-step instructions for one folder, and the other two shared folders can be created in the same way, but with different permissions.
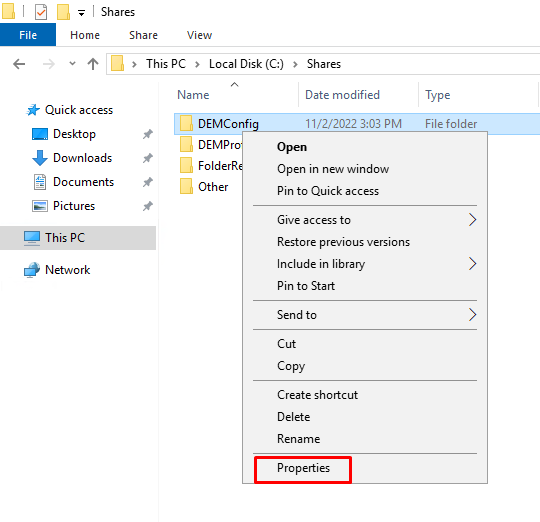
2- Right-click on the folder DEMConfig and select Properties.
3- Under Sharing tab, select Advanced Sharing and check the “Share this folder” box and click on the Permissions button.
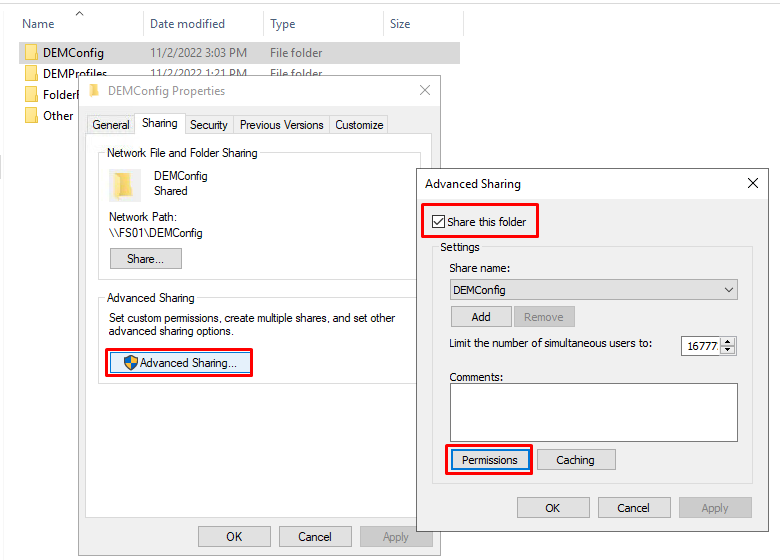
4- Give Everyone full control and Click OK.
5- In the Properties window, on the Security tab, click the Advanced button to set NTFS permissions. Inheritance is enabled by default, disable it by clicking Disable inheritance and then remove unnecessary permissions.
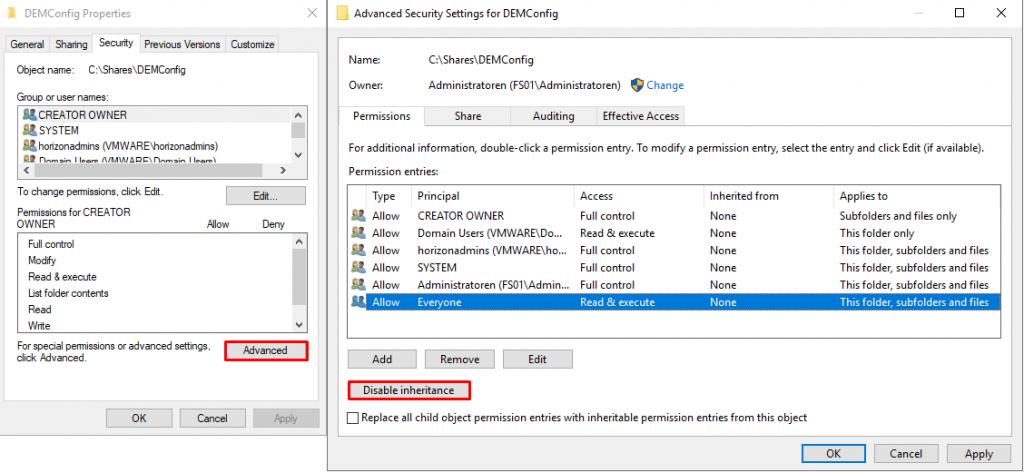
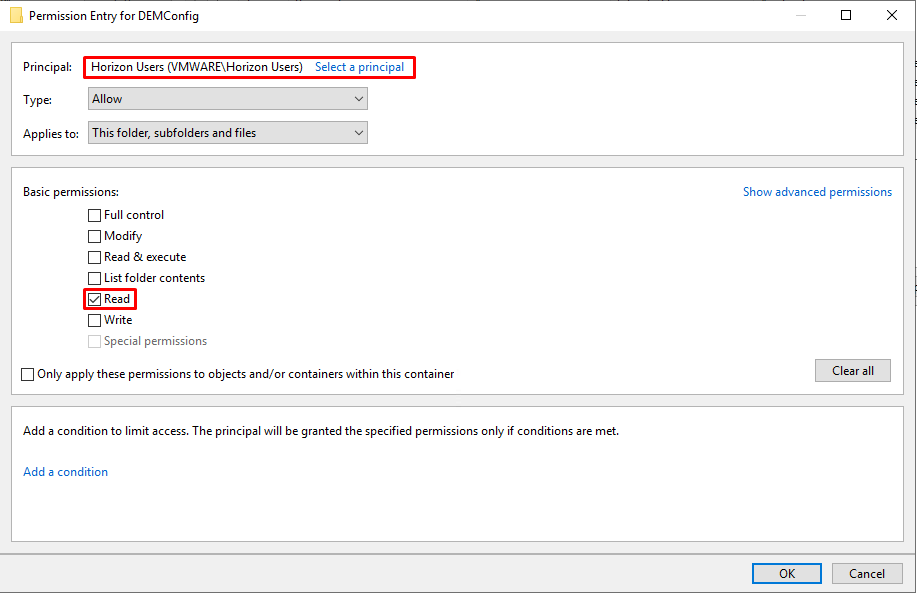
6- Add the required permissions based on the above information for the particular folder. For example, Horizon users must have read permissions for DEMCOnfig. Click Add and then click Select a principal to select Horizon users, set the required permissions (Read) and click OK.
7- Follow the same steps for the other two folders, and you should end up with these three shared folders on your file server.
Install DEM Agent
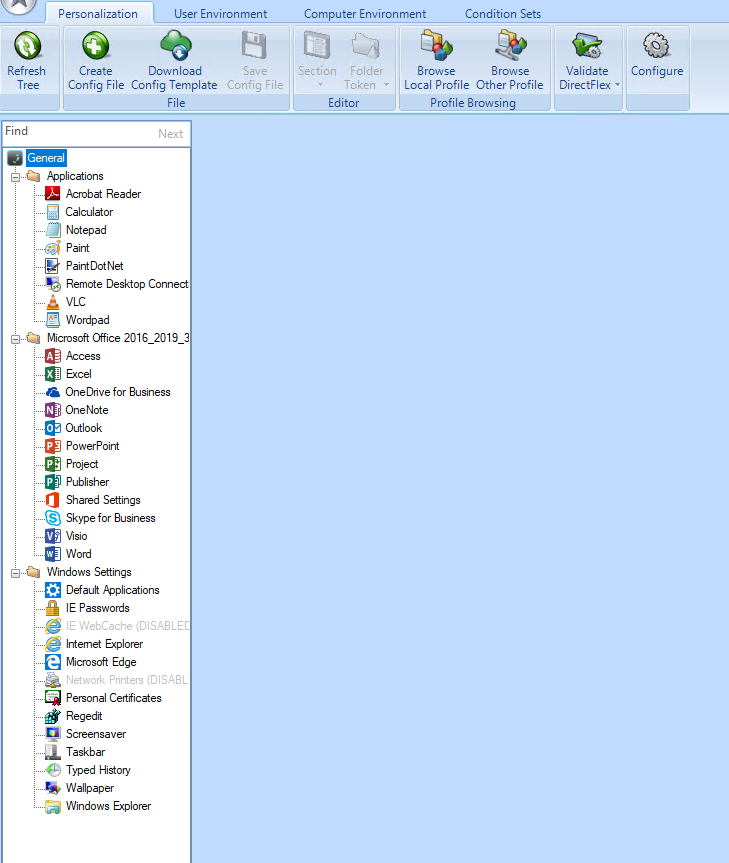
VMware Dynamic Environment Manager is available in Standard and Enterprise editions. The Standard edition provides a subset of the options available in the Enterprise edition, and the Computing Environment and Application Migration settings are also not available in Standard edition. DEM Enterprise Edition is the full-featured version of VMware Dynamic Environment Manager. In the following figure, you can see the DEM management console in the Standard and Enterprise versions.

As you can see, for the Standard Edition the Computer Environment and Application Migration ribbons are not available and the options are also limited compared to the Enterprise Edition. In this post, I will install the Enterprise version, let’s go!
1- Download the installer file from the Download VMware Dynamic Enviroment Manager page and extract the file and power on the Golden Image (virtual machine).
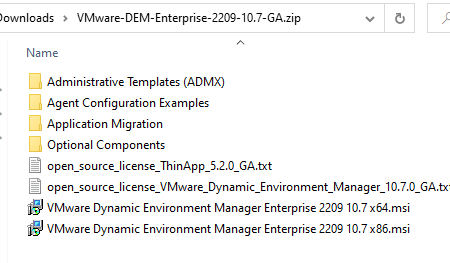
2- Copy the x86 or x64 installation file depending on the operating system’s architecture to your Golden Image. My Golden Image is Windows 11 64-bit, so I need to install VMware Dynamic Environment Manager 2209 10.7 x64.msi.
3- Run the installer and click Next.
4- Read and accept the End User License Agreement and click Next.
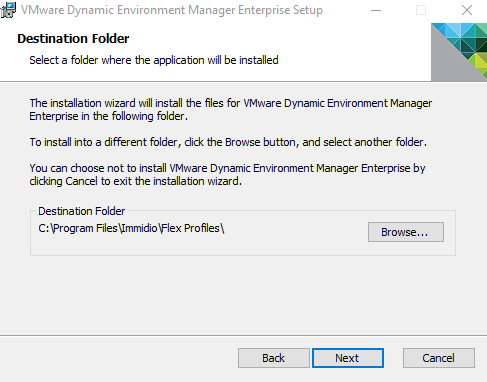
5- Accept the default destination folder and click Next.
6- On Choose Setup Type page, click the Typical button which contains the VMware Dynamic Environment Manager FlexEngine, Application Migration, and Self-Support tool. It contains all the functions except the Management Console, which is not needed by desktop users.
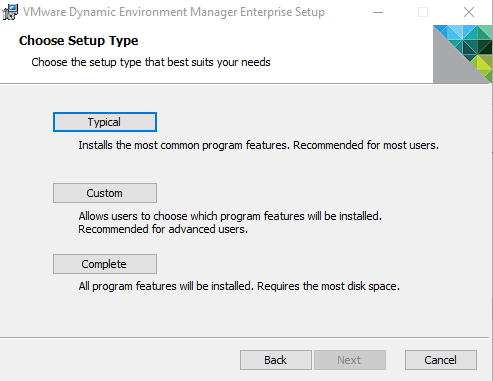
The Dynamic Environment Manager agent (FlexEngine) reads the centralized configuration file, applies settings, and saves those user settings that end users are allowed to control.
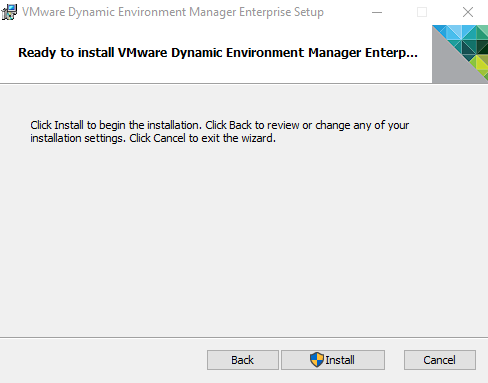
7- Click Install, and after the installation is complete, click Finish.
8- Shut down the Golden Image and take a Snapshot from it.
9- Update the desktop pool with the new version of Golden Image that includes DEM Agent. The following link shows you how to update the desktop with the new Snapshot.
Install DEM Management Console
You can use the Management Console to manage personalization and application configuration settings for end users. It can be installed on any supported Windows desktop or server that has access to the shared configuration folder (DEMConfig).
1- Copy the installation file “VMware Dynamic Environment Manager 2209 10.7 x64.msi” to the destination server or desktop that acts as the administration.
2- Run the installer and click Next.
3- Read and accept the End User License Agreement and click Next.
4- Accept the default destination folder and click Next.
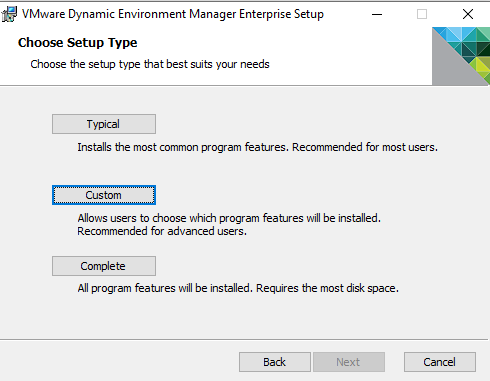
5- On Choose Setup Type page, click the Custom button.
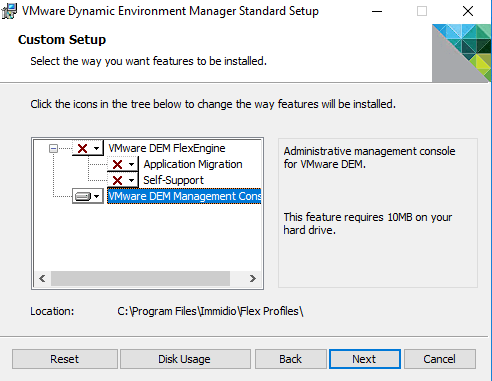
6- Deselect VMware DEM FlexEngine and select VMware DEM Management Console to install and click Next.
7- Click Install, and after the installation is complete, click Finish.
Group Policy Settings
After installing the Dynamic Environment Manager agent (FlexEngine) on desktops, you must configure it to run during Windows logon and logoff operations and read the centralized configuration file, apply settings, and save the user settings.
FlexEngine runs during Windows logon to get all the settings for the client device and apply them as soon as the user logs in. During Windows logoff, FlexEngine runs to save all the settings for the client device to the profile archives share. Let’s configure this agent!
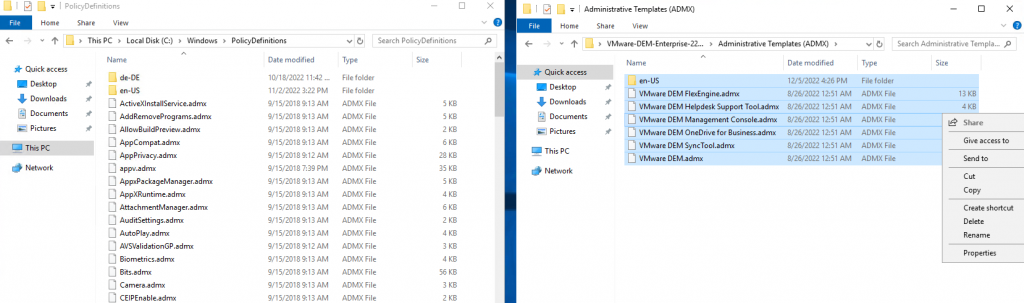
1- I extracted the Dynamic Environment Manager ZIP file in the last step to install DEM Agent and Management Console. In the same folder, there is a sub-folder called “Administrative Templates (ADMX)” which contains group policy templates for DEM.
2- Copy all the ADMX files from the Administrative Templates (ADMX) folder to the Sysvol share on your Domain Controller. The path is: “\\FQDN of Domain\SYSVOL\<domain-name>\Policies\PolicyDefinitions“.
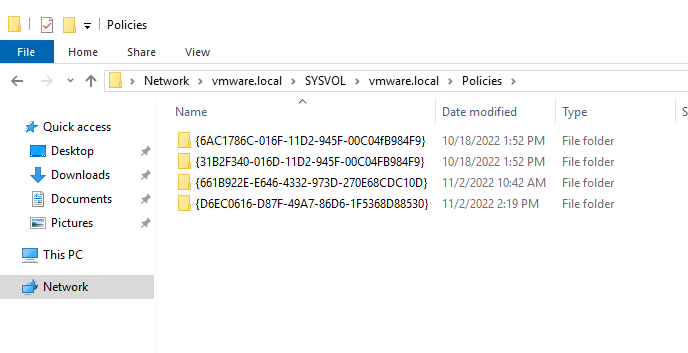
As you can see the folder “PolicyDefinitions” is not exist because the Group Policy Object (GPO) Central Store is not created by default in Active Directory, so if you don’t have a Central Store like me, copy the ADMX files to this location on the domain controller: “C:\Windows\PolicyDefinitions“.
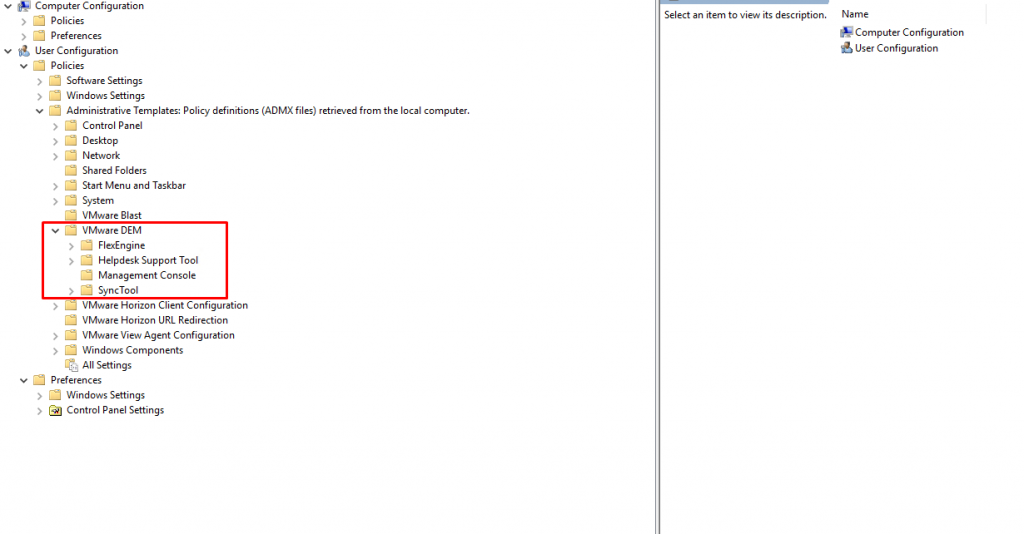
3- After that, If you open a GPO, you can see the new policy settings for VMware DEM under User Configuration.
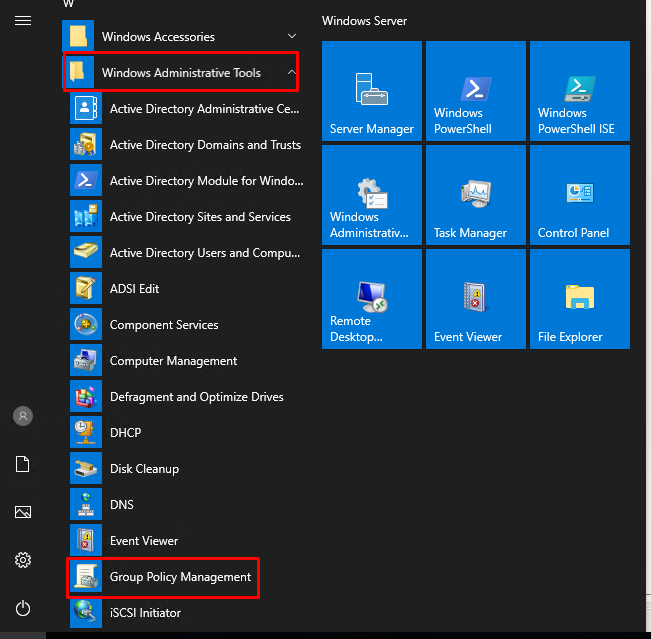
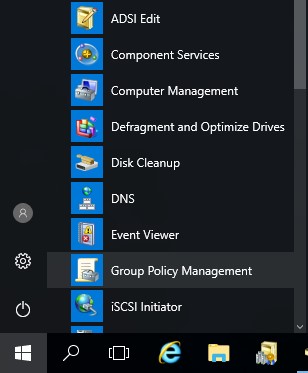
4- Create a new policy and configure the appropriate settings so DEM Agents can retrieve and apply their settings. Open Group Policy Management by navigating to the Start menu, Windows Administrative Tools, and then select Group Policy Management.
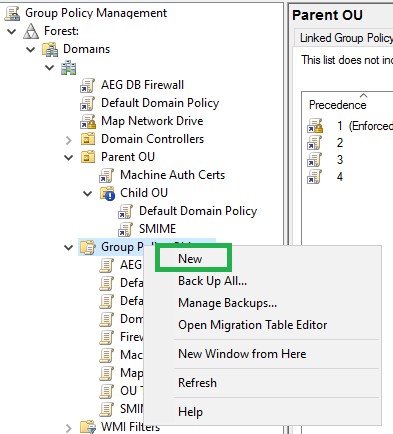
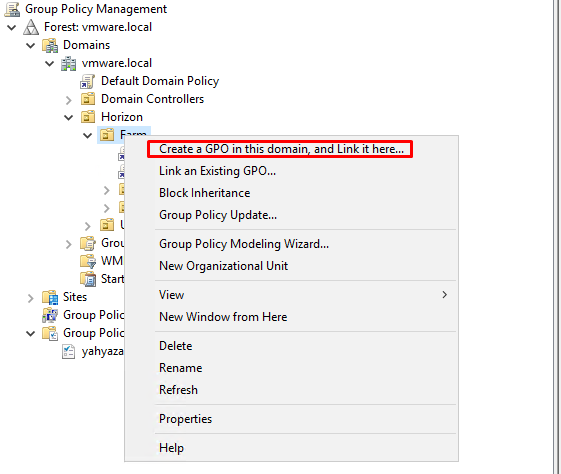
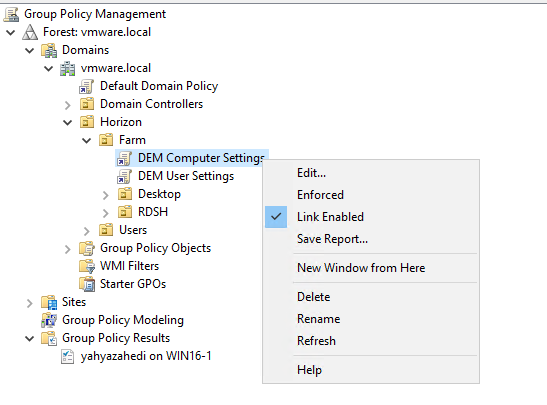
5- Right-click the desired OU and then select “Create a GPO in this domain, and Link it here” to create a new GPO and link it to this OU.
It is recommended to create at least one GPO for computer settings and one GPO for user settings.
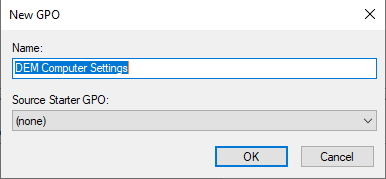
6- Give the new GPO a meaningful name and click OK. I have called them DEM Computer Settings and DEM User Settings.
7- Now you have two GPOs to which you can apply computer settings and user settings respectively. Right-click the “DEM Computer Settings” and click Edit.
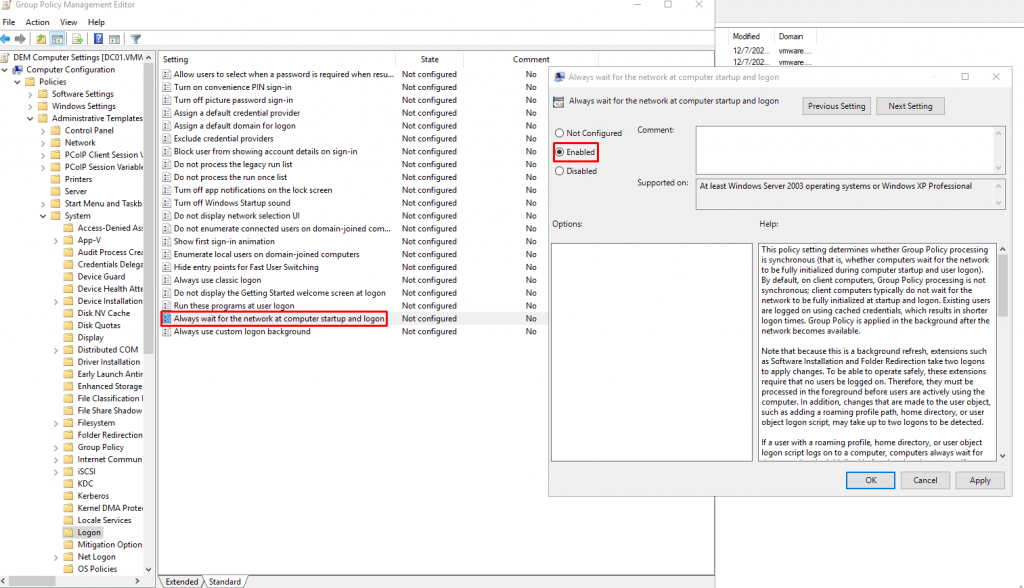
8- Navigate to Computer Configuration, Policies, Administrative Templates, System, and Logon. Configure the following policy settings to ensure that the DEM agent (FlexEnginge) runs completely during each login. The reset configurations are user configurations and you can close this policy.
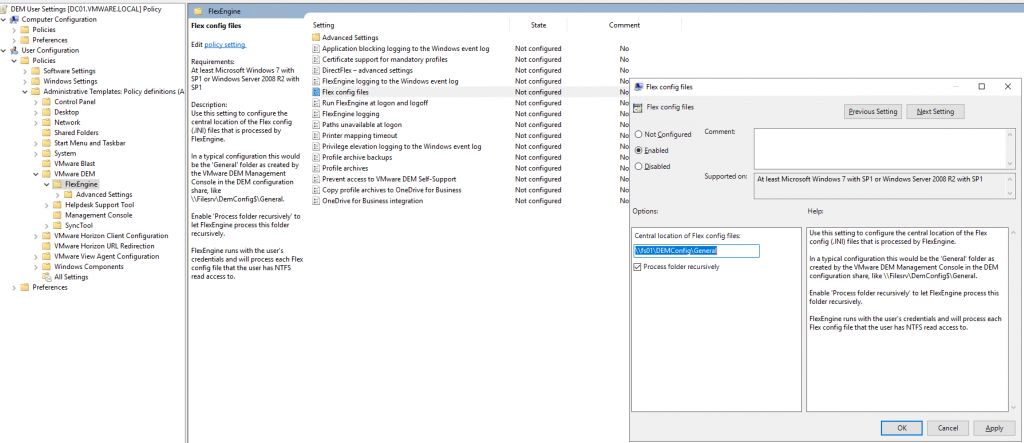
9- Now edit “DEM User Settings” and navigate to User Configuration, Policies, Administrative Templates, VMware DEM, and FlexEngine. Double-click Flex config files. Enter the path of the shared folder that was created for DEM configuration and add “\General” to the end of the path. For this example, the path is \\FS01.vmware.local\DEMConfig\General.
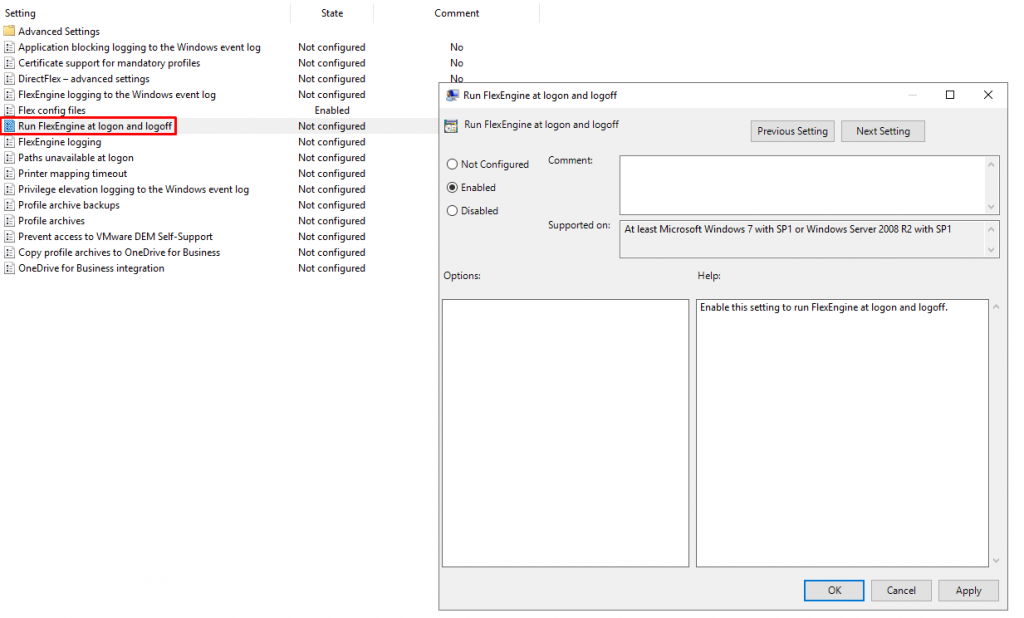
10- Double-click the “Run FlexEngine at logon and logoff” policy setting and enable the policy to run FlexEngine at logon and logoff.
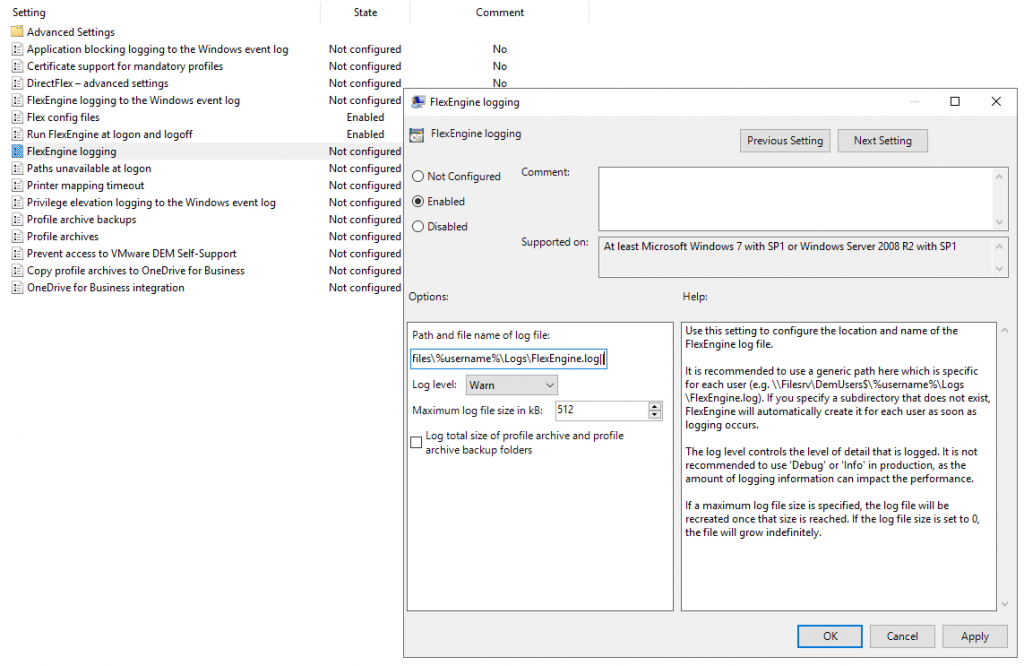
11- Double-click the “FlexEngine logging“ policy setting and set the policy to collect logs. Enter the path of the shared folder that was created for the DEM profile and add “%username%\Logs\FlexEngine.log” to the end of the path so that a unique subfolder will be created for each user and inside this user profile folder, a log folder is automatically created for each user. For this example, the path is \\fs01.vmware.local\DEMProfiles\%username%\Logs\FlexEngine.log
For the log level, it is recommended to use the default settings unless you actually need to troubleshoot something.
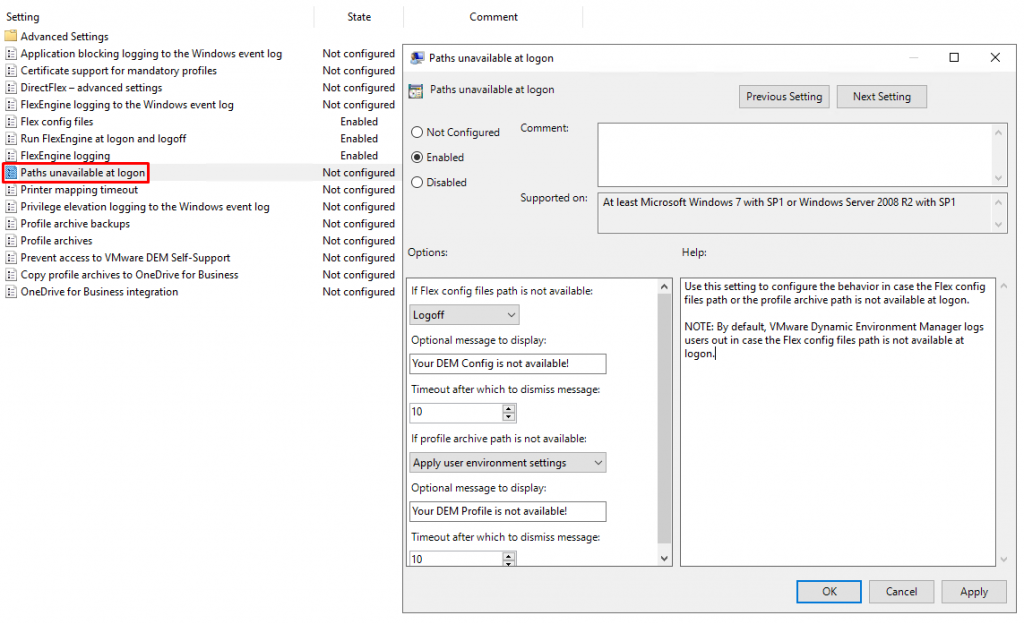
12- Double-click the “Paths unavailable at logon“ policy setting and set the policy that determines DEM’s behavior when the path to the configuration files or profile archives is unavailable at login. You can enter your custom messages to be displayed when it happens.
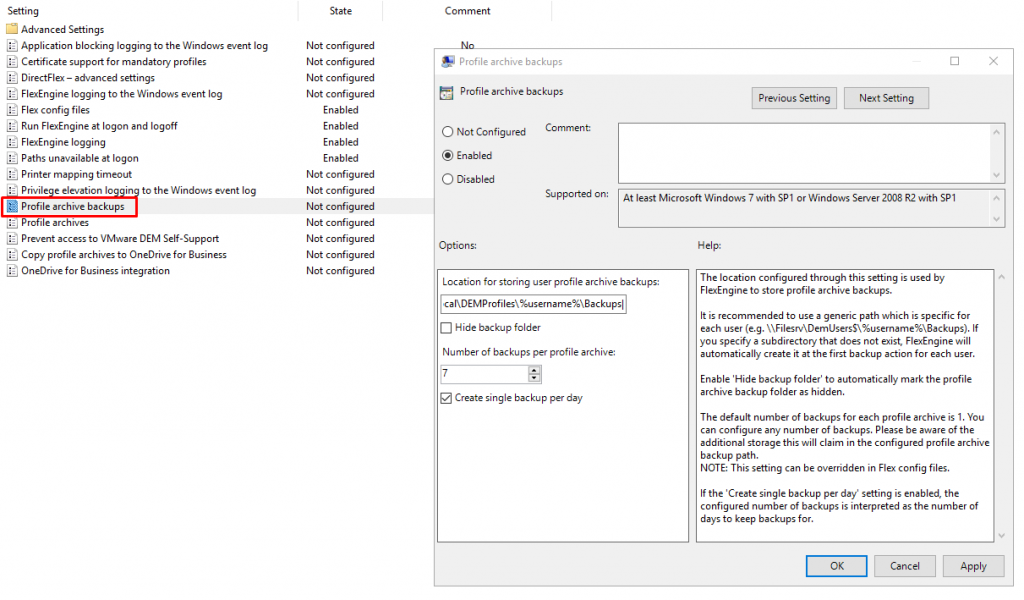
13- Double-click the “Profile archive backups“ policy setting and set the policy to configure the backup location for profile archives. I enter the path of the shared folder that I created for the DEM profile and add “%username%\Backups” to the end of the path. A backup folder is automatically created for each user under their profiles. For this example, the path is \\fs01.vmware.local\DEMProfiles\%username%\Backups
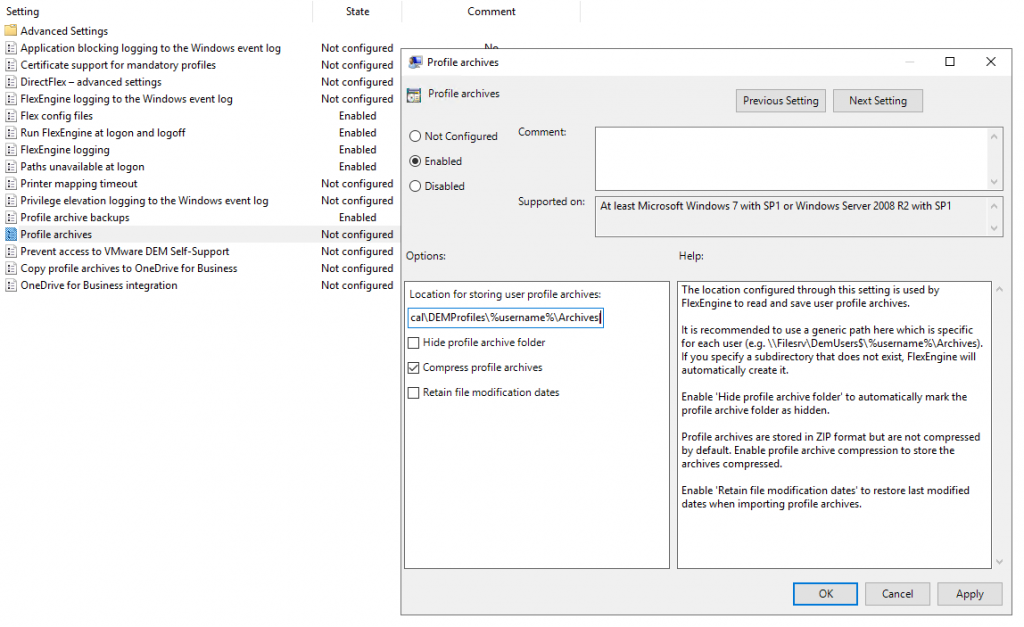
14- Double-click the “Profile archive “ policy setting and enter the path of the shared folder created for the DEM profile and add “%username%\Archives” to the end of the path so that the Archives folder is automatically created for each user under their profiles. For this example, the path is \\fs01.vmware.local\DEMProfiles\%username%\Archives
These were the necessary configurations to get DEM Agent running, but there are many settings that you can customize depending on your environment and design plan.
Dynamic Environment Manager Configurations
DEM does not manage Windows applications or environment settings by default. You must initialize it to specify which applications and settings it should manage. To perform an initial configuration of Dynamic Environment Manager, do the following
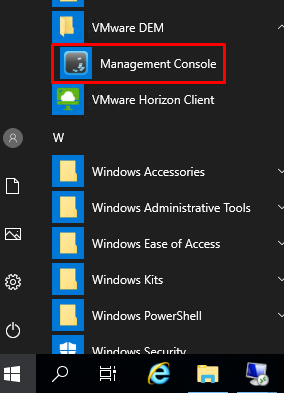
1- Launch the Management Console from the Start Menu in the VMware DEM folder.
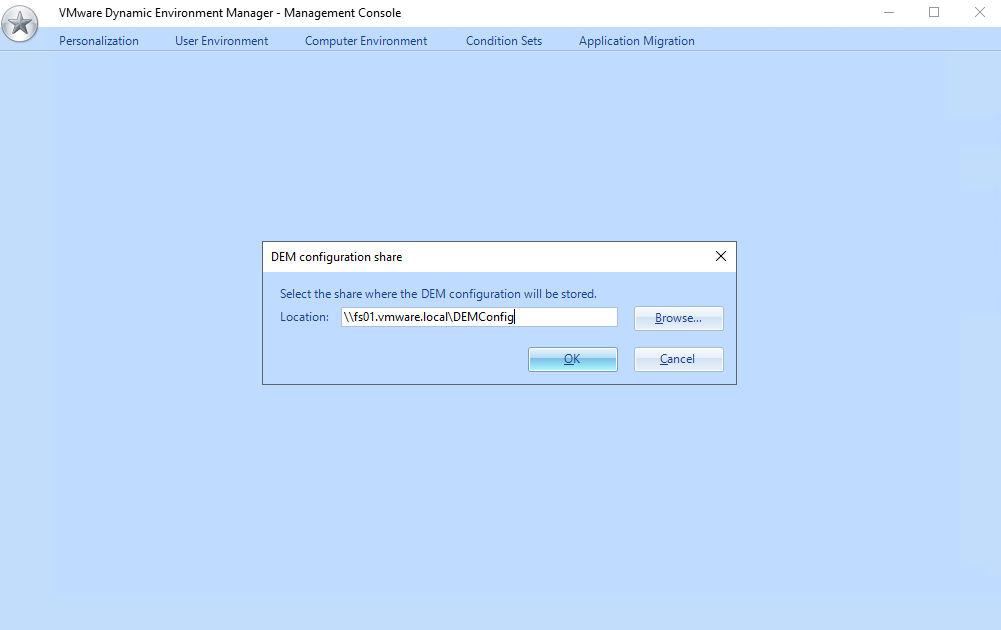
2- The first time, you are prompted to enter the path to the DEM configuration shared folder and click OK.
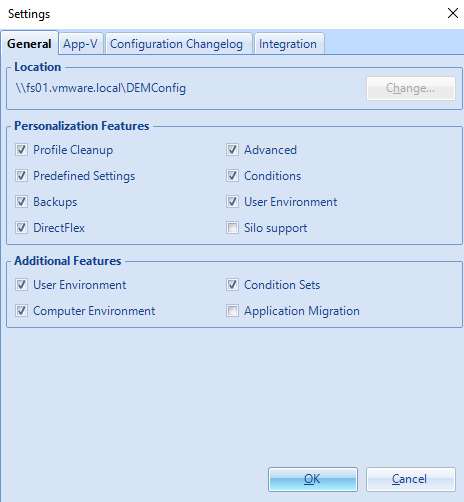
3- Leave the settings as default and click OK.
4- In the Personalization tab, click Easy Start and select the version of Microsoft Office that is installed on the desktop pool.
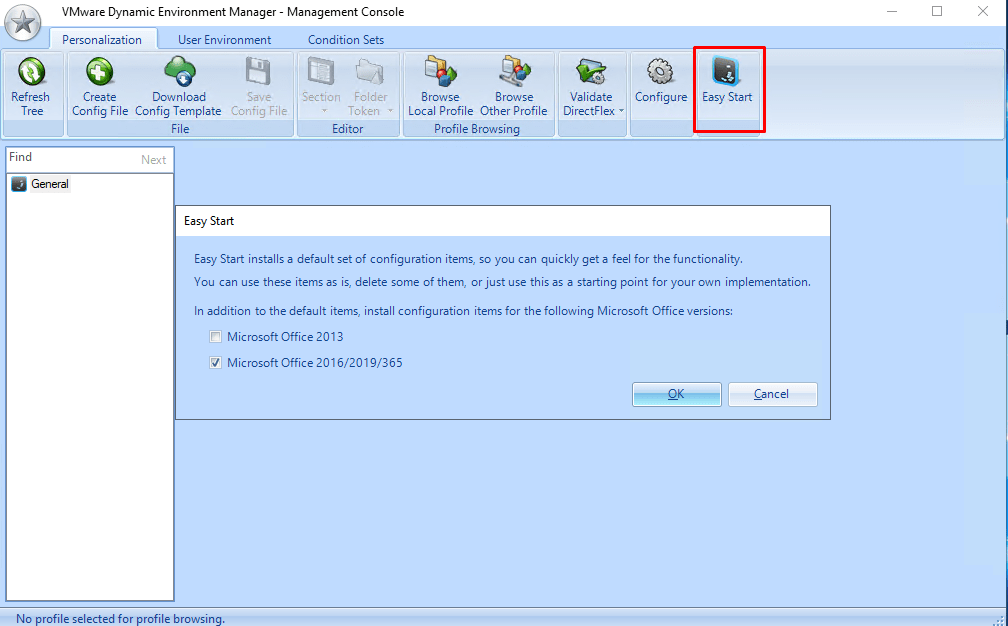
5- Click OK when configuration items have been installed successfully.

6- In the left pane, under General, there are Applications whose settings you can customize. Check the default settings and make the changes you want.
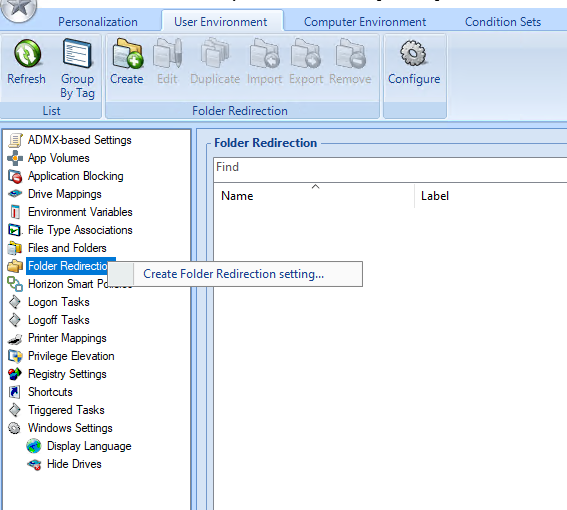
7- Navigate to the User Environment tab and right-click on Folder Redirection and select the only available option!
8- Specify the Name and Remote path, the path of the shared folder that was created for folder redirection, and add “\%username%” to the end of the path so that a unique subfolder will be created for each user. For this example, the path is \\fs01.vmware.local\FolderRedirection\%username%. Select the folders you want to redirect to the shared folder and click Save.
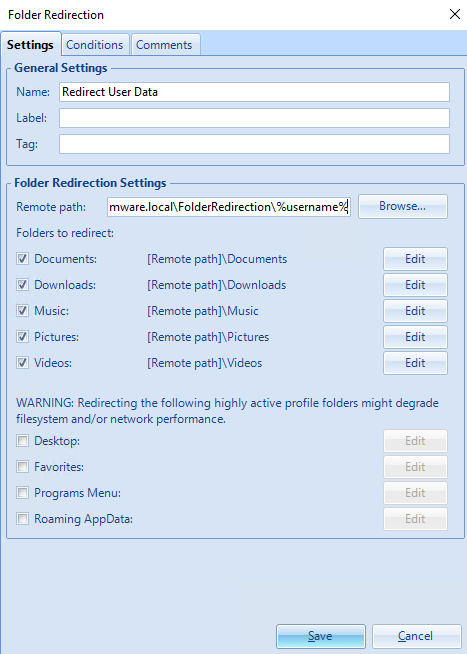
For performance reasons, it is not recommended to redirect folders such as AppData and the Programs Menu.
End users can now switch between devices or desktops while preserving custom application settings and Windows personalization settings. When a user logs in to a desktop, DEM reads the profile archive file for the user profile and configures the desktop based on that file so that settings are preserved across sessions.
Test User Personalization
As I mentioned in this post when you have a floating desktop pool, users get a random desktop every time they log in, so users do not use the same virtual desktop for subsequent logins. In this exercise, I will log in to a desktop, save some files, change some application settings, log out, and then log in again and verify that the settings have persisted across sessions.
1- Use Horizon Client to log in to the Horizon desktop with an entitled user.
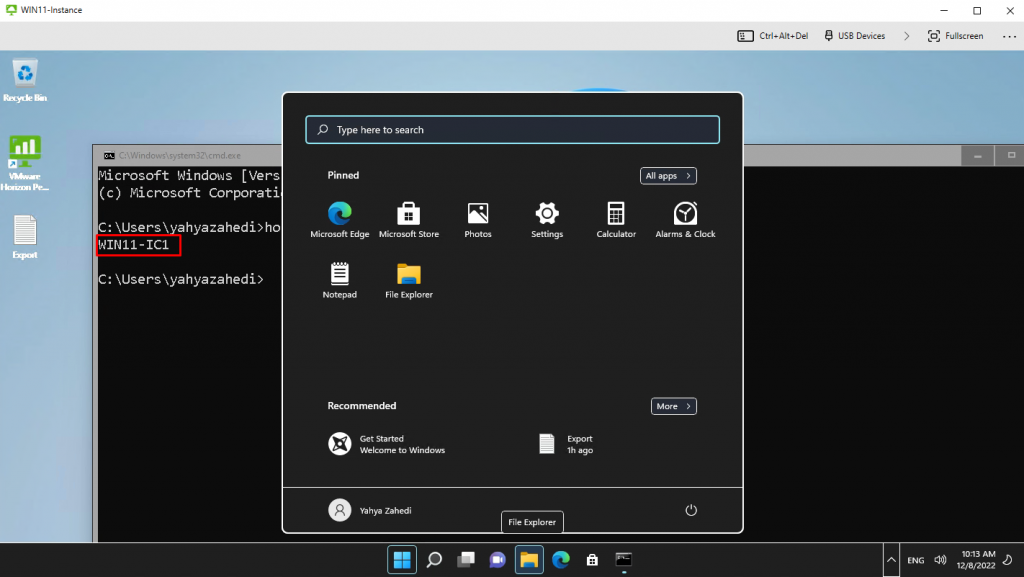
2- Create some files and make some personal changes on your desktop, for example, I changed the theme of my desktop and created a file in Desktop. As you can see I logged in to the virtual machine “WIN11-IC3“.

3- I logged out of this session and connected to the desktop again. Since I am using a floating desktop pool, It assigned me a new virtual machine “WIN11-IC1“, but as I expected my files and changes are preserved.
I hope this is informative for you. If you have any questions, please do not hesitate to contact me.
I configured exactly as your guide but it’s not worked. Can your show me how to troubleshoot this problem. Thank you.
Hi David,
What is the problem exactly? Could you check if ADMX is visible in Group Policy? Has the policy been applied for users? Could you verify if the policy is applied when you log in?
I still missed appdata roaming users complaining that their settings got missed if they sign-out from Horizon. After I reconfigure folder redirection I enable roaming app data to be redirected. But still the roaming app data not redirected. How I fix this issue
i checked all these and still not applying the profile
Check the log file and events log.