To manage OS patches and software updates with instant clones, you can use the push-image operation for the patching process with zero downtime. You start by preparing a new virtual machine and snapshot and then scheduling a push-image. Horizon deletes old desktops that are unused and quickly create new desktops, for other desktops, it waits until the user logs off and then recreates those desktops. This approach eliminates boot storms, reduces storage IOPS, and creates less of a load on the vCenter Server.
Horizon 8 Series:
- Overview Horizon
- Install Horizon Connection Server
- Horizon Initial Configuration
- Deploy an Instant-Clone Desktop Pool
- Deploying Published Desktops and Applications
- Update an Instant-Clone Desktop Pool
- Configure Dynamic Environment Manager
- Deploy and Configure Unified Access Gateway
- Configure Workspace ONE Access – Part 1
- Configure Workspace ONE Access – Part 2
- Configure Workspace ONE Access – Part 3
As I mentioned, to perform this exercise, you must have a new golden image and snapshot or a new snapshot from the current golden image. One option is to power on the current golden virtual machine and install the operating system and software updates and then power it off and create a new snapshot for this virtual machine. Another option is to clone the current golden virtual machine, make changes to the cloned virtual machine and then create a snapshot of it.
Scenario
I currently have a desktop pool “WIN11-Instance” that includes Windows 11 desktops with the following configurations:
- 2 CPU cores
- 4 GB of memory
I plann to update the operating system, install the latest patches for the softwares and increase the memory for the desktops to 8 GB and the CPU to 4 cores. So I power on the golden VM and install the latest updates and patches on it, then shut it down and create a new snapshot.
Push a new image to a desktop pool
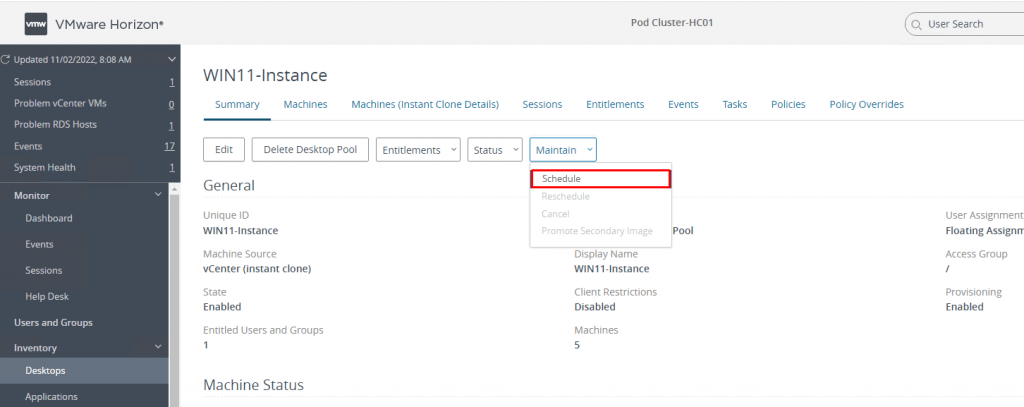
1- In the Horizon console, navigate to Inventory, Desktops and click on the name of the desktop pool.

2- On the Summary tab, click the Maintain button, and select Schedule from the drop-down list.
3- On the Image page, select the new snapshot. It is also possible to select a different golden image, but for now I made the changes in the current golden virtual machine, so I choose only the new snapshot.

3- On the same page, scroll down and in the VM Compute Profile Settings section, change the CPU to 4 and RAM to 8. If you look at the hardware configuration of the golden virtual machine, you will notice that the virtual machine has 2 CPU cores and 4 GB RAM. You have the option to change these settings in the golden image or here. I prefer to change these settings here.

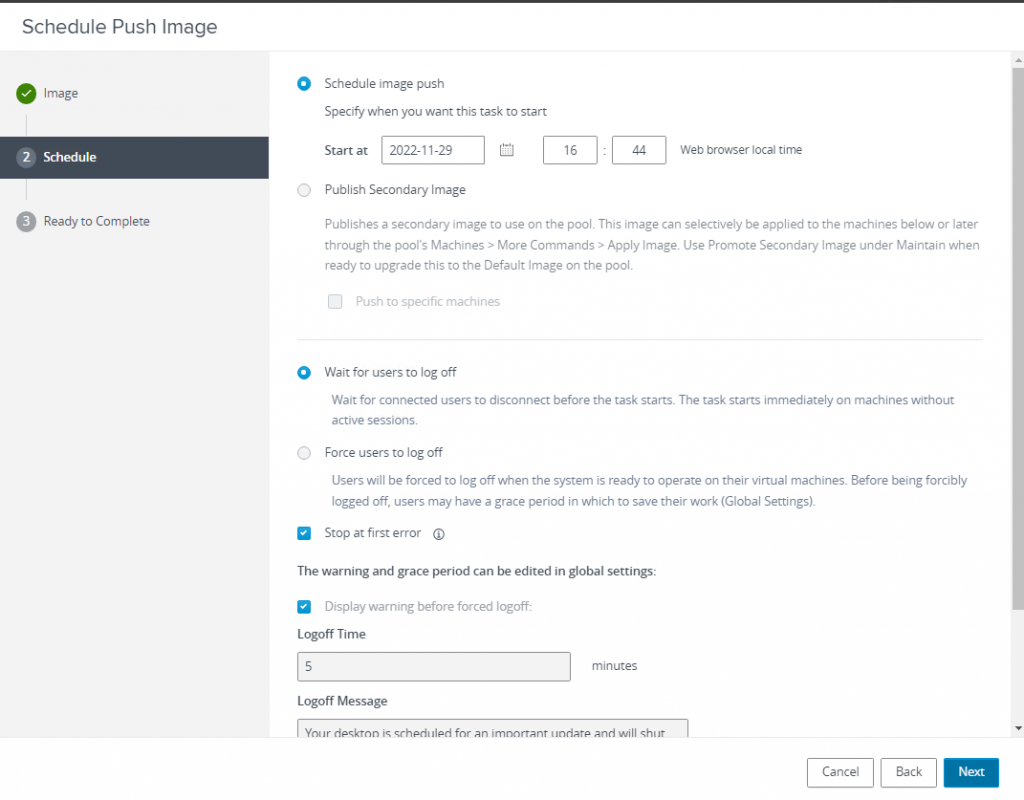
4- On the Schedule page, leave the defaults, and click Next. The default behavior is set to Wait for users to log off (recommended), but you can Force users to log off, maybe the changes that you made are critical and you can’t wait for the user to log off.
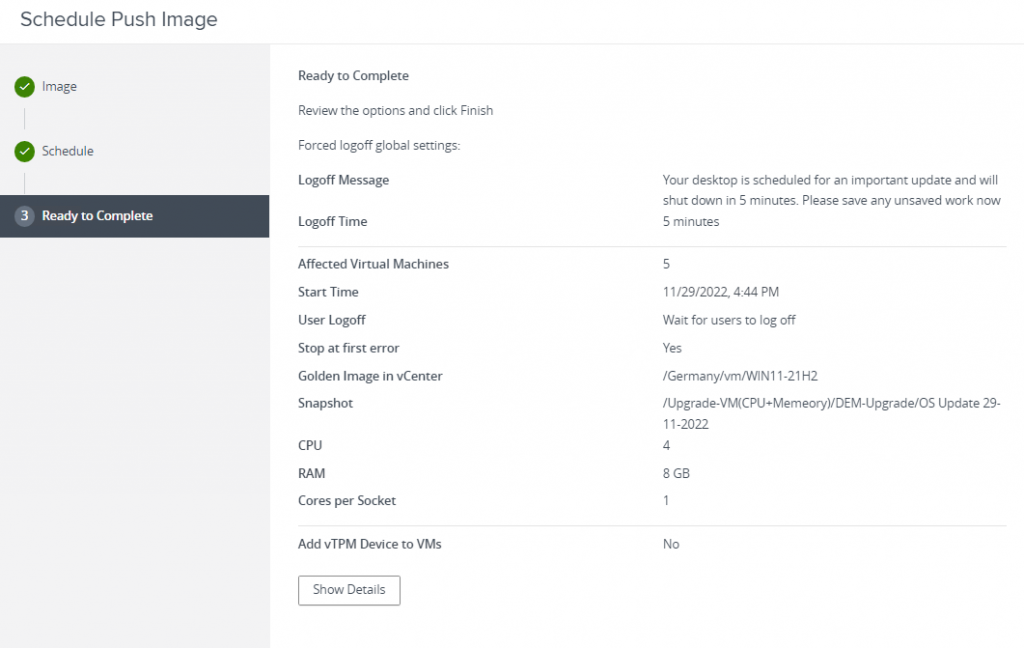
5- On the Ready to Complete page, review the settings and click Finish.
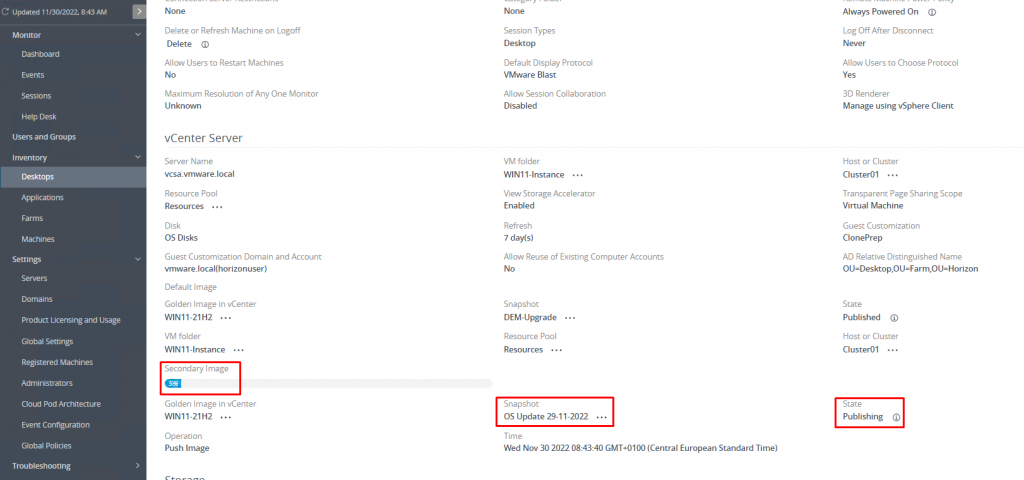
6- You can monitor the progress of a push image operation on the Summary tab, which displays the current image and pending image information, including any error messages. In the vCenter Server section, under Secondary Image, the progress bar shows the percentage of completion and the State shows current status and changes from Publishing to Published after the successful completion of the operation.
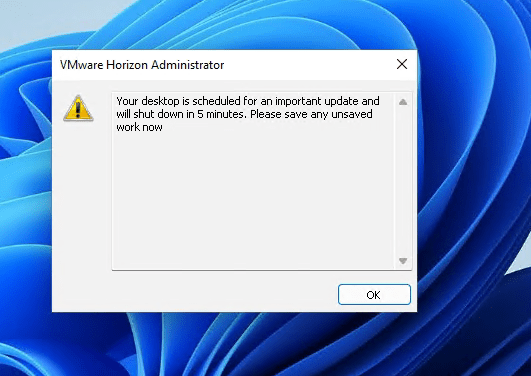
7- If you set Force users to log off in the scheduling section, users who are currently using desktops will be confronted with the following warning, which indicates that they have only 5 minutes to save their unsaved work, and then the operating system will shut down automatically.
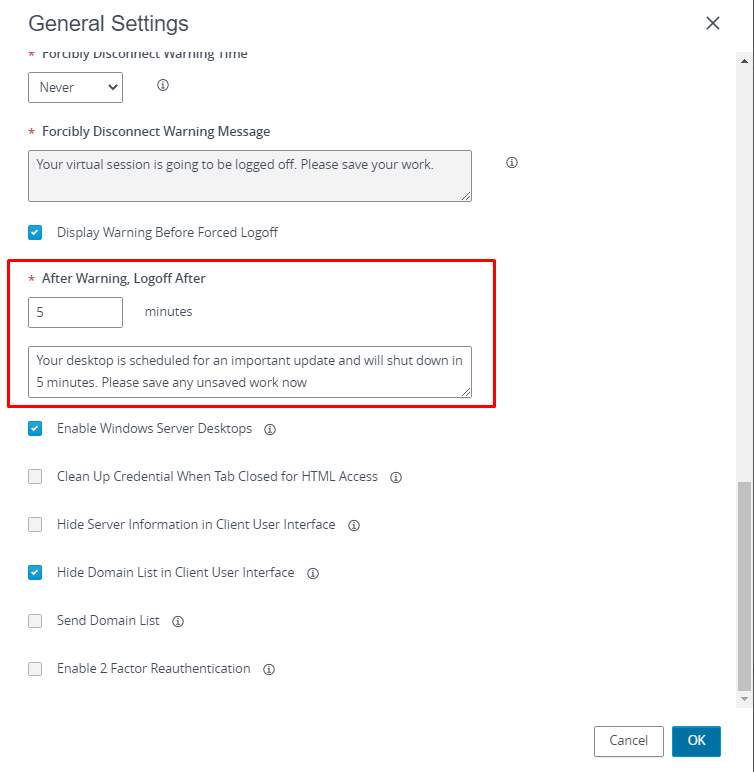
8- To edit this message, navigate to Settings, Global Settings, and click Edit.
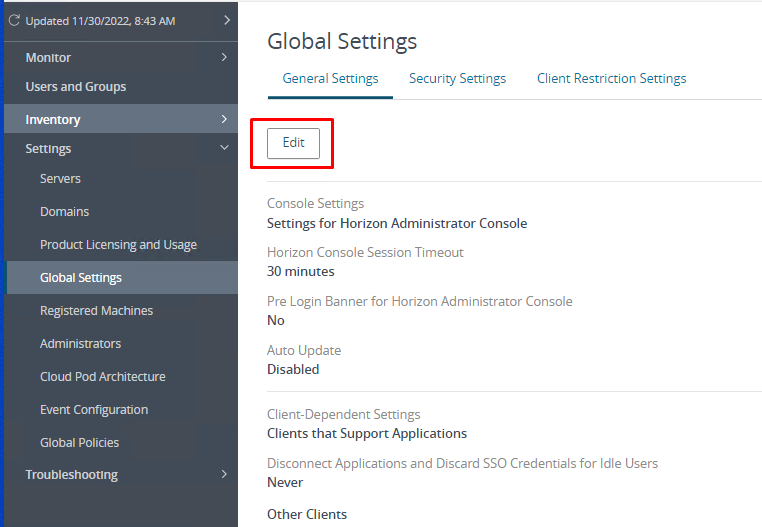
9- Scroll down and change the message according to your needs.
I hope this is informative for you. If you have any questions, please do not hesitate to contact me.