Welcome to my VMware Horizon series. In the last post, I implemented and configured Workspace ONE Access and now I want to install and configure the Workspace ONE Access Connector. Workspace ONE Acces connector is a VMware Workspace ONE Access component that integrates with infrastructure such as Active Directory, RSA SecurID, and VMware Horizon to provide directory integration, user authentication, and virtual apps integration.
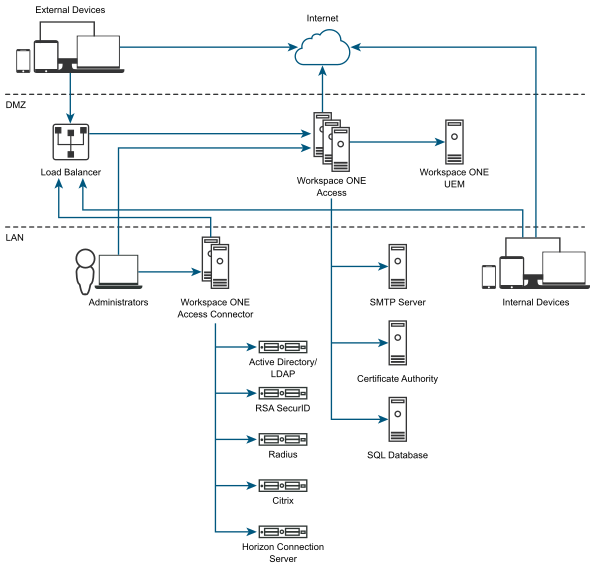
As I mentioned in the previous post, I configured Workspace ONE Access on the DMZ network and will configure the Connector on the internal network as shown in the following image.
Horizon 8 Series:
- Overview Horizon
- Install Horizon Connection Server
- Horizon Initial Configuration
- Deploy an Instant-Clone Desktop Pool
- Deploying Published Desktops and Applications
- Update an Instant-Clone Desktop Pool
- Configure Dynamic Environment Manager
- Deploy and Configure Unified Access Gateway
- Configure Workspace ONE Access – Part 1
- Configure Workspace ONE Access – Part 2
- Configure Workspace ONE Access – Part 3
Installing Workspace ONE Access
1- In order to install Workspace ONE Access Connector you need a Windows Server that is a member of the domain. I have already created a new virtual machine and installed Windows Server 2019 on it and joined it to the domain. For more information and systems requirements click here.
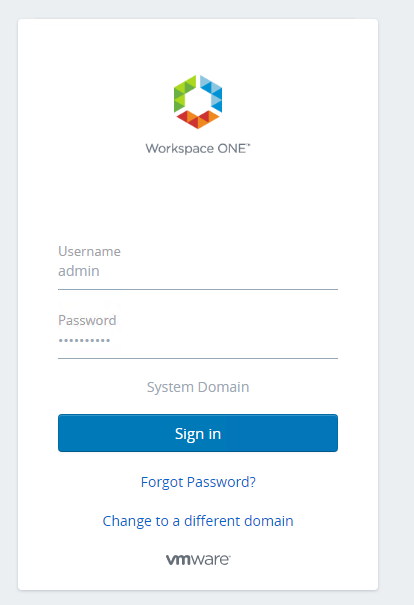
2- After you prepared your Windows Server, log in to the Workspace ONE Access console “https://FQDN of Workspace ONE Access/SAAS/admin” as the System domain admin.
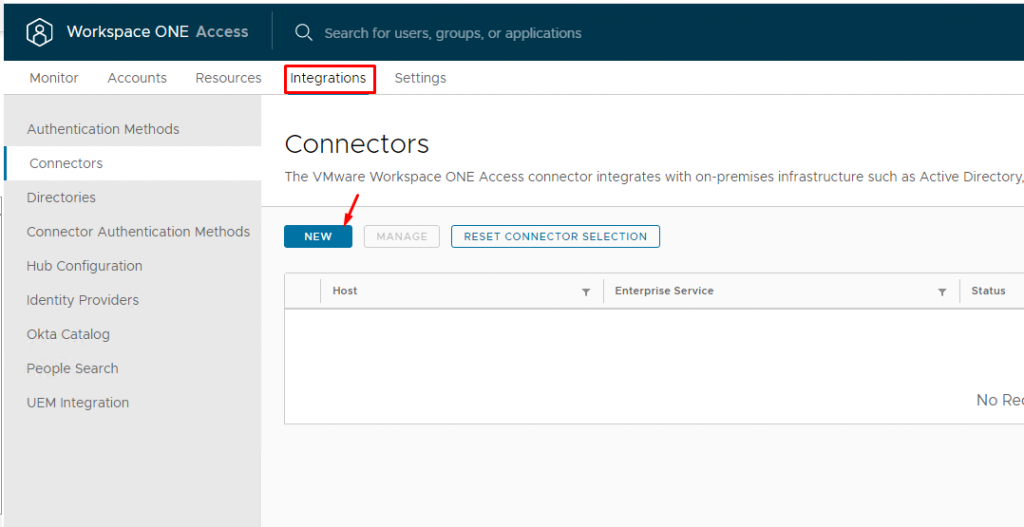
3- Navigate to the Integrations tab and from the left pane select Connectors and click New.
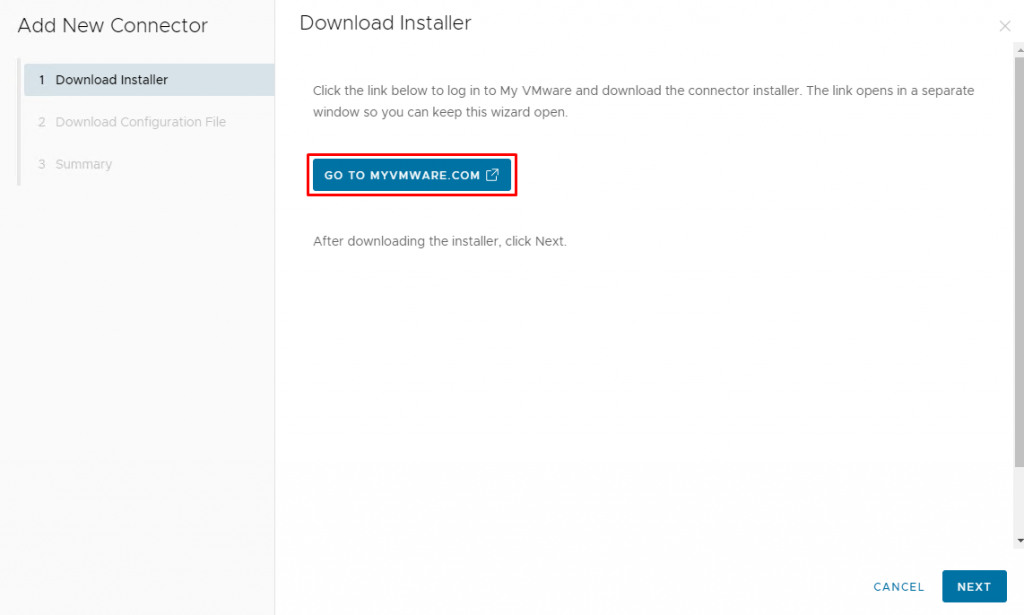
4- Click GO TO MYVMWARE.COM to be redirected to the VMware portal.
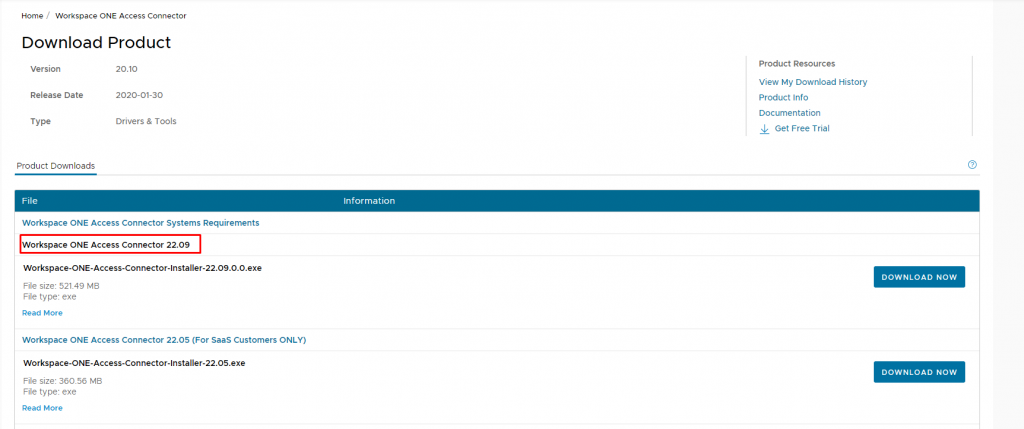
5- Download the Workspace ONE Access Connector Installer file.
6- After downloading the installer, return to the Admin Console and click Next.
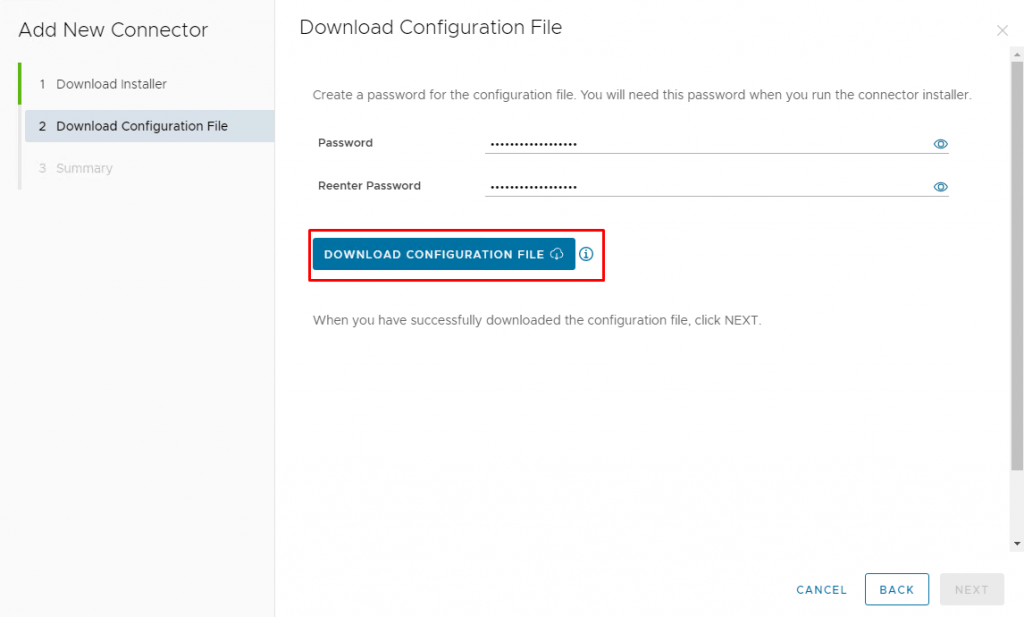
7- On Download Configuration File page, enter a password for the configuration file and download it.
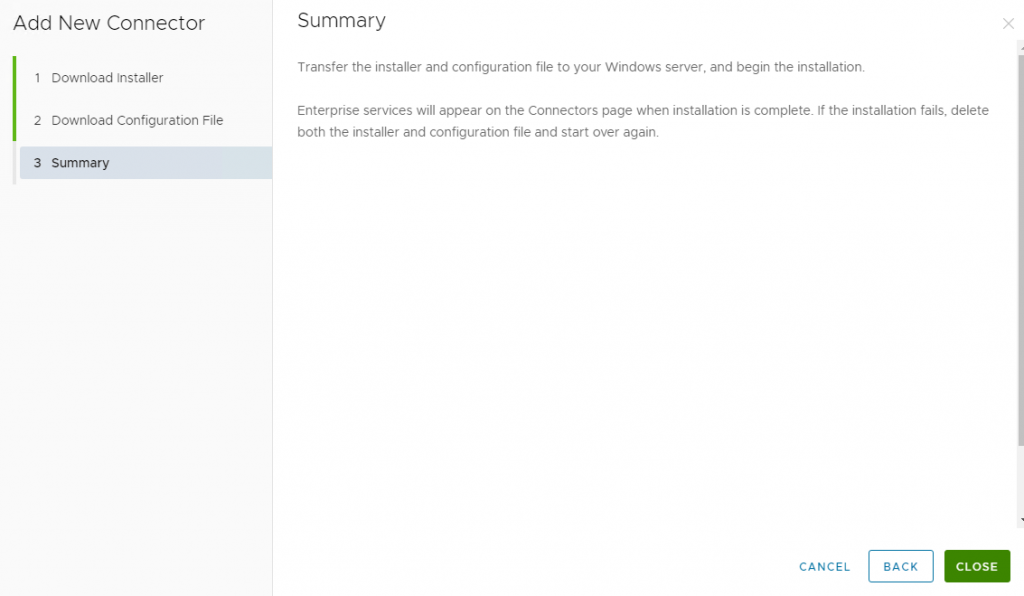
8- Click Close in the wizard and Copy the installer and configuration file to the Windows Server that you prepared for this purpose.
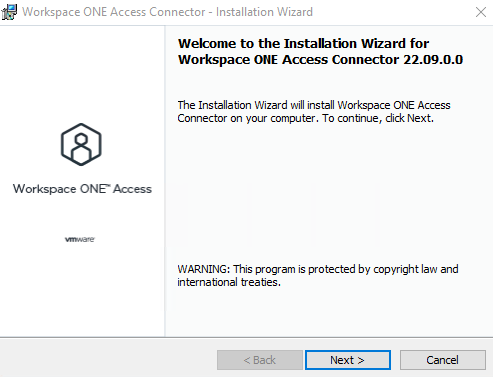
9- Run the installer file as Administrator and click Next on the Welcome page. If the server does not have Microsoft .NET Framework 4.8 Web, it will be installed first, and then installation proceeds.
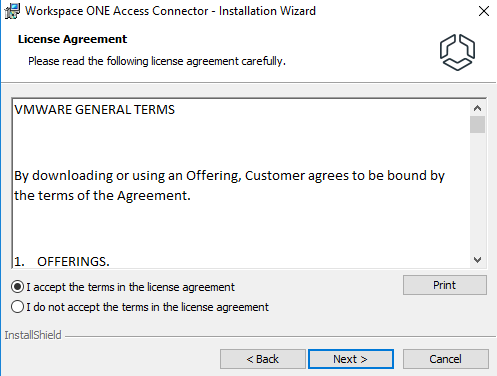
10- Accept the license agreement and click Next.
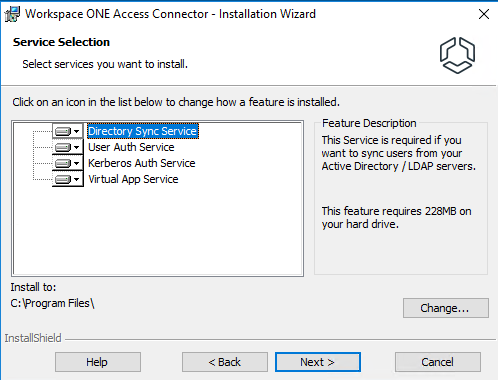
11- Here you can select which service to install, leave all as default and select Next.
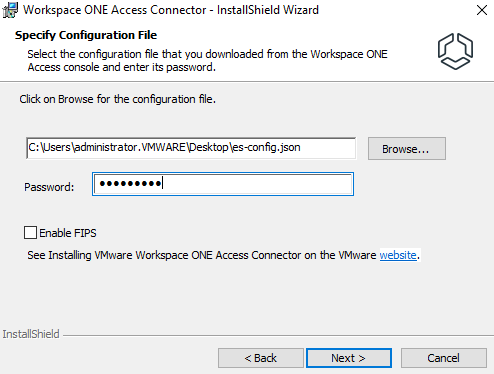
12- Select the downloaded configuration file and enter the password you set for it, then click Next.
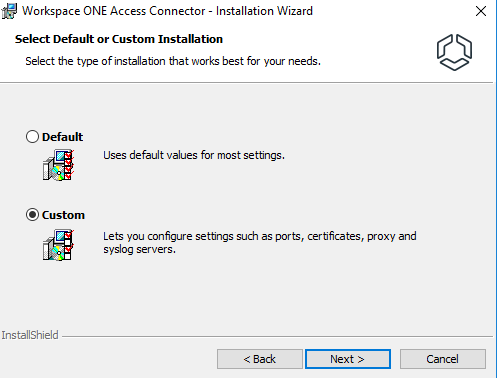
13-Select Custom installation.
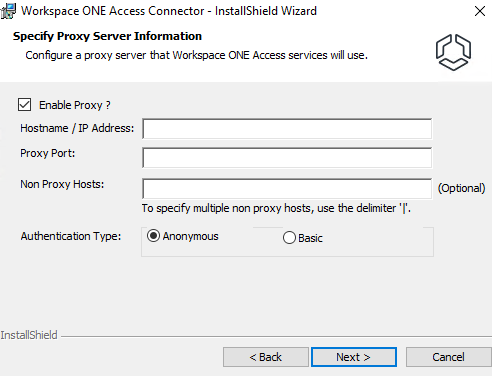
14- Select Enable Proxy box if required. Since I don’t have a proxy server, I skipped that and deselect Enable Proxy.
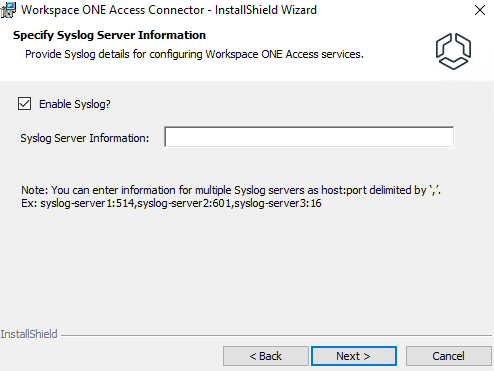
15- Select Enable Syslog box if you want to use an external Syslog server to store event messages. Enter the Syslog server’s IP address or FQDN with the port number, Since this is my lab environment, I skipped this step, because I don’t have a Syslog server.
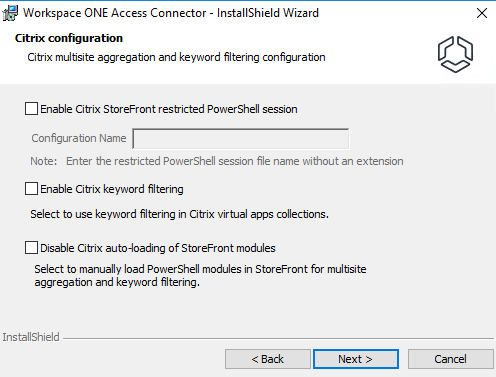
16- Currently we do not have a Citrix environment, so click Next.
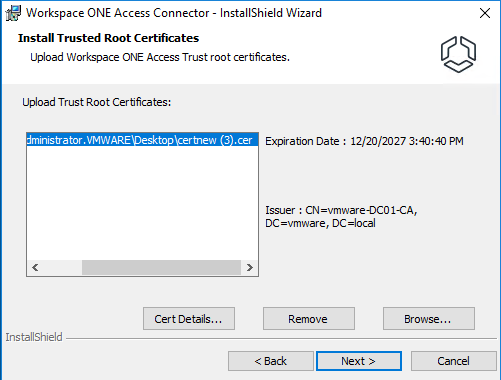
17- Click Browse to upload the root or intermediate certificates. The root certificate is necessary to:
- Establish trust between the Connector and the Horizon Connection server
- Establish trust between the enterprise services and the Workspace ONE Access
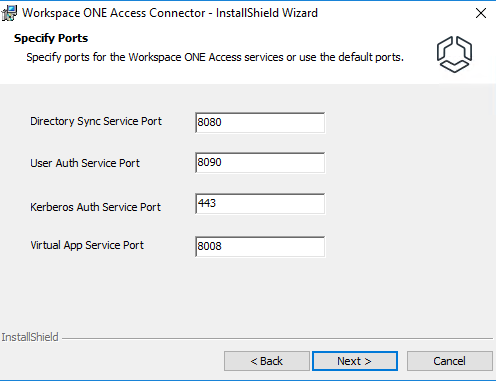
18- Accept the default port and click Next.
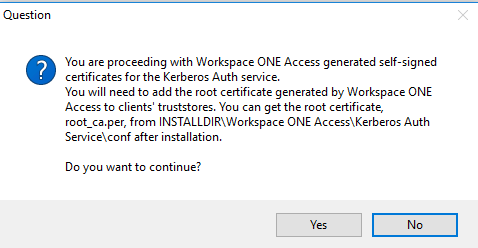
19- Select the certificate to use for the connector server. However, if you do not have a certificate, a self-signed certificate is generated.

If you use a self-signed certificate, you will be faced with this question in the next step, which says that you need to add the root certificate to the client’s truststores.
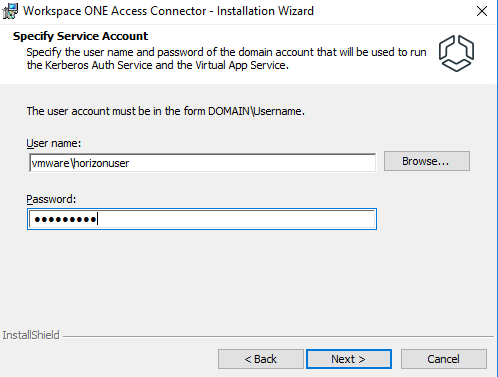
20- Enter the username and password of the domain user account to use to run the Kerberos Auth service and Virtual App service or click Browse and select the domain and user.
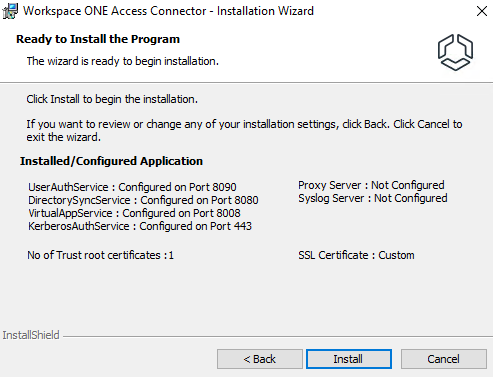
21-Review your selections and click Install.
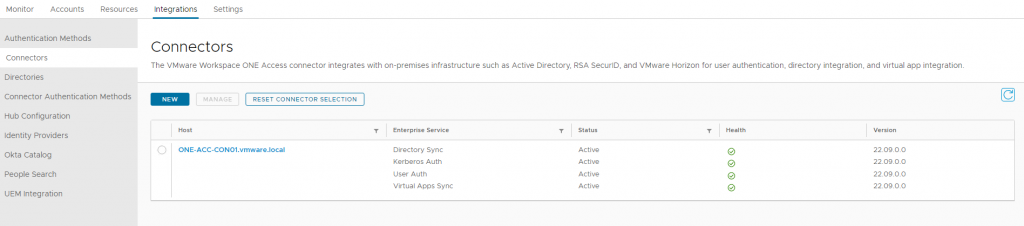
22- After installation finishes successfully, return to Workspace ONE Access and verify that the new services appear and are in an Active state.
Configuring Active Directory Connection
1- In the Workspace ONE Access console, under the Integrations tab, select Directories and click Add Directory and select Active Directory.

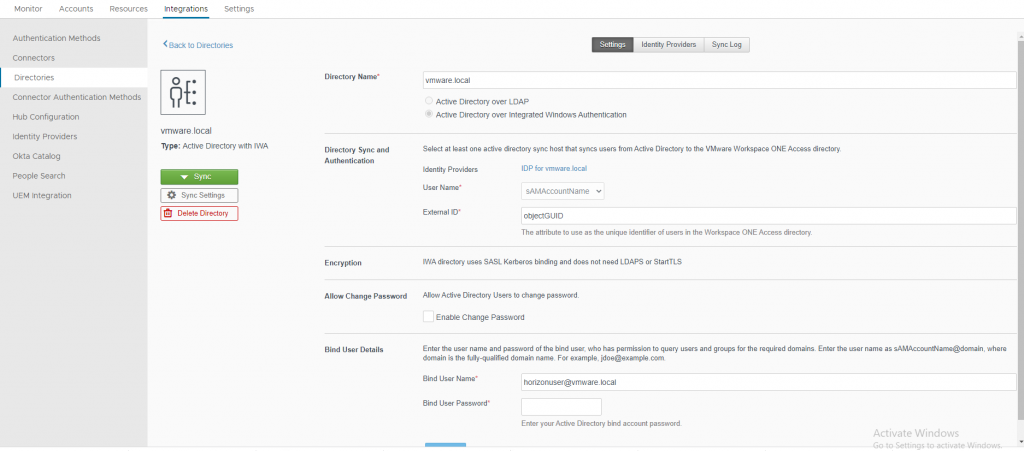
2- Enter a name for this directory and select Active Directory over Integrated Windows Authentication.
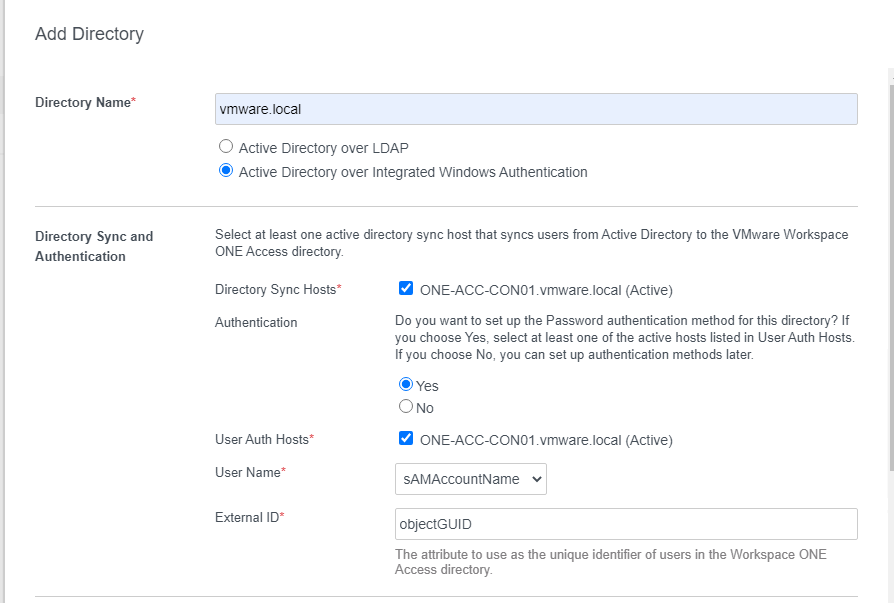
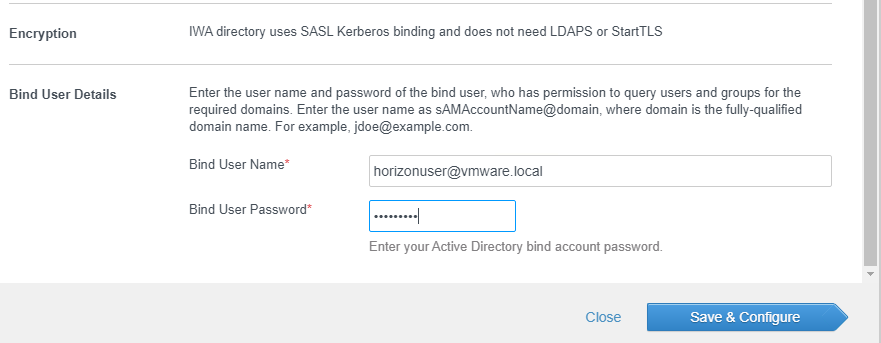
3- Enter the user name in the following format to query users and groups in Active Directory. This user must have the following permission in Active Directory and then click Save & Configure.
- Read
- Read All Properties
- Read Permissions
A user account with a non-expiring password is recommended.
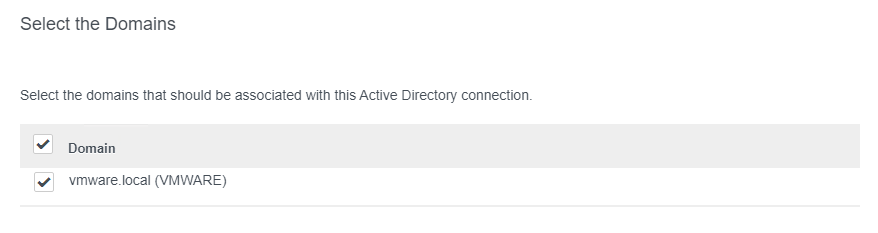
4- Select the domain and click Next.
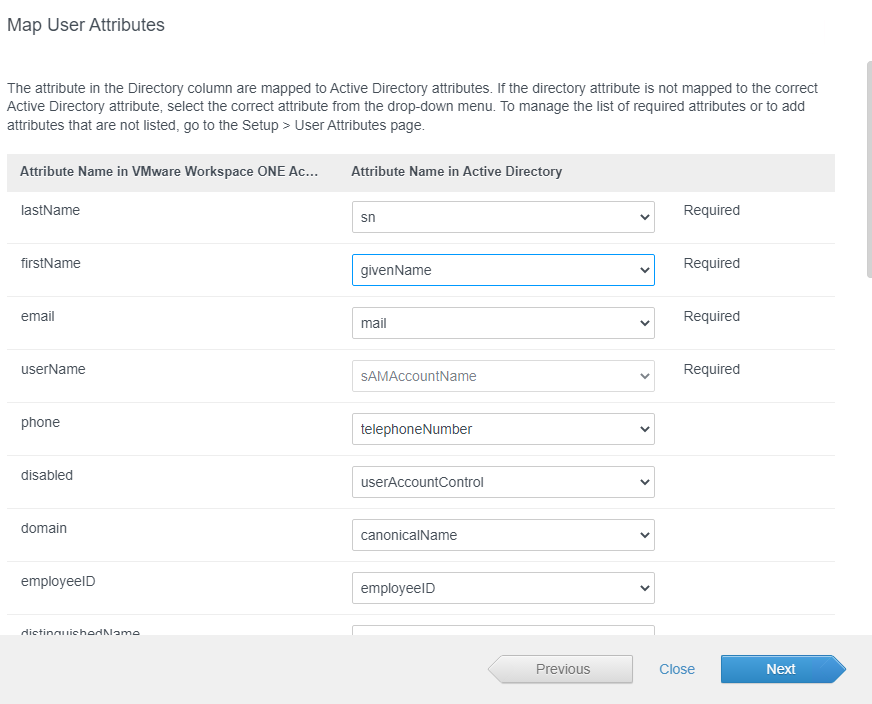
5- Verify that attribute names are mapped to the correct Active Directory attributes. Make changes if necessary and click Next. Since these attributes are marked as required, it is important that they have a value. In my case, my users don’t have email addresses, so I have two choices: I can set a value for this attribute or I can change it from “required” to “optional”. Let’s continue and I will explain further.
6- Enter the Base DN to search for users and groups under that DN and click the Plus button. For example, if you want to search for all users and groups under Users in Active Directory, enter:
CN=users,DC=vmware,DC=local
If you specify a parent DN, as I did, all active directories will be searched.
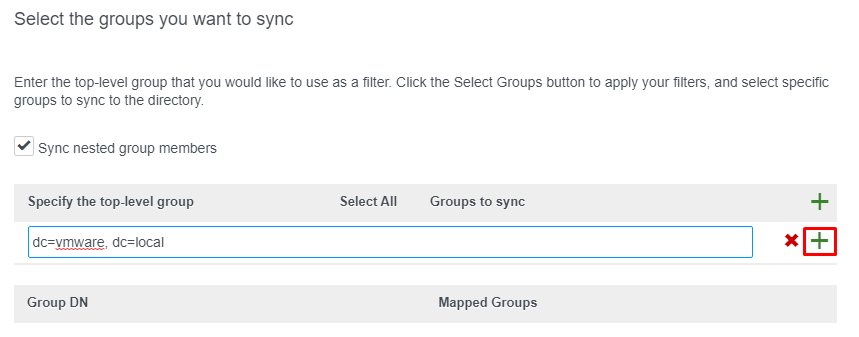
7- Click on Select Groups to specify the group instead of selecting all of them.

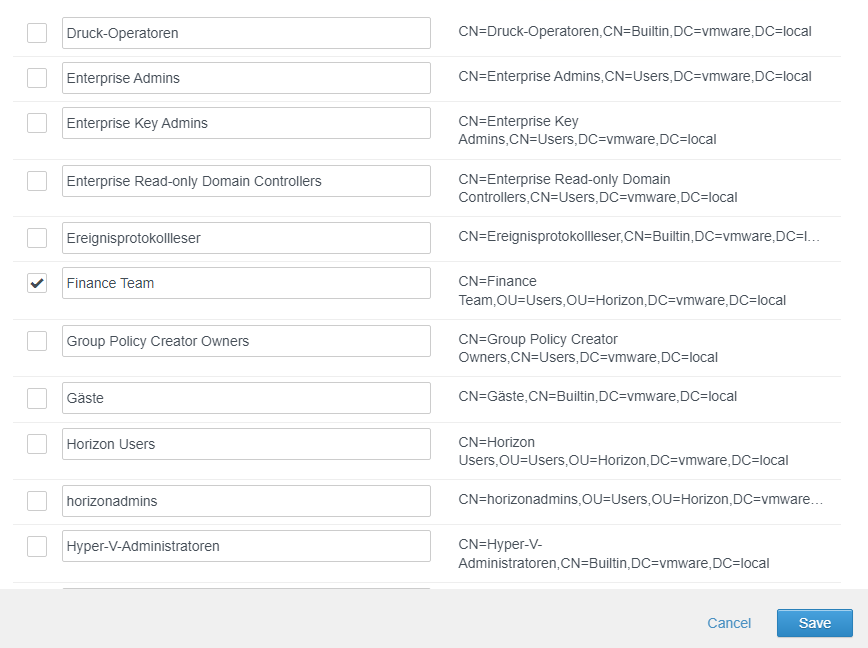
8- Now all the groups under the DN are listed. Make your selections and click Save.
9- The selected group is displayed here, click Next to navigate to the user’s page.

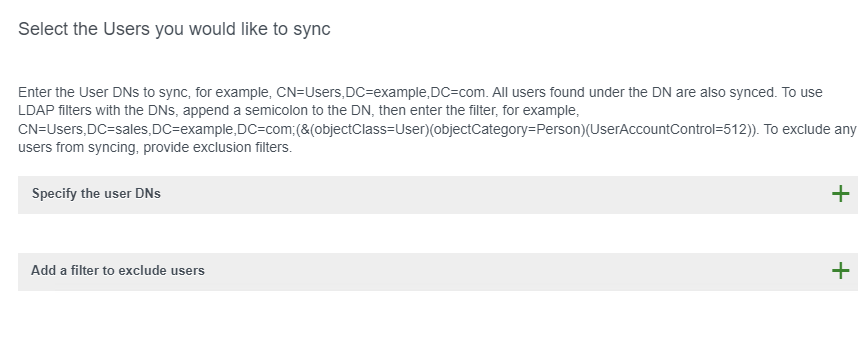
10- Leave it at the default setting to find all users in this group, or specify the DNs of the users as I did for the group.
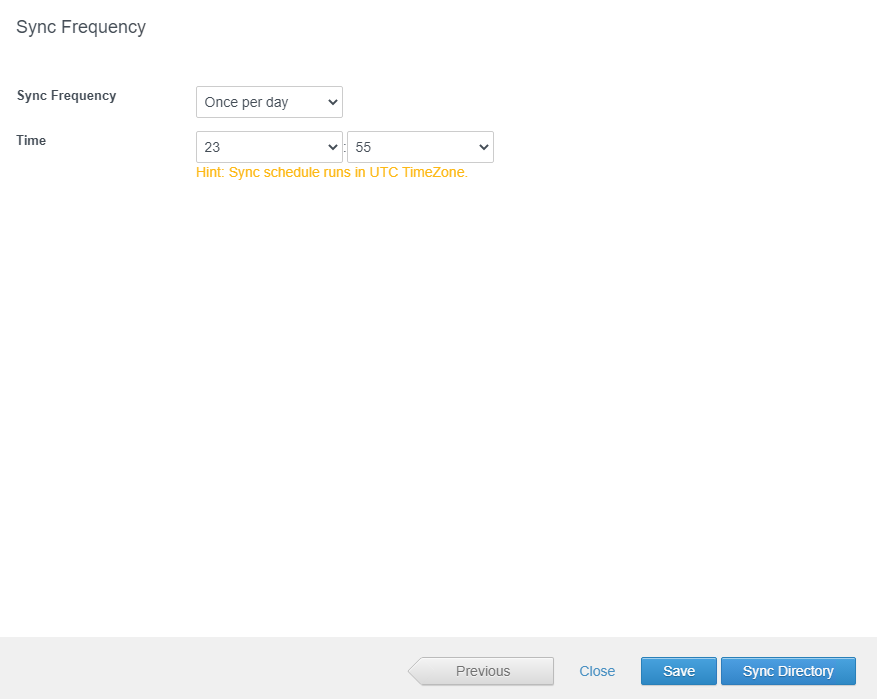
11- Set up a sync schedule to sync users and groups at regular intervals and click Sync Directory.
12- In my small lab, it only takes a second to synchronize users and groups from Active Directory.

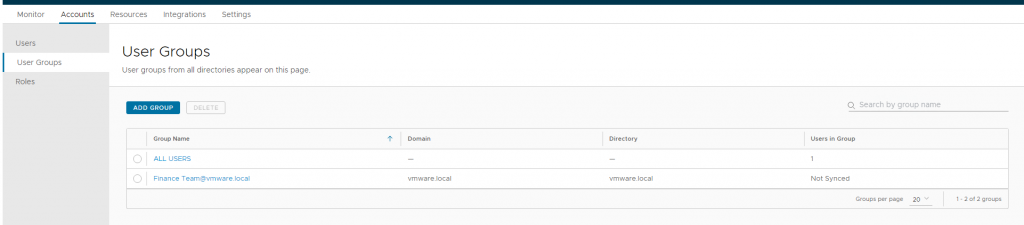
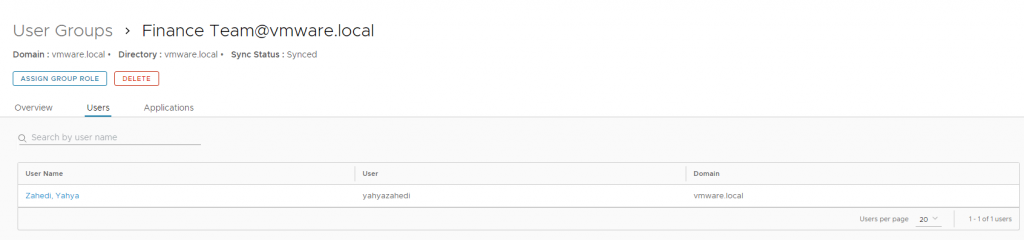
13-When you navigate to the Accounts tab and select User Groups, you will notice the users under your selected group are in the state “Not Synced“. The first time you need to synchronize users manually, so click on the group name.
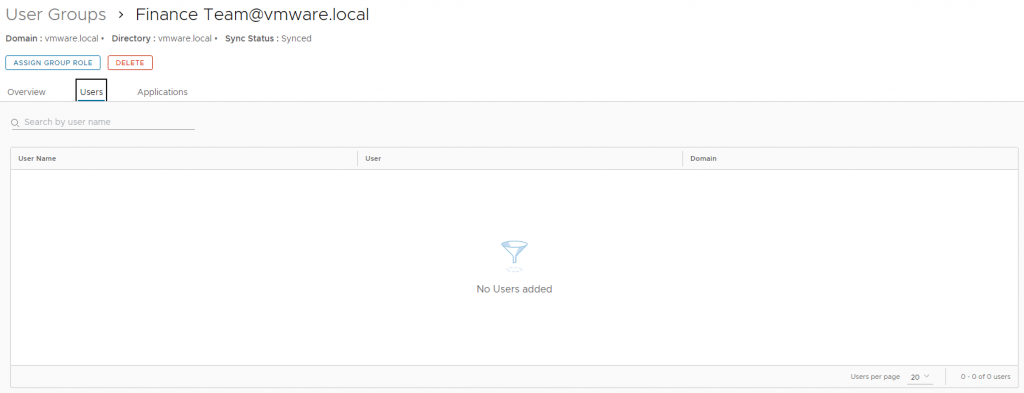
14- Under the Users tab, click SYNC USERS.

15- After successful synchronization, the users were not displayed. As you remember I said above that for proper synchronization all required attributes must have a value, users with missing attributes will not be synchronized. I mentioned that the users in my lab have no email address, so this attribute is null, since this attribute is required, I would like to change it to optional.
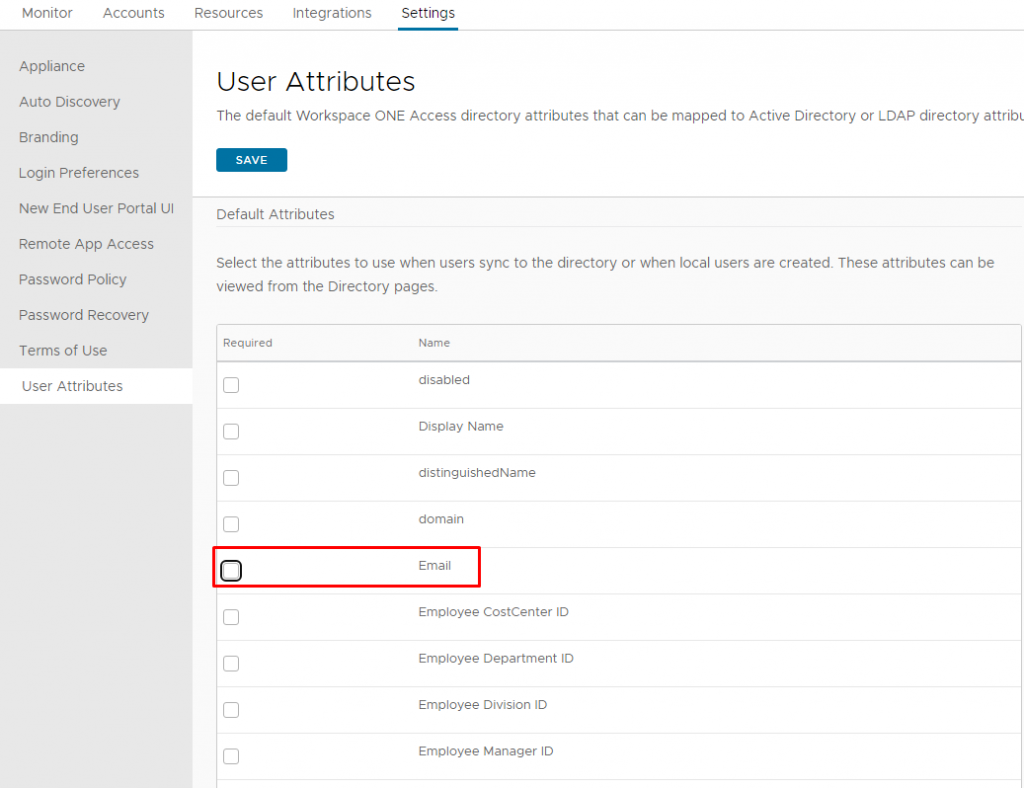
16- On the Settings tab, click User Attributes. The user attributes and the required attributes are displayed here. Uncheck Email and click Save.
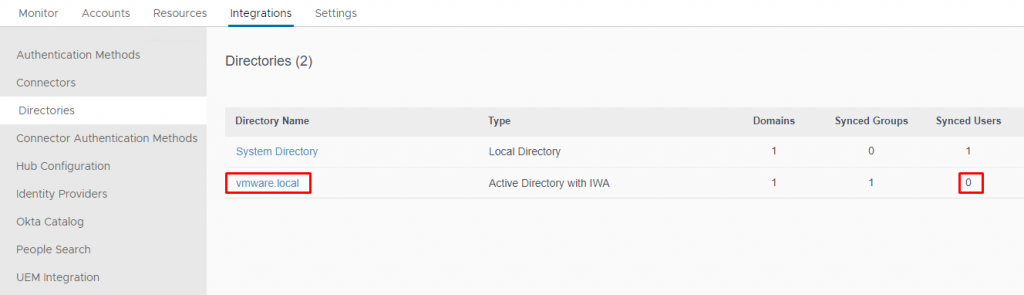
17- Return to the directory and you will notice that the synchronized users are 0, you can wait until the next synchronization or perform synchronization manually. I would like to perform it manually, so click the domain or the directory.
18- From the Sync menu, select Sync without Safeguards.
19- After the sync process is complete, you can see the users.
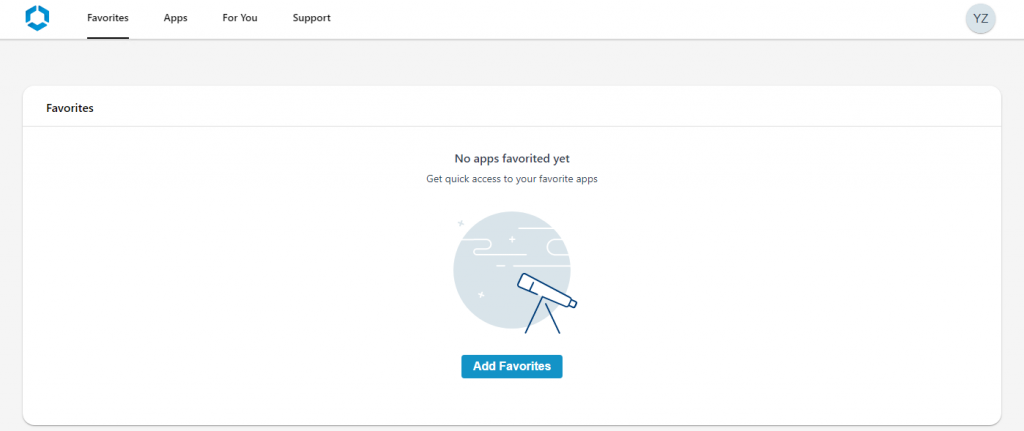
20- Login to the VMware Workspace ONE Access console as a synchronized user.

21- There is no application or desktop because Horizon Configuration is not yet complete, but the login with a user from Active Directory was performed successfully. In the next post, I will integrate Horizon with Workspace ONE Access.
I hope this is informative for you.